

Use this easy home canning recipe for Basic Salsa with fresh tomatoes, onions, and peppers to keep fresh summer flavors in your pantry all year round. You can make it as mild or spicy as you like and add it to all your southwest recipes!
This is the time of year that I always get on a huge canning kick. How can I not with all the great fresh produce that’s available?
In this post, I’m sharing my basic canning recipe for salsa. With tomatoes and peppers starting to come to market, it’s a good time to go ahead and put up a few jars of this deliciousness to keep on hand for the winter.
It’s so nice to open a jar of homemade salsa when it’s cold out and be able to taste those fresh summer tomatoes once more. Mmmmm. A jar of this in my Salsa Chicken recipe in the middle of winter…well, I have to say it’s just fabulous.
This recipe makes five pints, which is just about right for our household. If you want to make more, you can double or triple the recipe. Just make sure that you keep the same proportions to guarantee that it’s safe for canning.
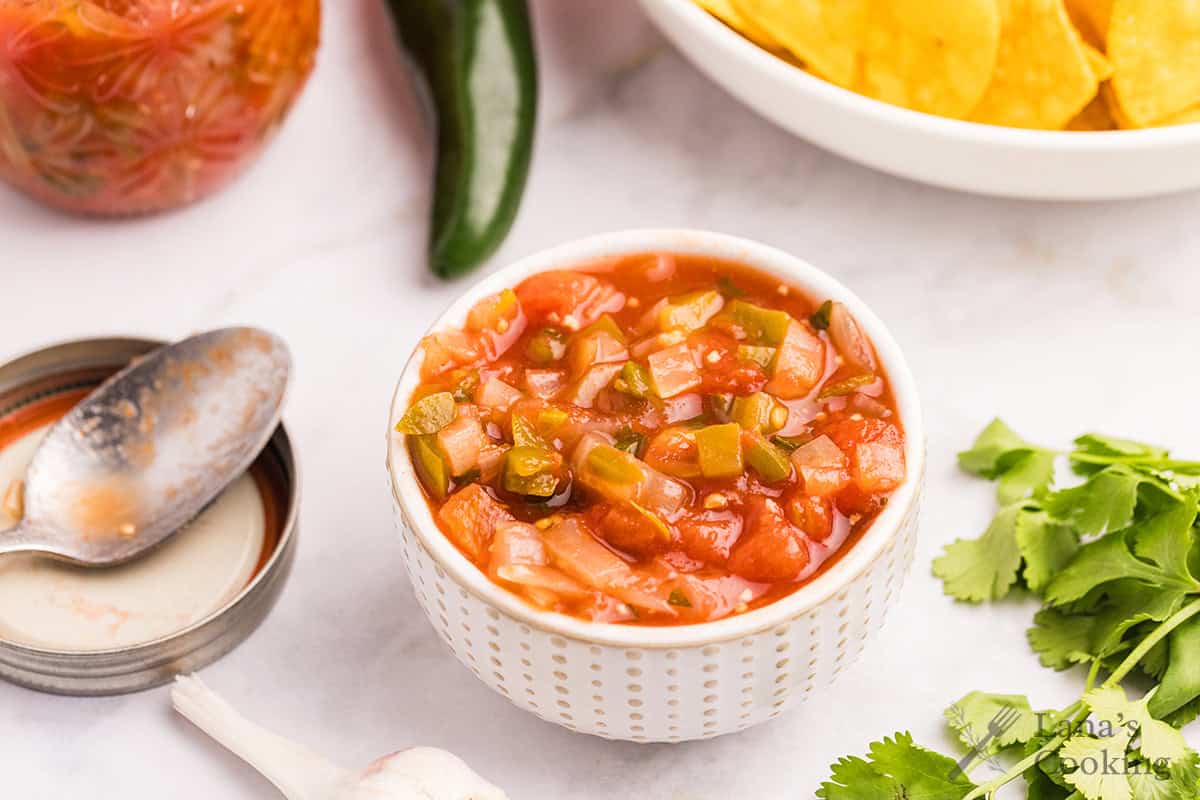
Be sure to can enough to use in all your favorite southwest recipes! Of course, it’s great as a dip with tortilla chips, but it’s also fantastic added to tacos and burrito bowls or even in chili.
Recipe Snapshot
Cuisine: American
Cooking Method: Stovetop
Total Time: 1 Hour, 45 Minutes
Servings: 40 servings
Primary Ingredient(s): Tomatoes, Onions, Bell Peppers, Jalapenos, Vinegar, Sugar, Cilantro
Skill Level: Intermediate
What You’ll Like About This Recipe
- You can have fresh-tasting, homemade salsa any time of year.
- It’s a great way to use up garden tomatoes.
- The sense of accomplishment you get from making and canning your own!
WHAT PEOPLE ARE SAYING …
“This is going to be my salsa recipe! It’s gòt the perfect mix of heat, tang, and sweetness, and the tomato sauce gives it richness and body.”
— Heather
Ingredient Notes
This post contains affiliate links. Lana’s Cooking is reader-supported and earns a tiny commission at no extra cost to you when you shop from our links.
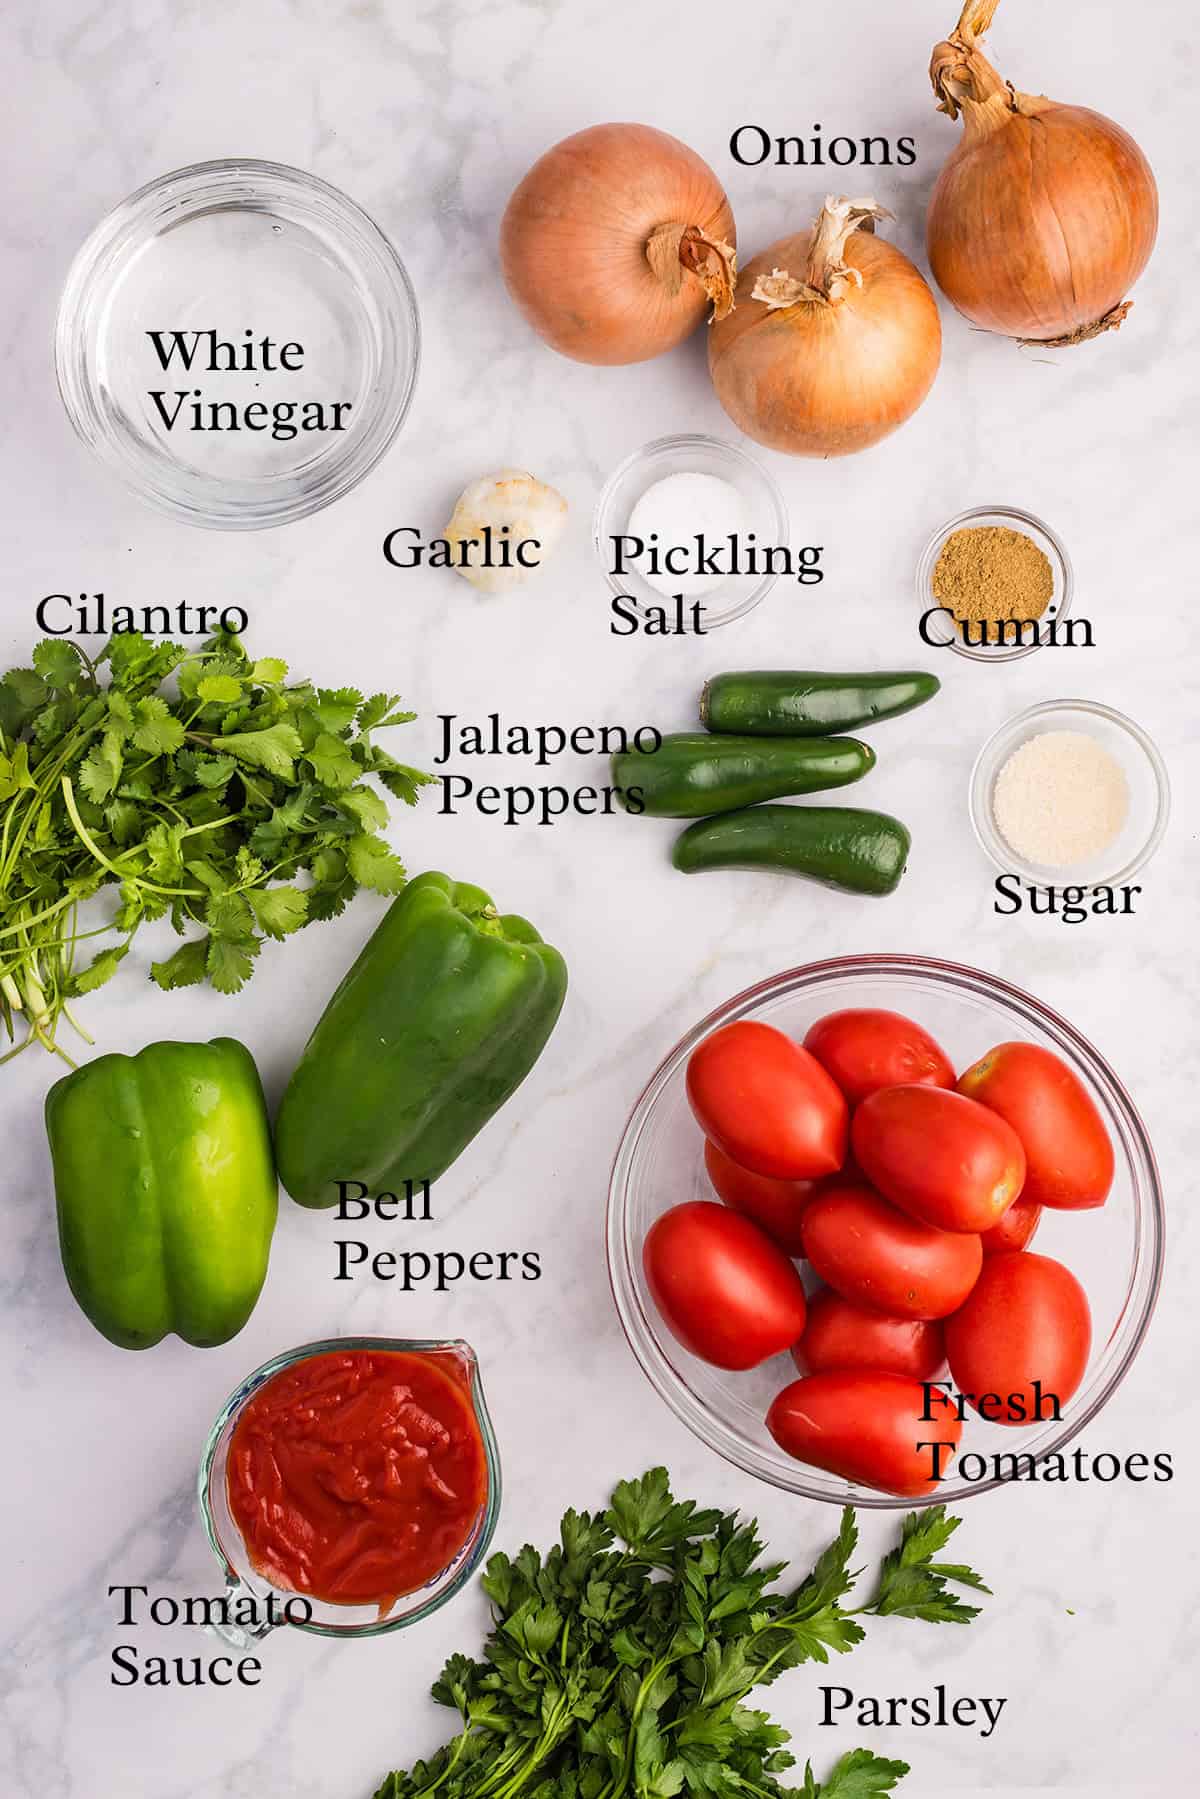
- Tomatoes – I prefer Roma tomatoes, also called plum or paste tomatoes, for salsa, but you can use any variety that you grow or purchase.
- Onions, Green Bell Pepper, Jalapeno Peppers, Garlic – All typical salsa ingredients.
- Tomato Sauce – It’s used simply to enrich the tomato flavor.
- White Vinegar – I prefer white vinegar because it has a more neutral flavor; it’s possible to use apple cider or other vinegars, but the acidity MUST be at least 5%.
- Sugar – Just a little sugar helps to mellow and offset the vinegar flavor.
- Pickling Salt – It’s a very pure salt that’s used for clarity in the finished product; table salts can cause cloudiness.
- Fresh Parsley and Fresh Cilantro – You can use all parsley or all cilantro if you like.
The complete ingredient list with detailed measurements is included in the printable recipe card at the bottom of this post.
How to Can Basic Salsa
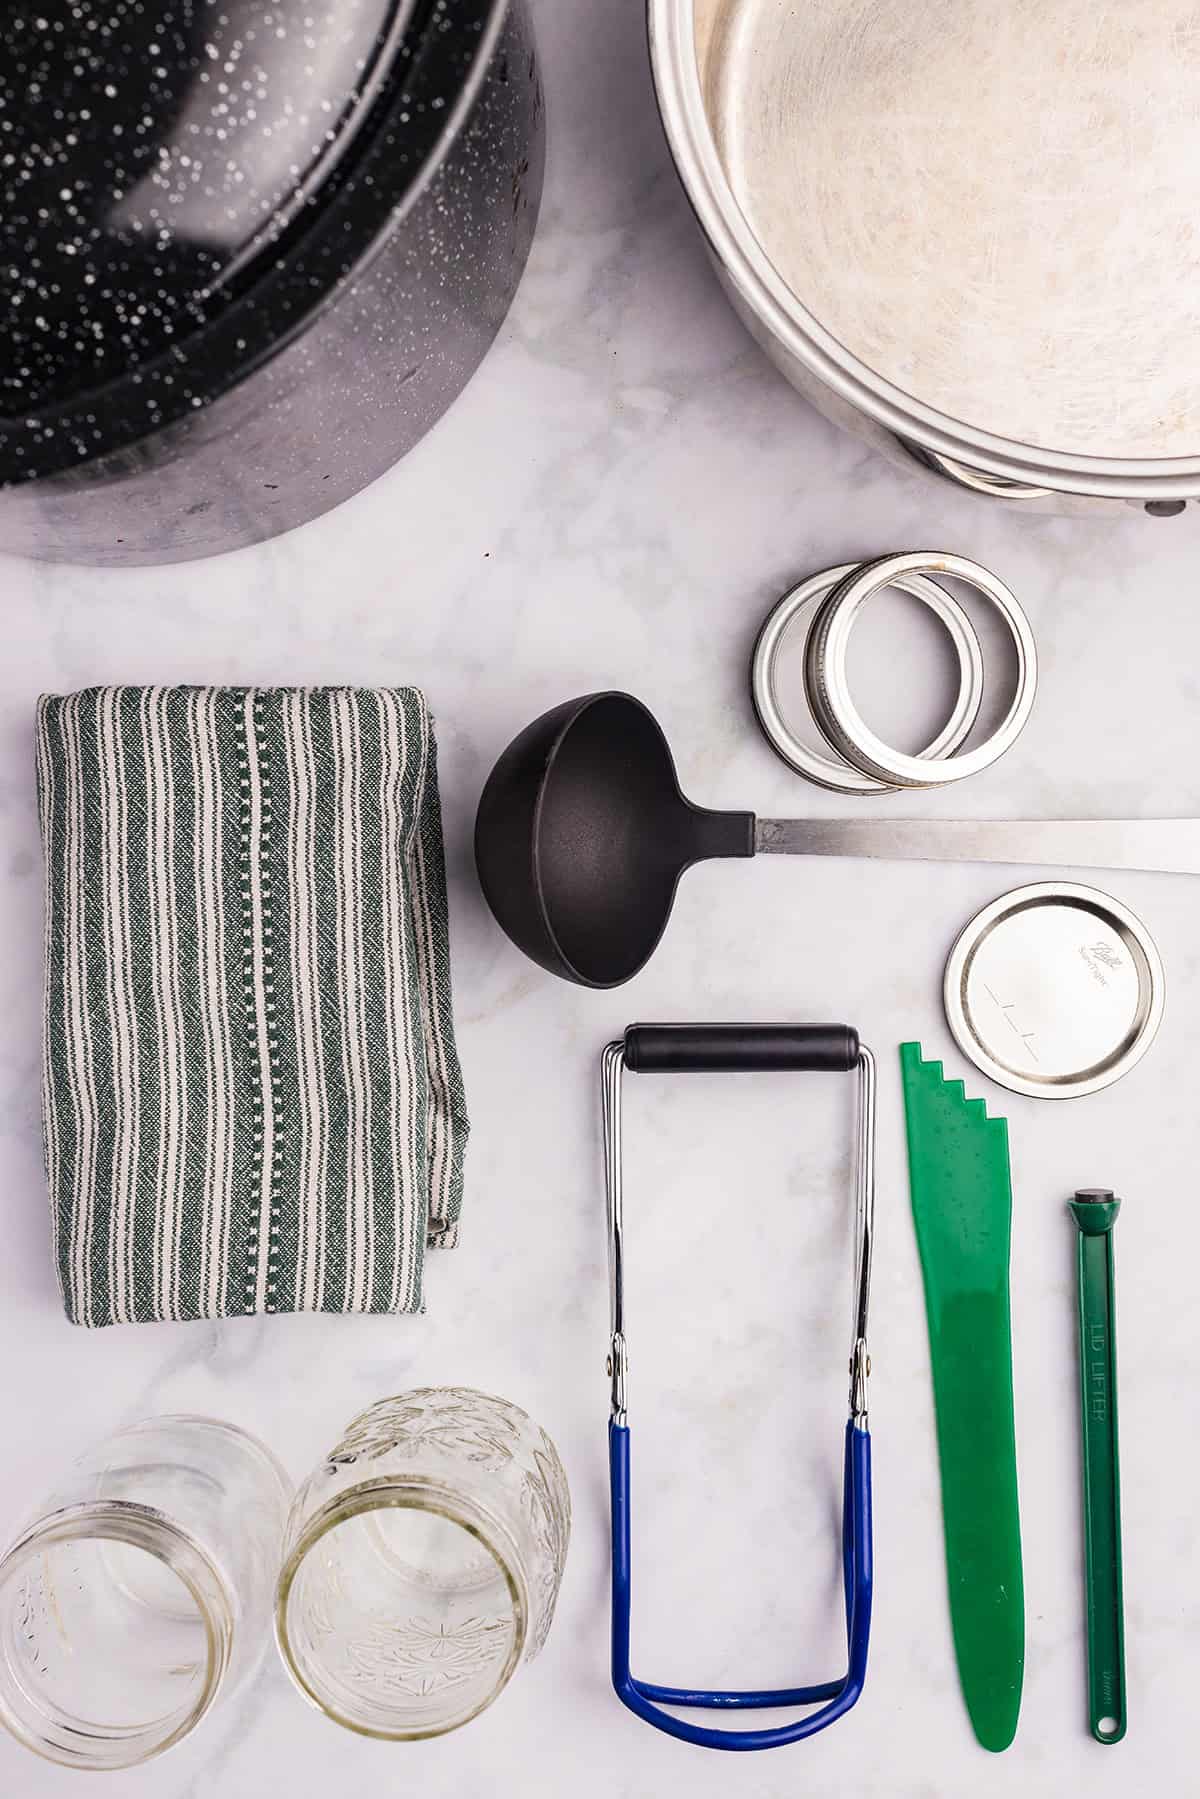
- Before you start the canning process, get everything you need together. All your jars, lids, kitchen towels, produce, knives, water bath canner, funnel. Everything. It’s so much easier than running around looking for something while you’re in the middle of a canning session.
Prepare the Jars and Lids
- Prepare the jars, lids, and rings as usual. You can review how I manage this part of the process in my Favorite Kosher Dills post.
- Fill the canner about 2/3 to 3/4 with water, bring it to the boil, and hold it there until ready to fill the jars. Add the empty, clean jars into the canner and let them sterilize while you prepare the salsa.
There is a good bit of prep work involved in this recipe, but it’s not difficult at all – just peeling and chopping. And you begin by preparing the tomatoes.
How to Easily Peel the Tomatoes
I prefer Roma tomatoes for salsa, but you can use any combination and type of tomatoes you like.

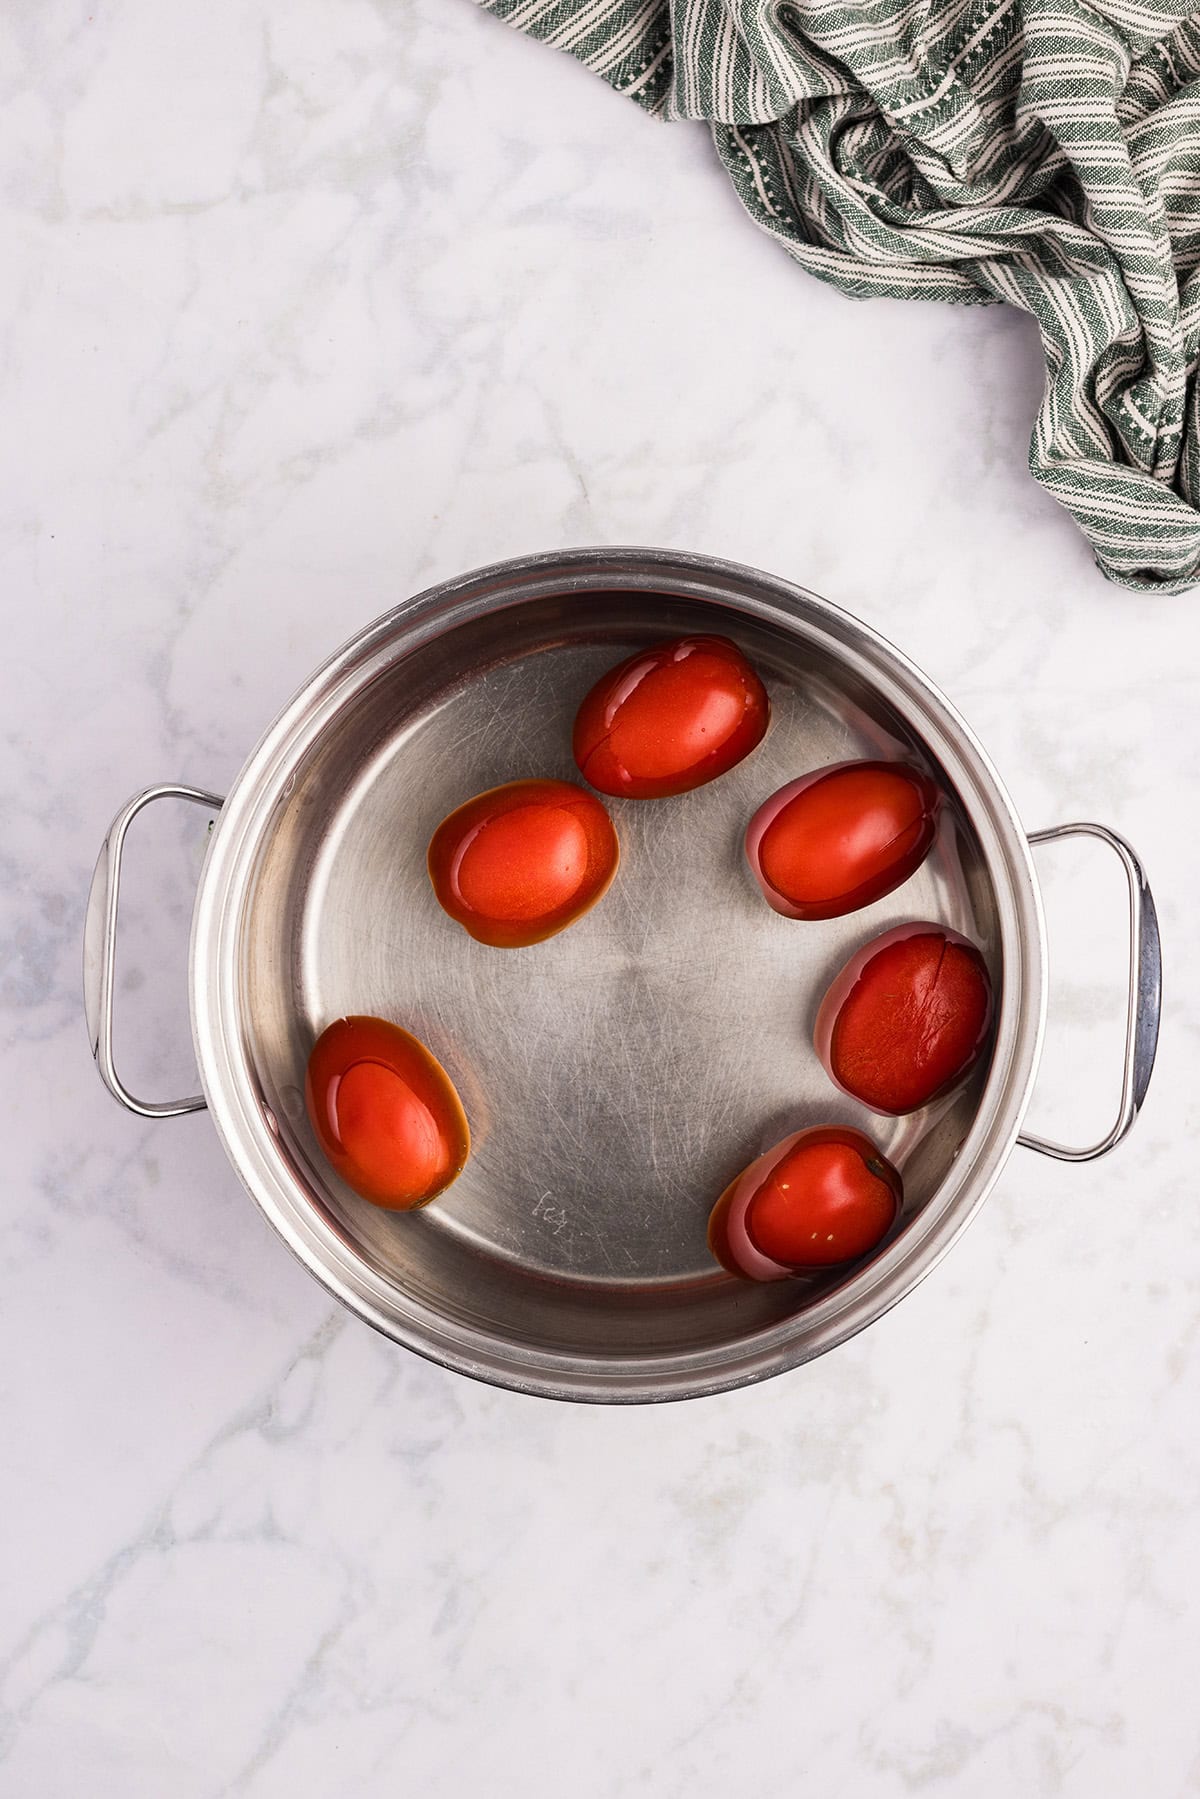
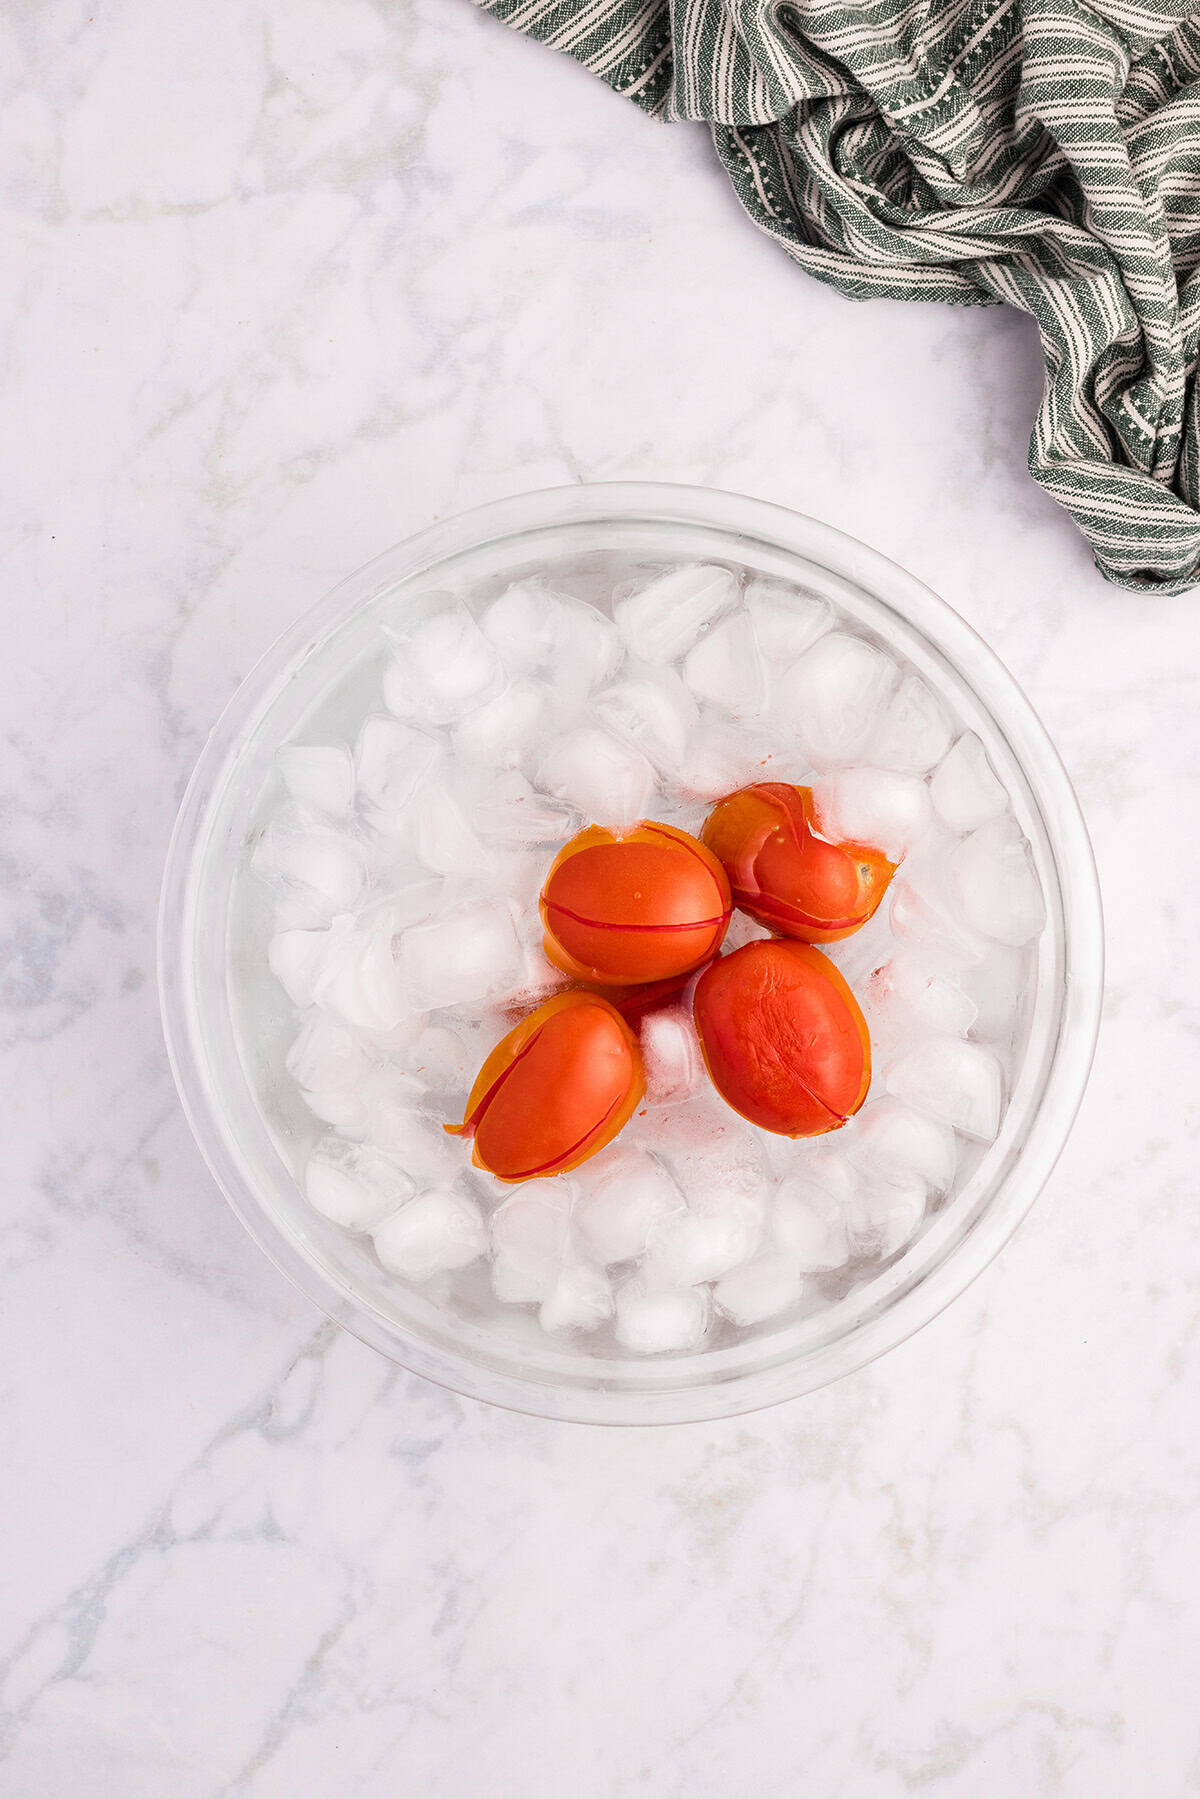
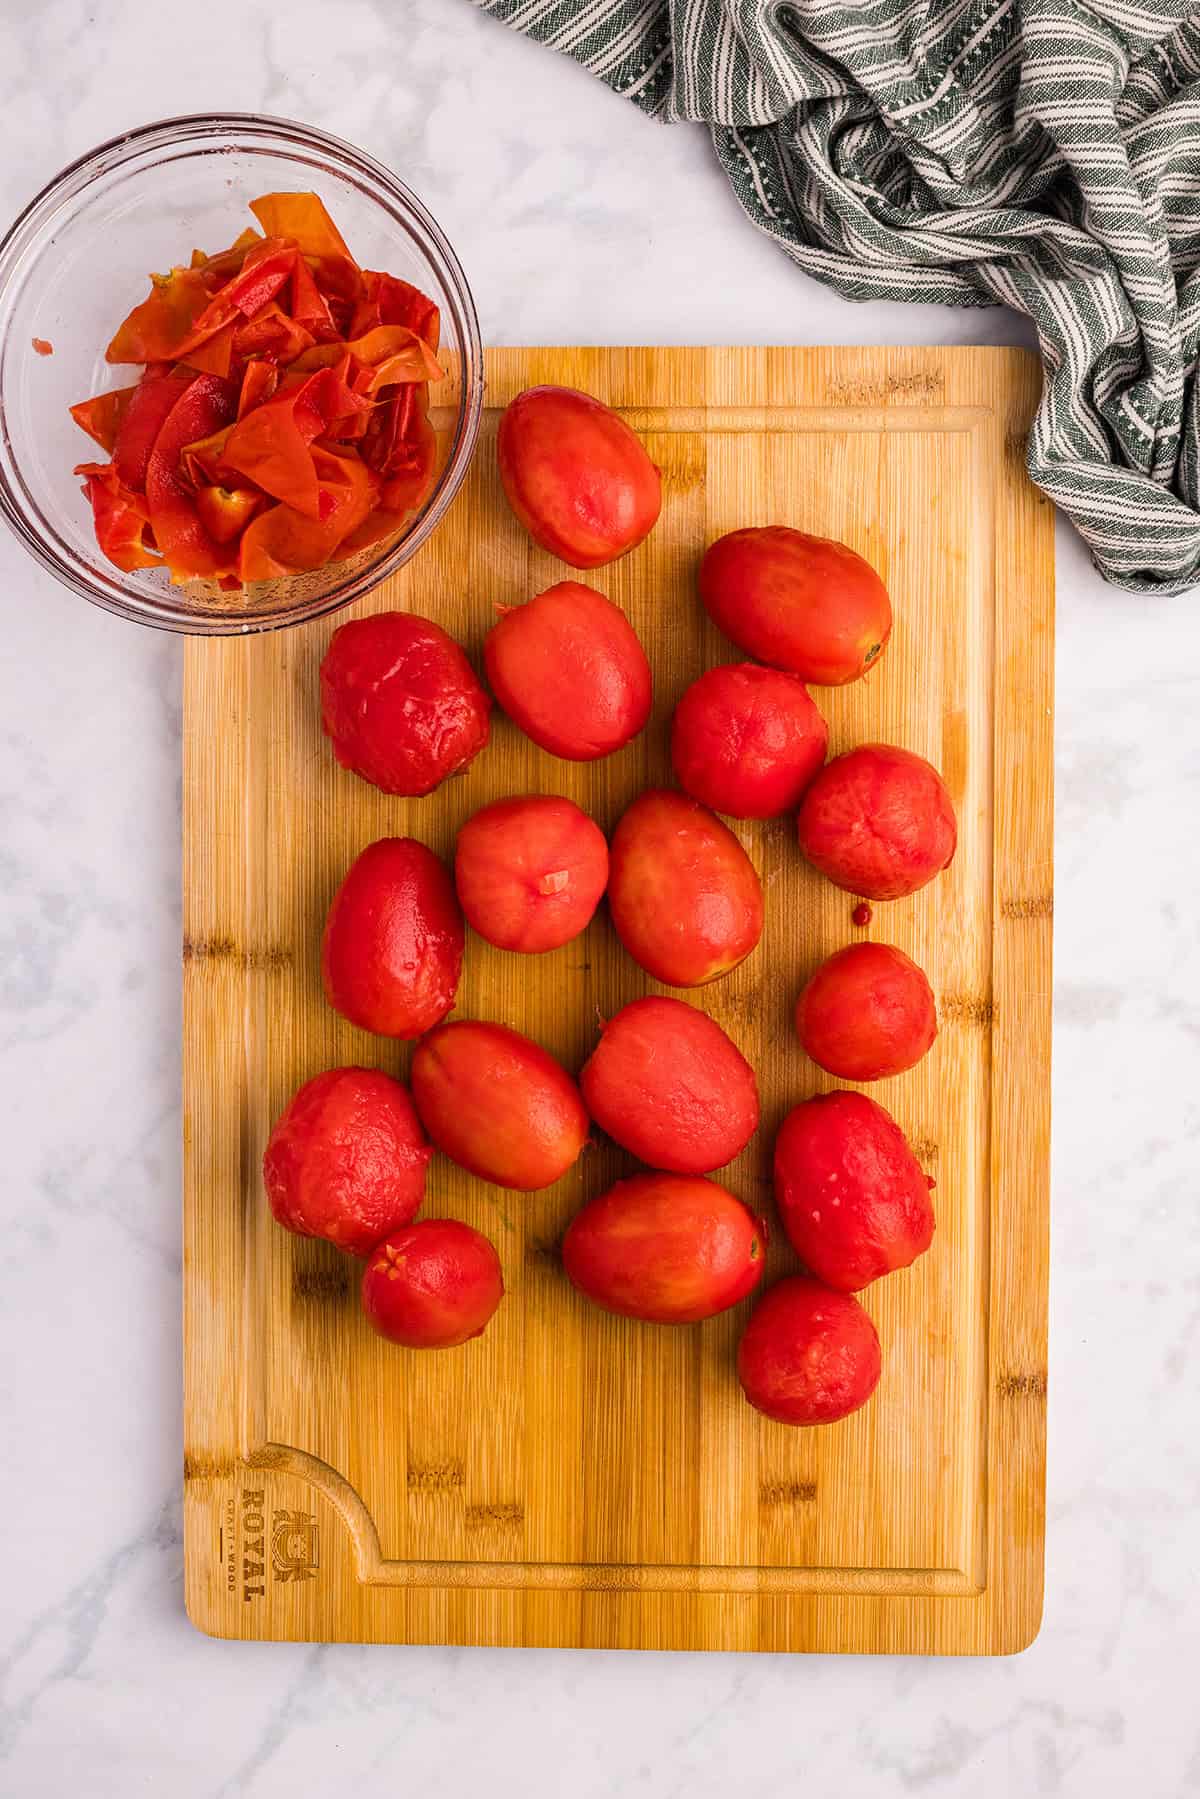
To make peeling the tomatoes easy, cut an “X” in the end, then simply drop them into boiling water for one minute. Then drain them and put them into cold water and ice for a few minutes. The skins will slip right off, making the peeling so simple!
Prep the Remaining Ingredients
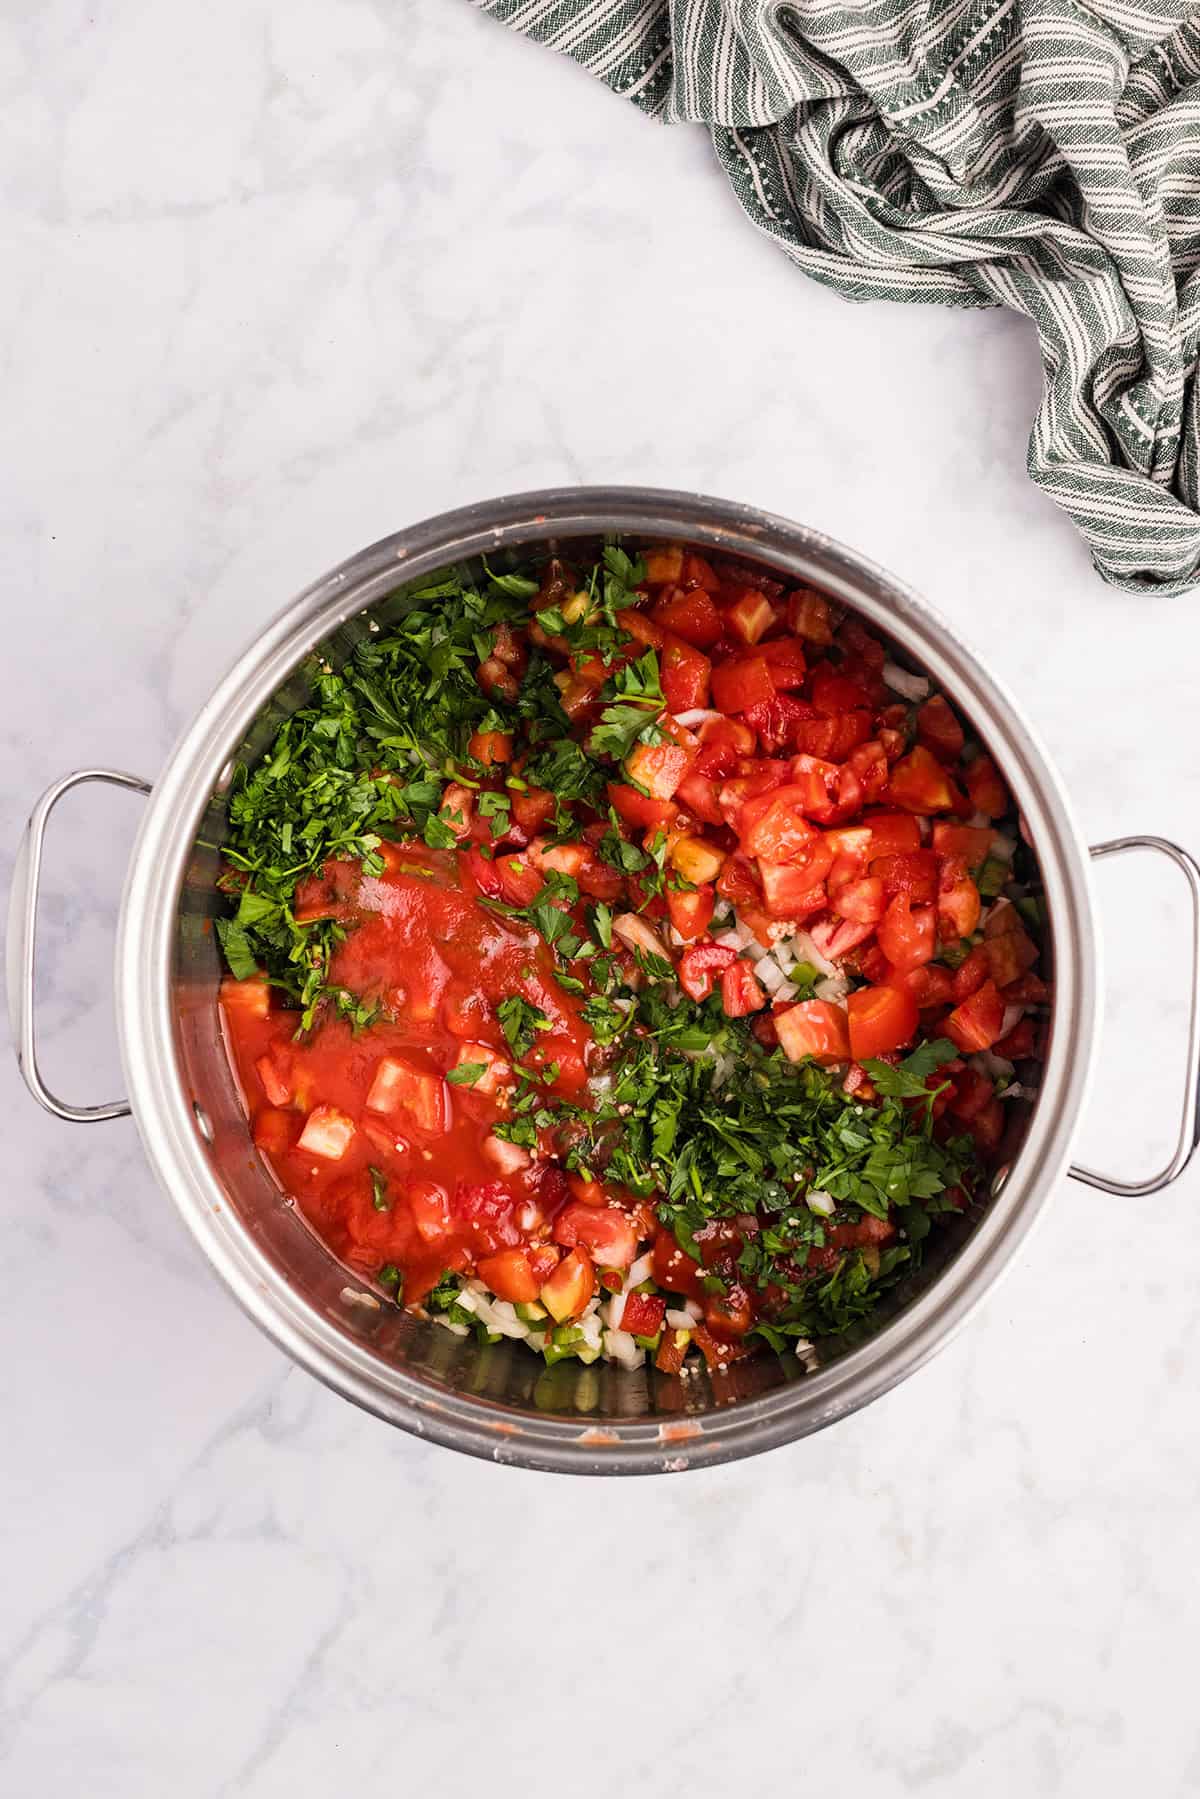
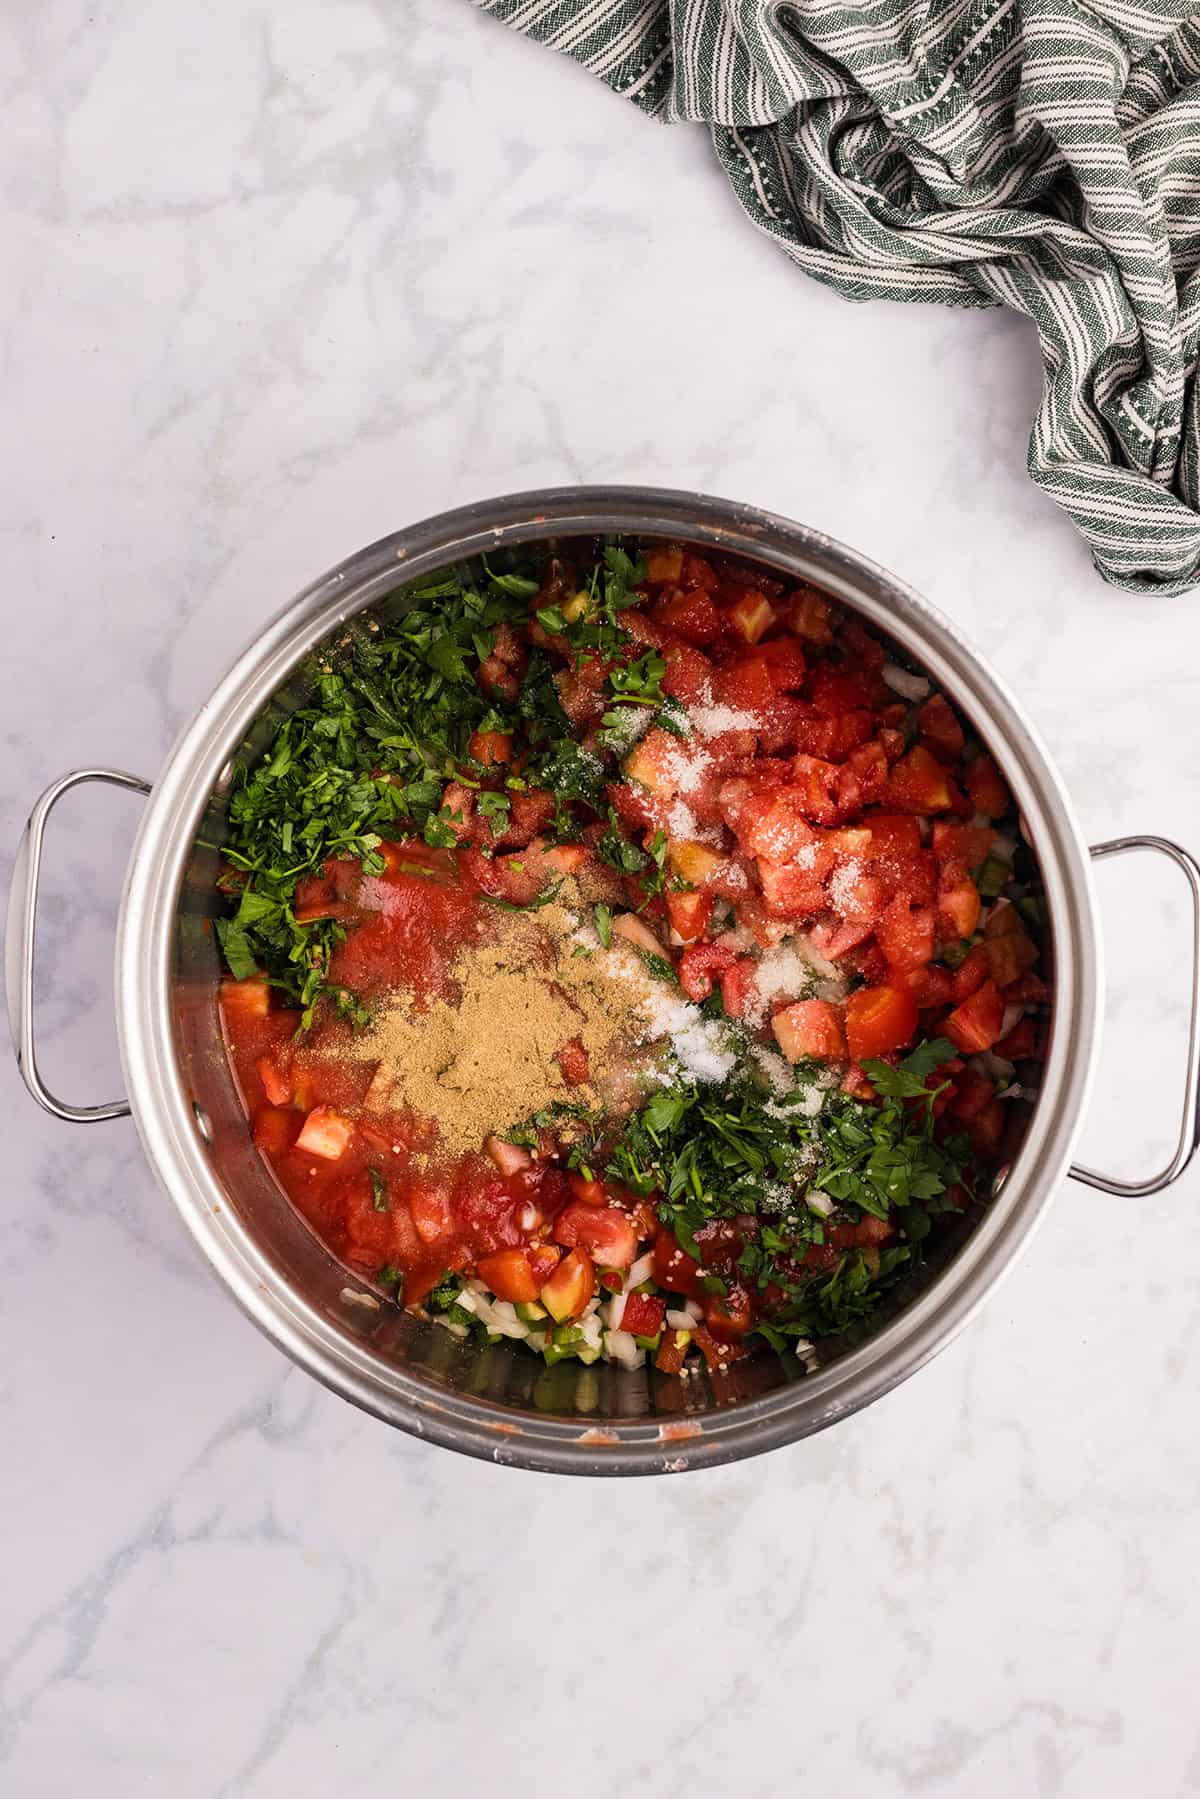
- Chop the tomatoes, onions, green pepper, and jalapenos. Finely mince the garlic.
- Combine all the ingredients in a stainless steel or enamel saucepan.
👉 PRO TIP: I use three medium-sized jalapenos for this amount of salsa because we like ours fairly mild. You can add up to nine jalapenos if you like it hotter. You could also substitute a hotter pepper, such as serrano, if you like, but don’t add more than the equivalent of about nine medium-sized jalapenos, so you don’t upset the pH balance of the recipe and make it unsafe for canning!
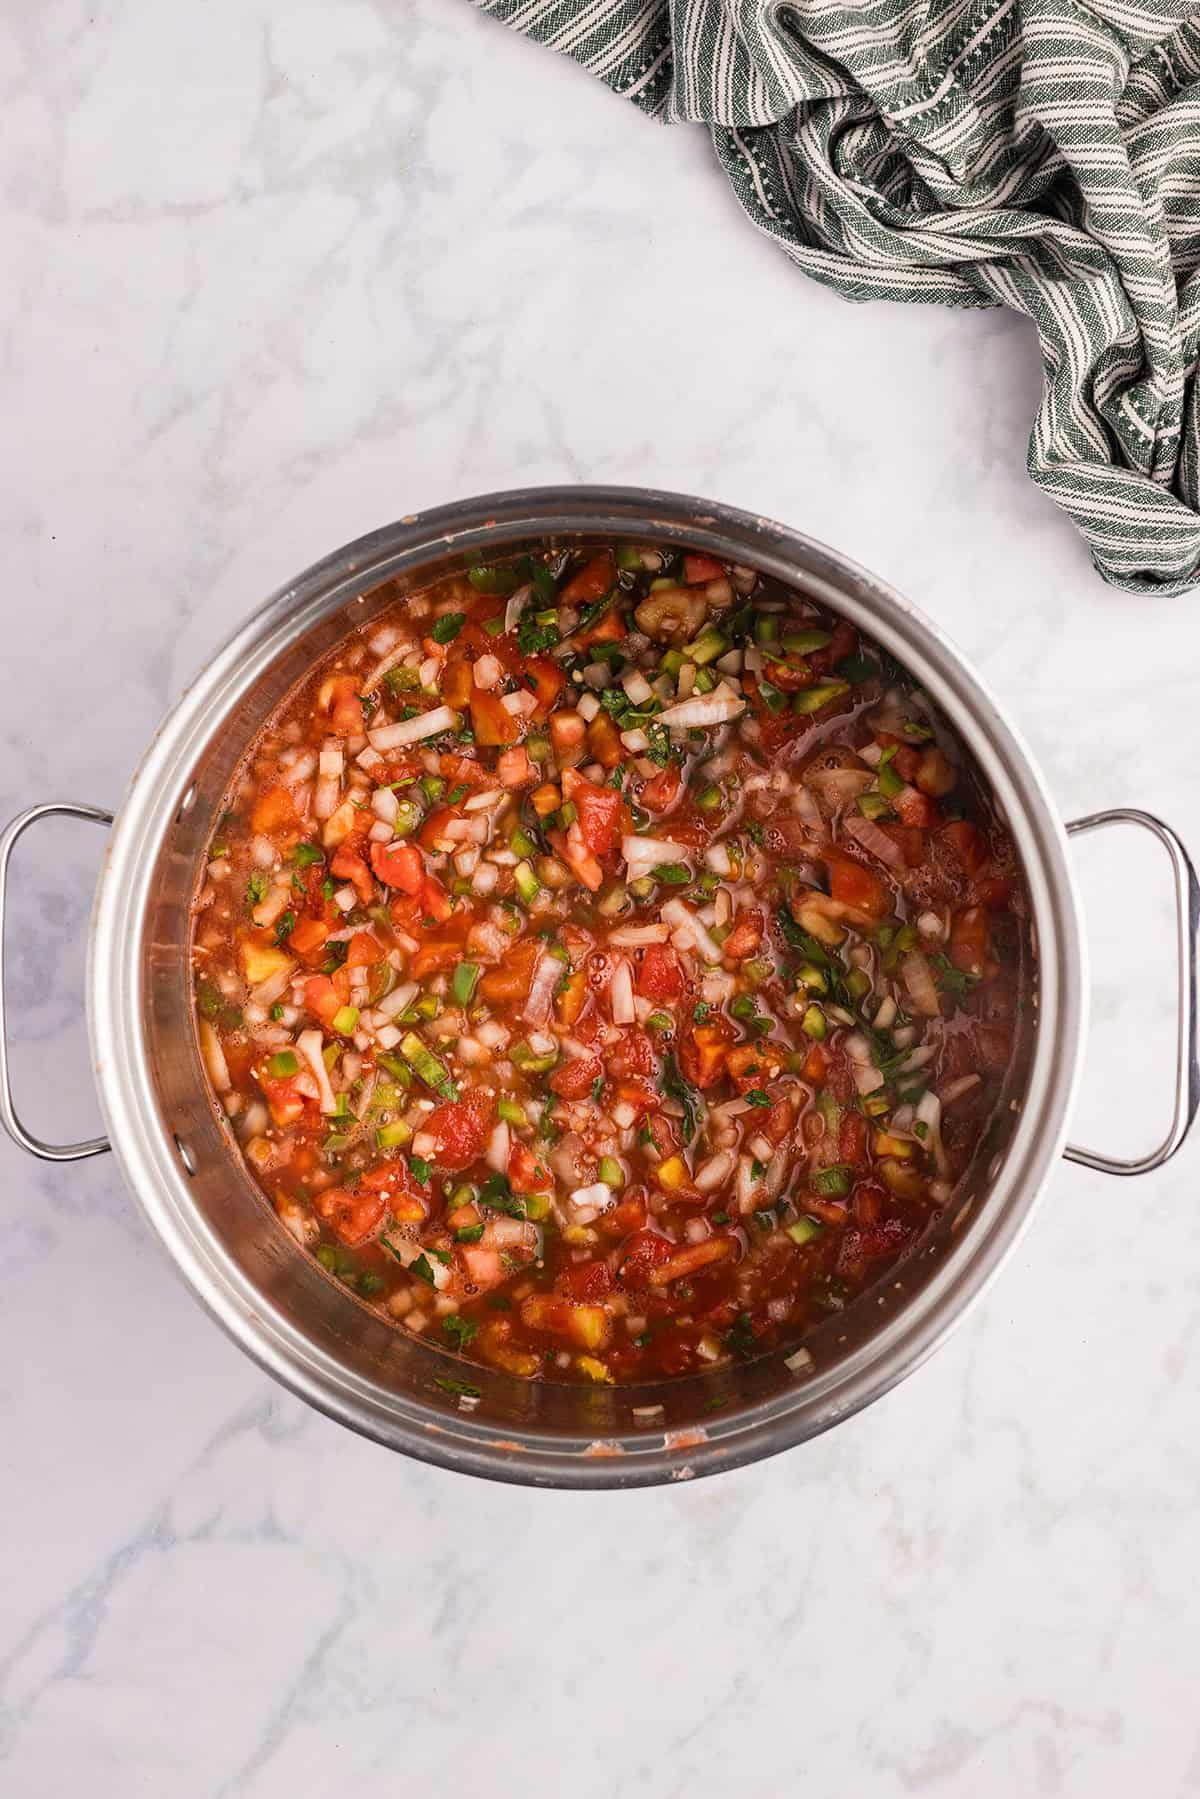
Cook the Salsa
- Bring the mixture to a boil over high heat. Reduce the heat and boil gently, uncovered, for 25 minutes or until desired consistency, stirring frequently. Your house will smell like the most delicious Mexican eatery by the time this finishes cooking!
Fill and Process the Jars
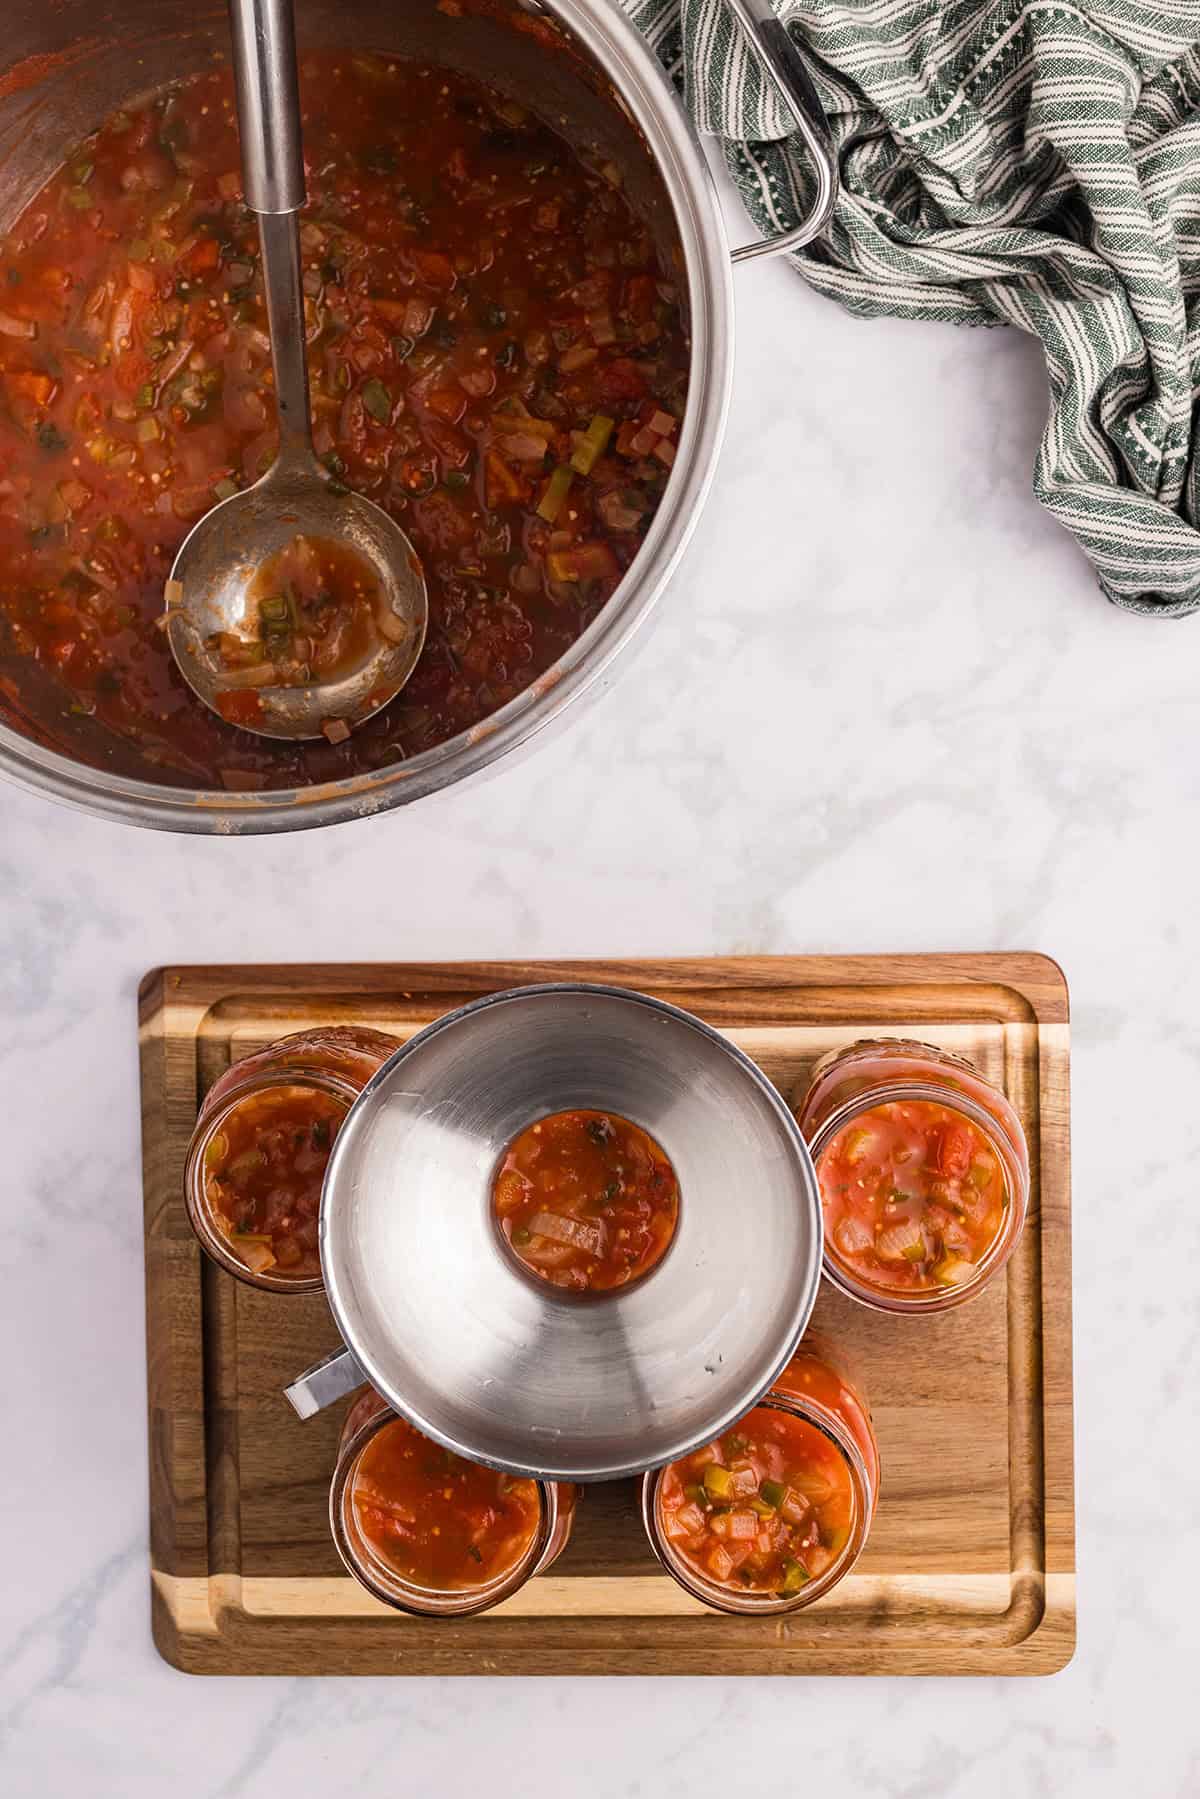
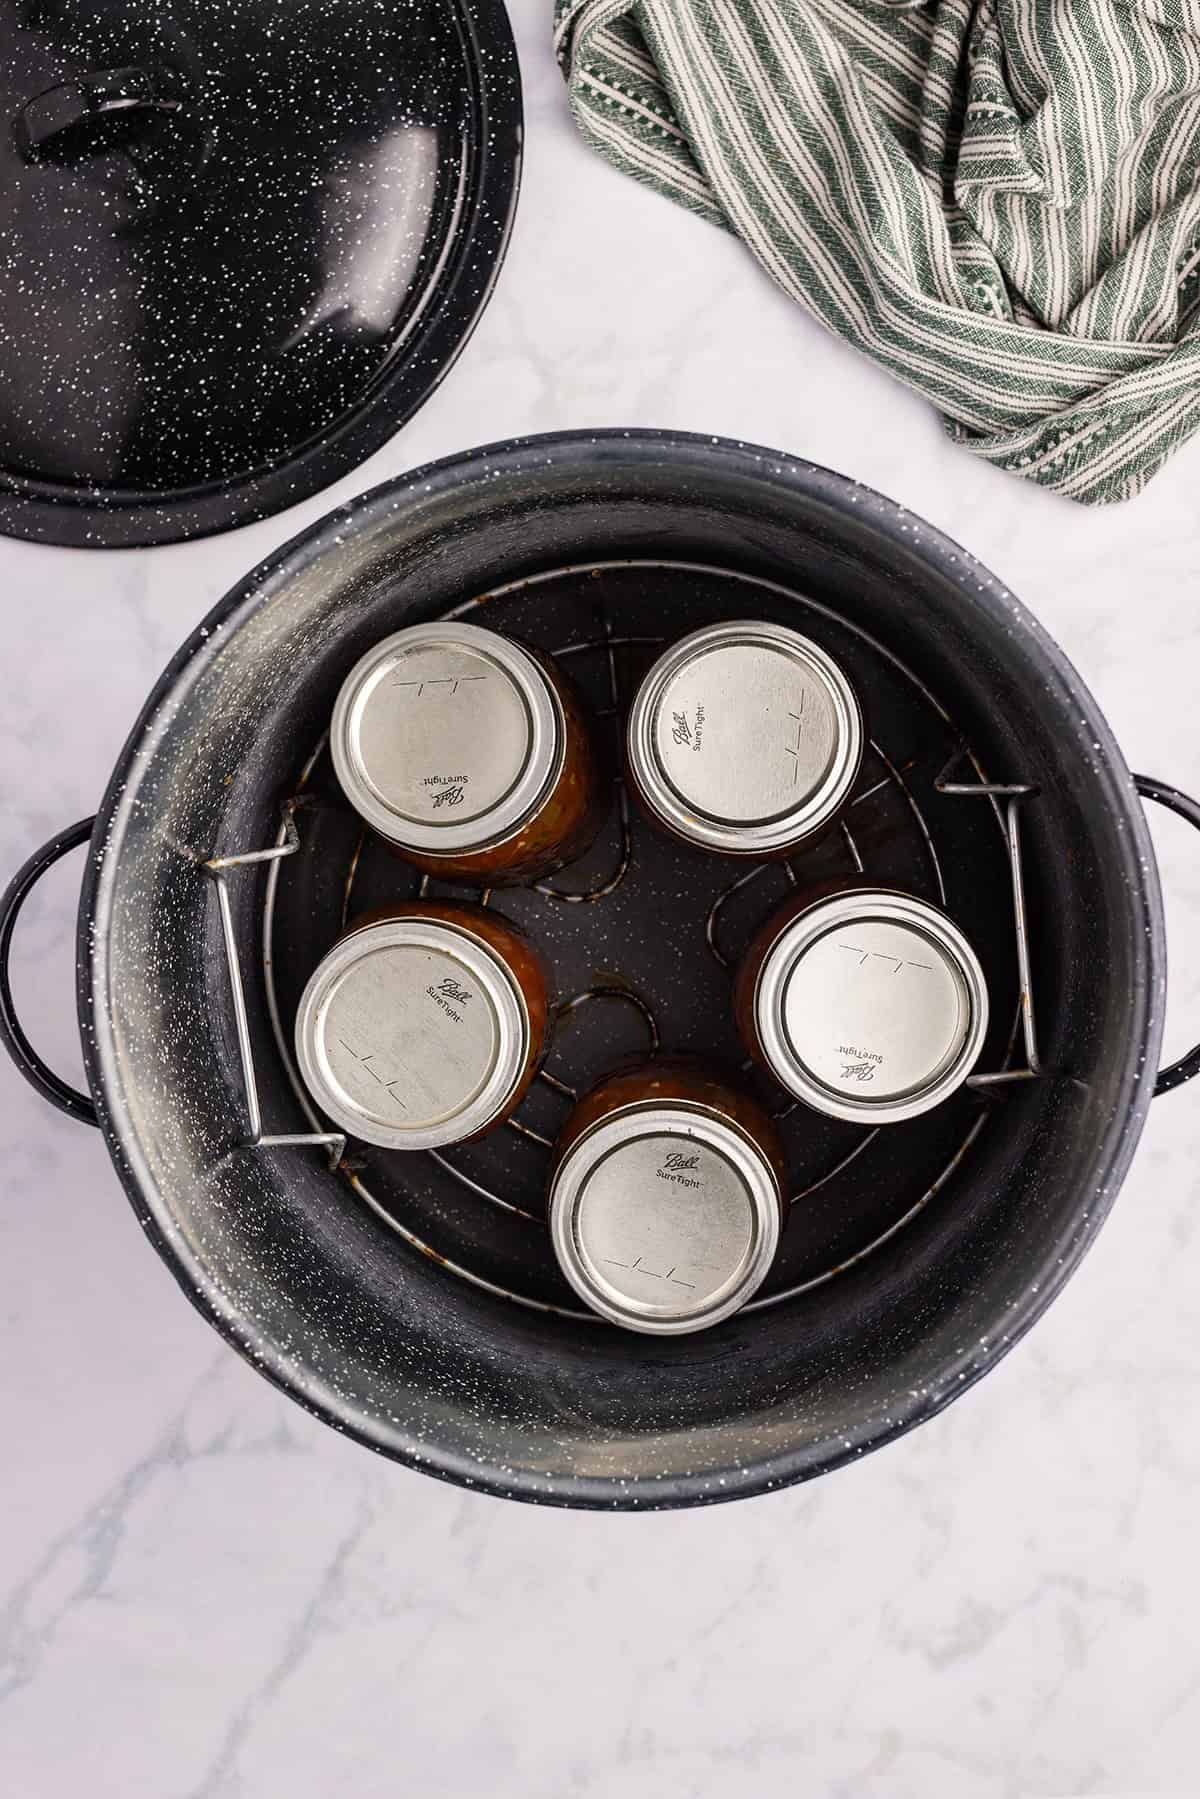
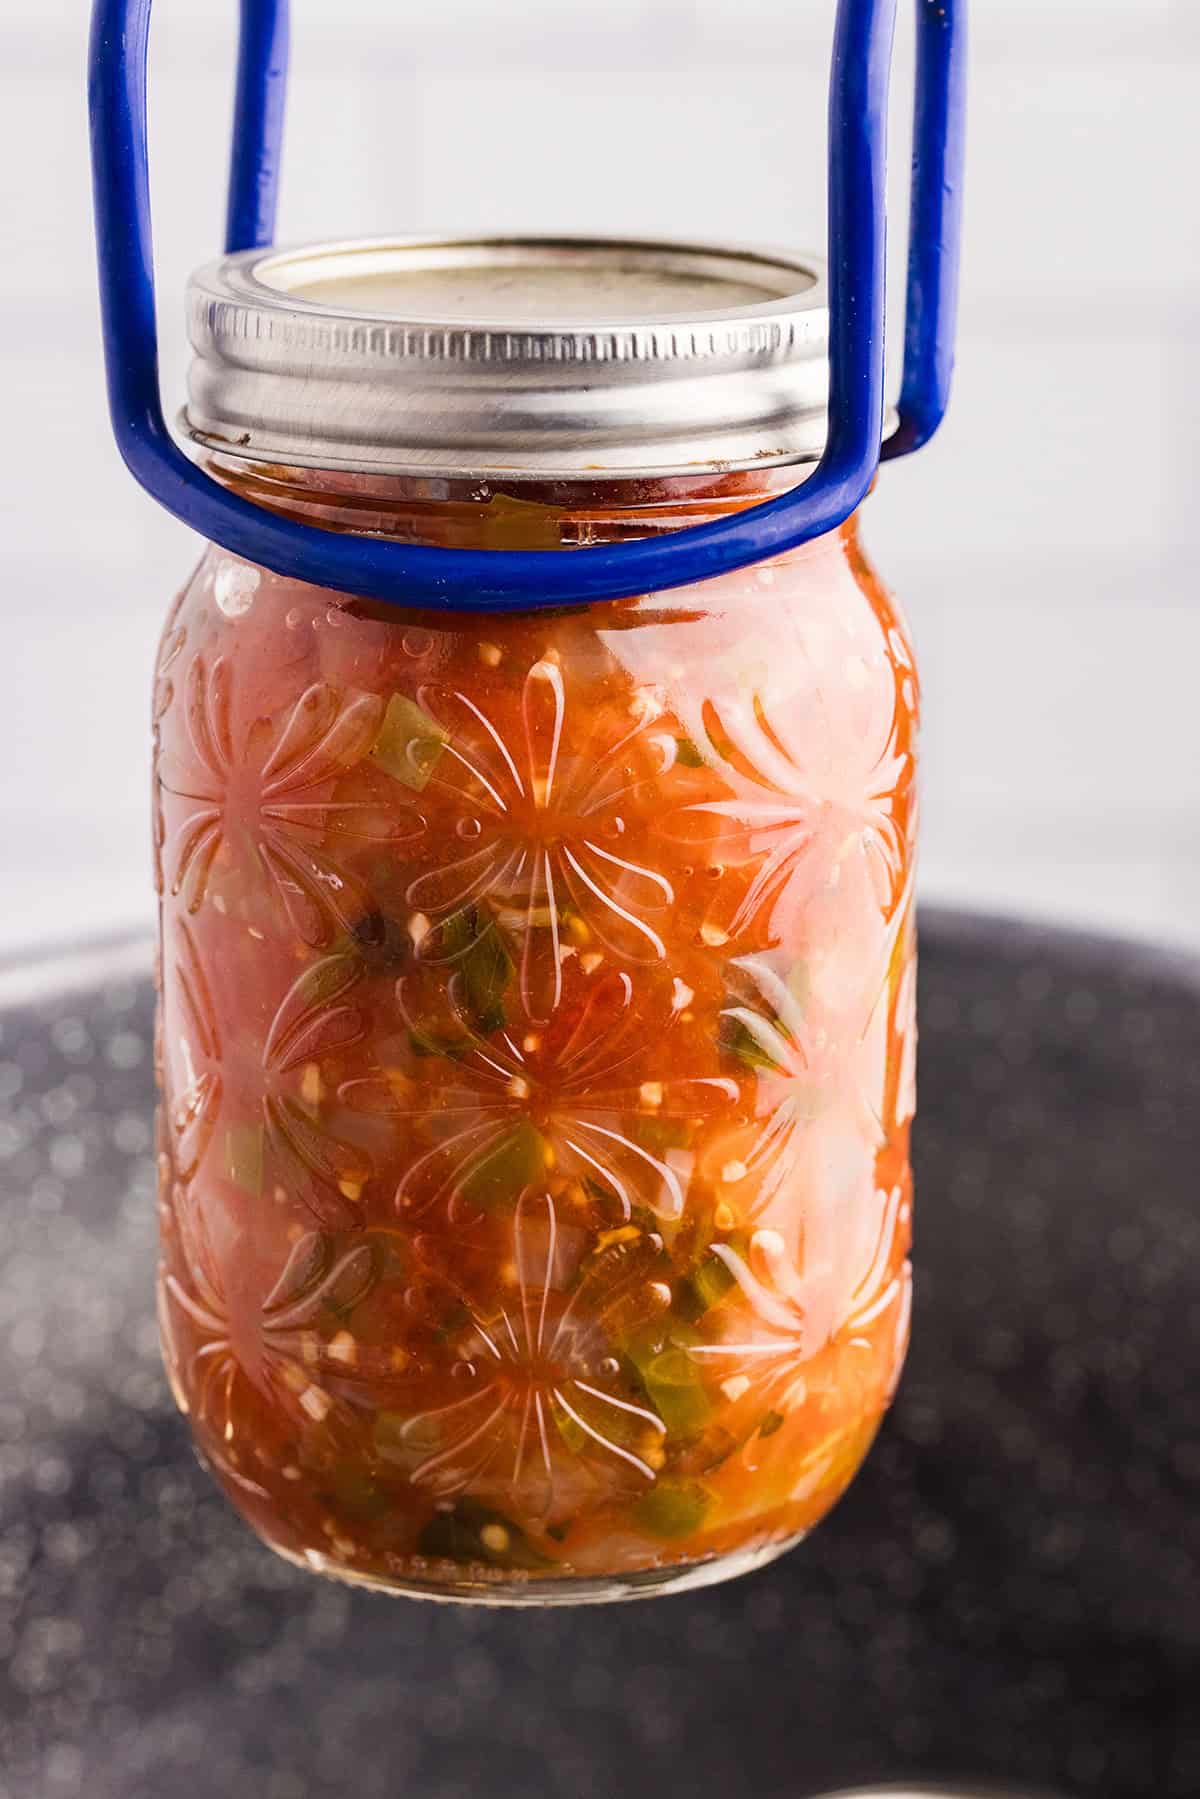
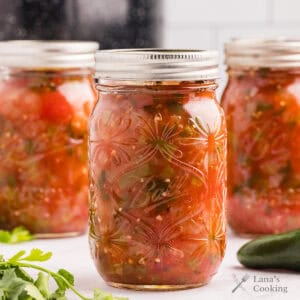
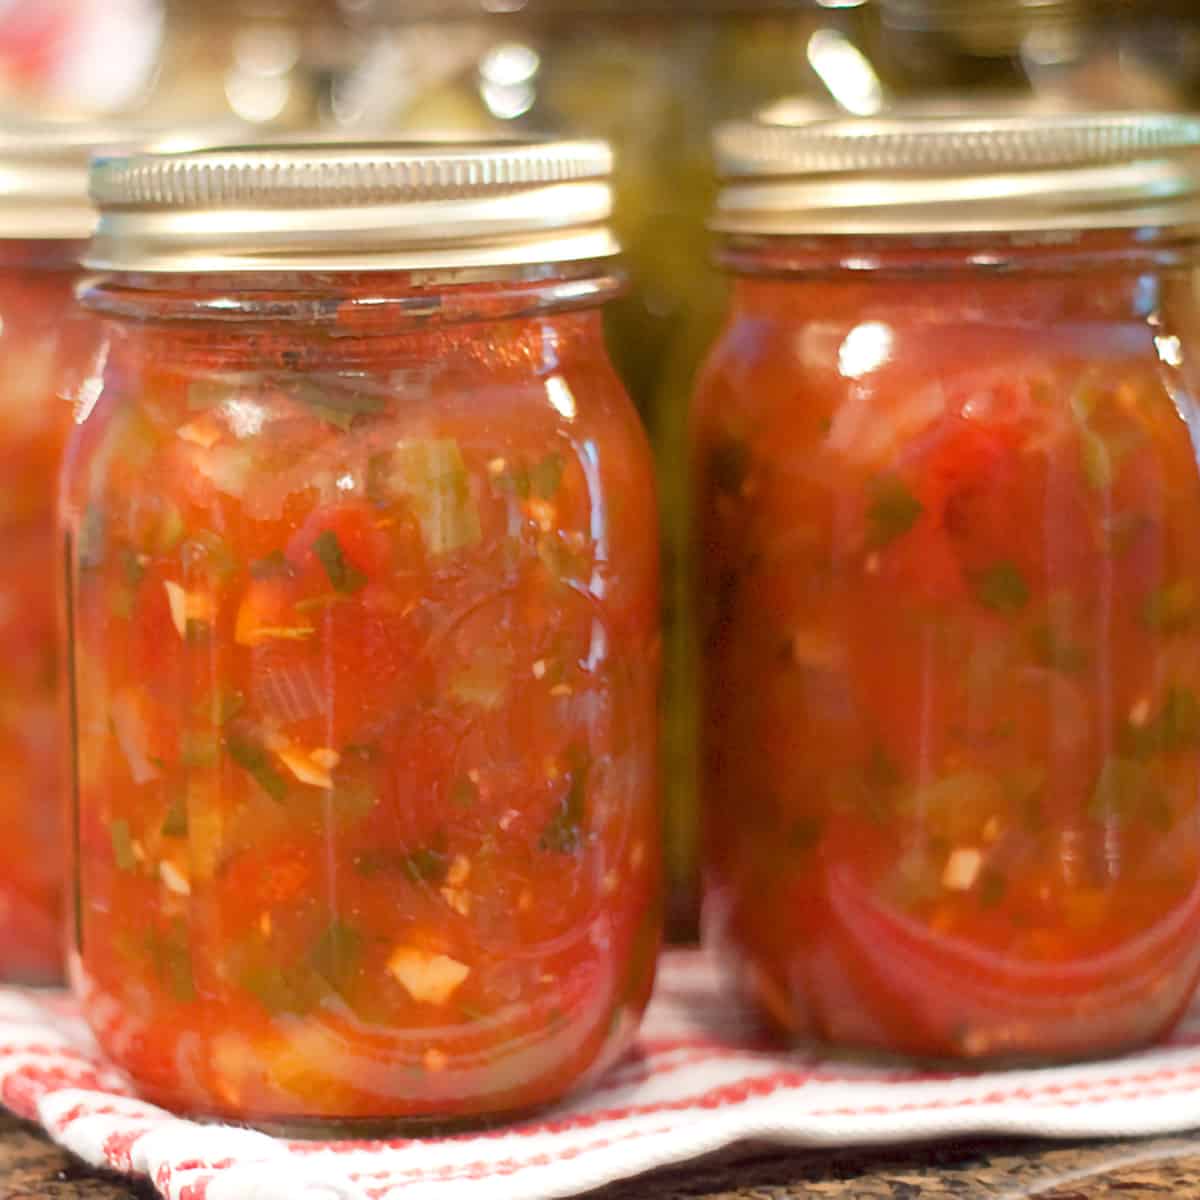
- Working with one jar at a time, carefully remove a jar from the canner and ladle in the hot salsa to within 1/2 inch of the rim (that’s called “headspace”). Wipe the jar rim with a moist paper towel and apply a lid and ring (just finger-tight).
- Return the filled jars to the canner and lower them into the boiling water. Begin timing when the water returns to a boil. Process pints for 10 minutes at 1 to 1,000 ft. (20 minutes at 1,001 to 6,000 ft. and 25 minutes above 6,000 ft).
Cool Completely
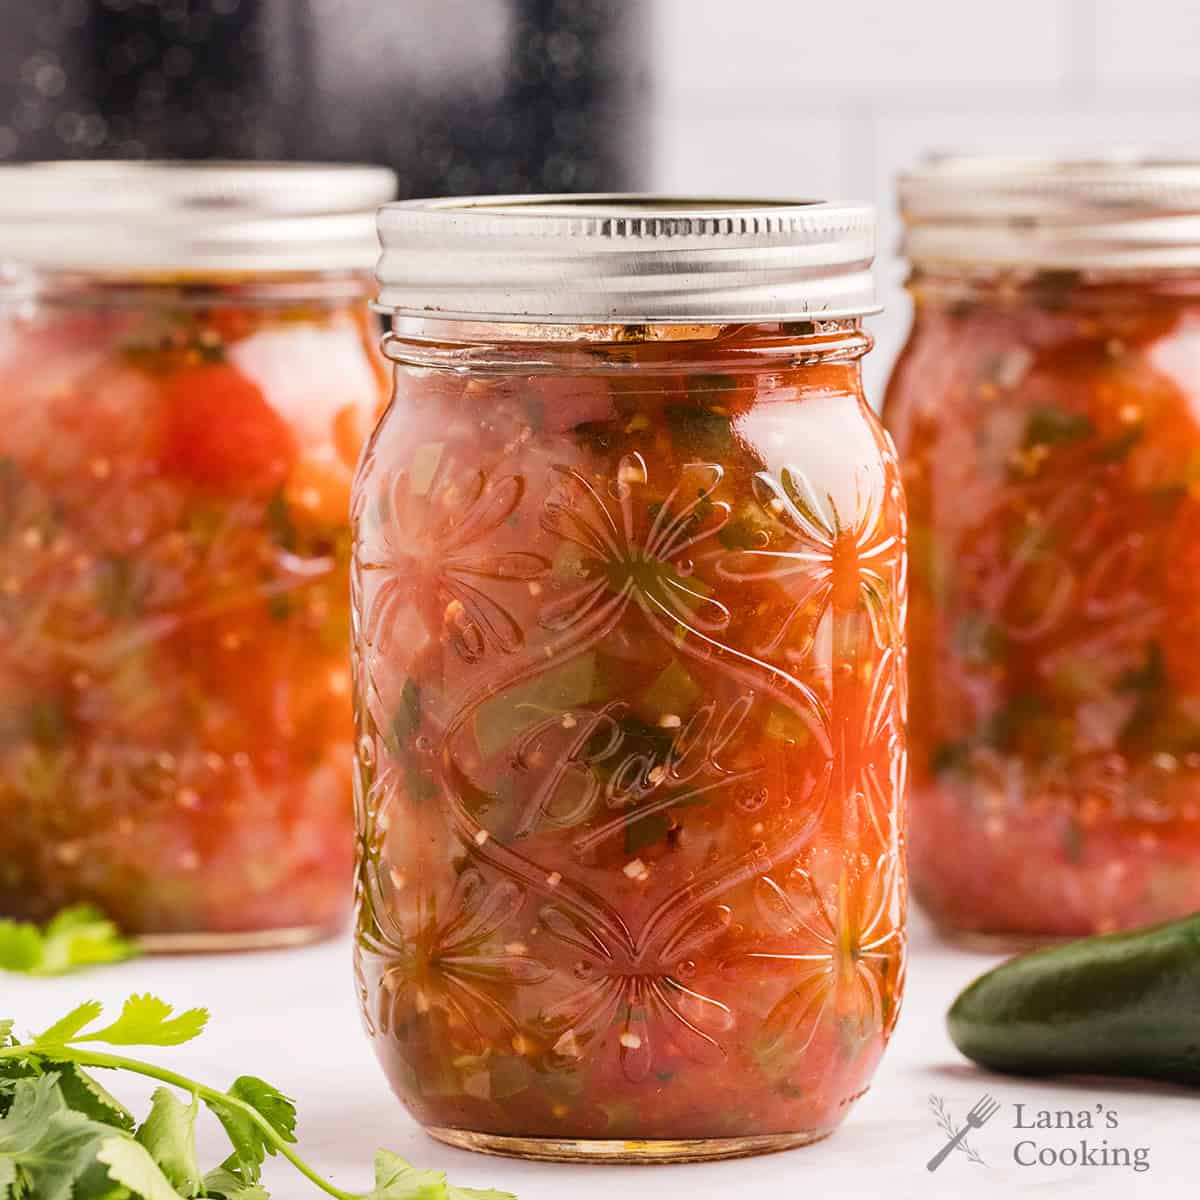
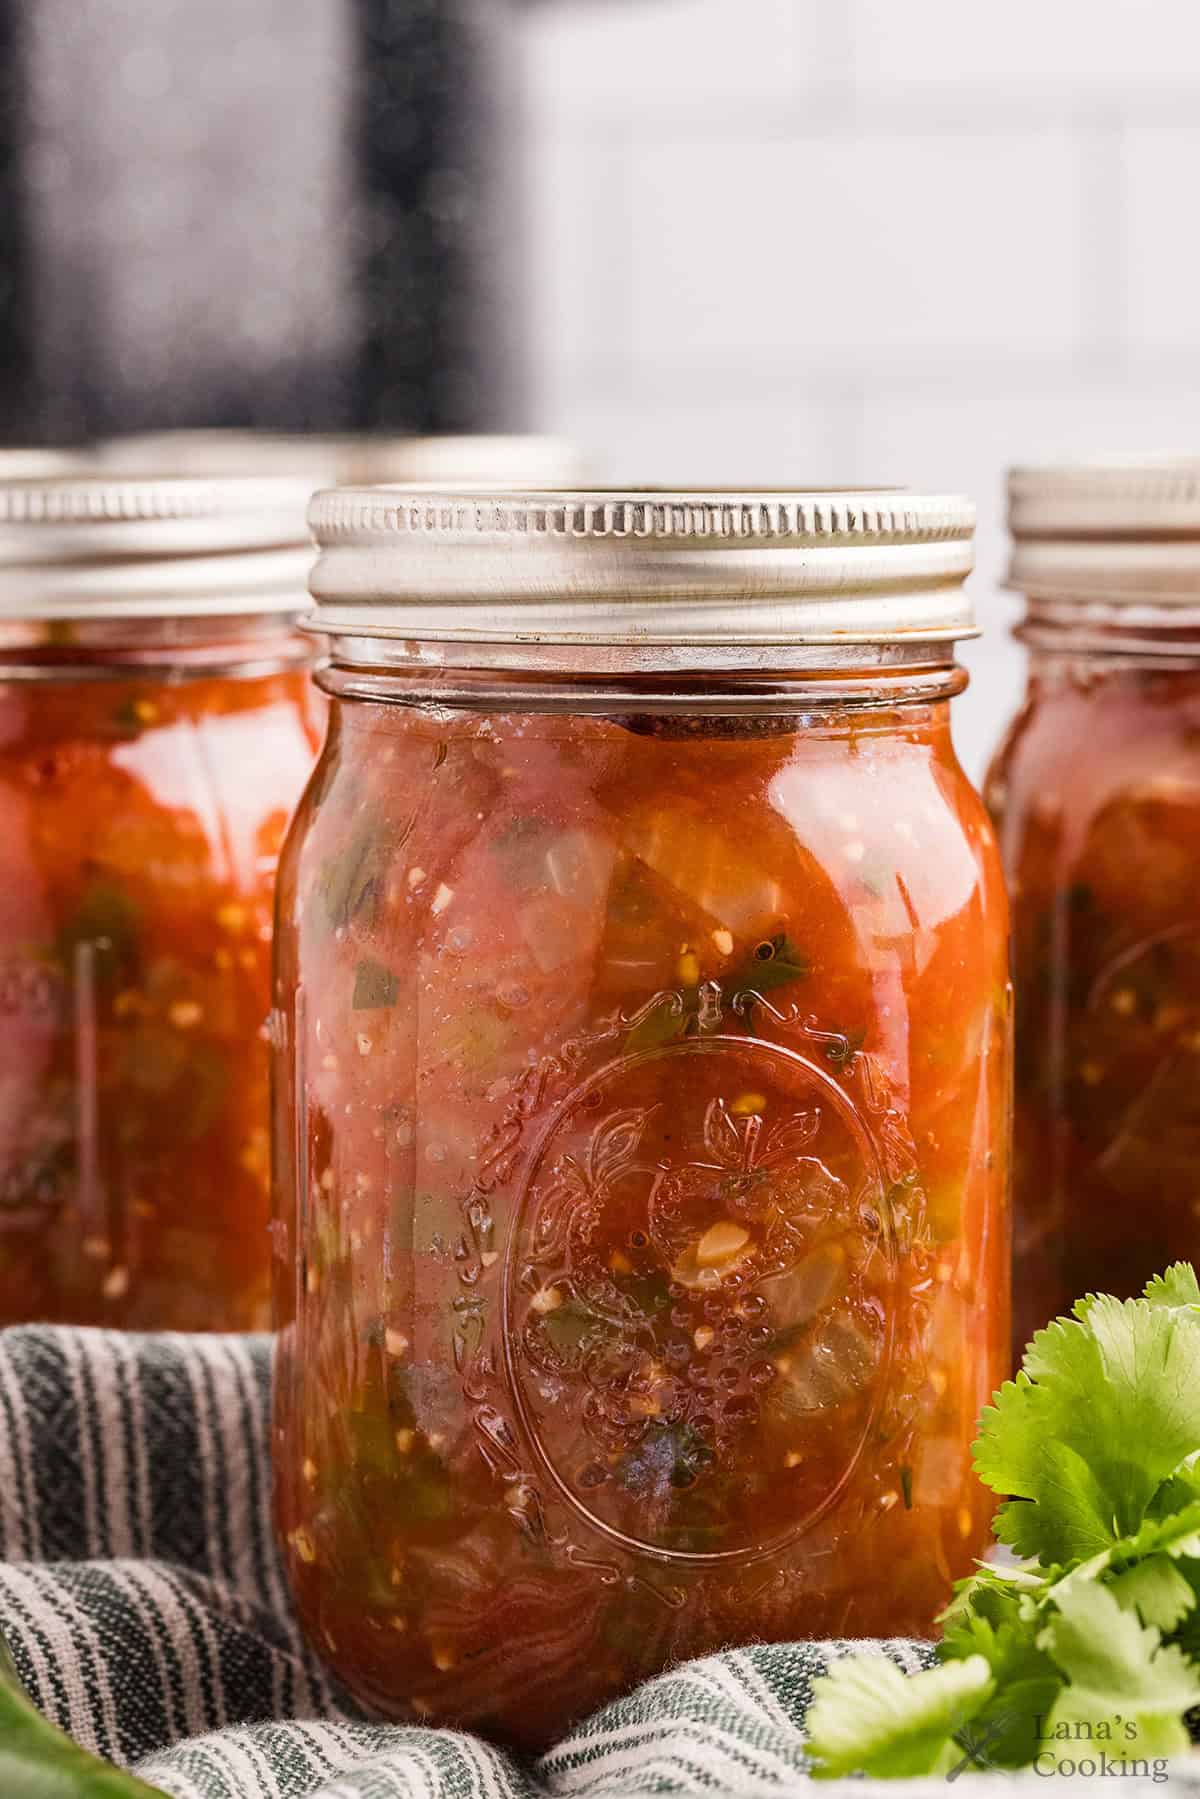
- Remove the hot, processed jars of gorgeous salsa from the canner and set them on a kitchen towel or something similar to give them a little cushion. Let them sit until completely cool – at least 8 hours, preferably overnight. Test to make sure you have complete seals (see How to Test for a Complete Seal), and then store the jars in a cool, dry place until ready to use.
- Let the salsa sit for four weeks before using. This will allow time for the flavors to mellow. Use within one year of canning. Store in the refrigerator after opening.
Tips
- After cooking the salsa and before ladling it into the jars, give it a taste. If you think it could use a little more sugar to neutralize the taste of the vinegar, you can add up to one additional tablespoon.
- If you want to add additional vegetables, such as black beans or corn to the salsa, add those after you open the jars for use. Do not add additional ingredients to the recipe. This can alter the pH balance and make the salsa unsafe for canning.
More Popular Home Canning Recipes
If you enjoyed this post, you’ll also want to check out my recipes for Pickled Okra, Sugar-Free Bread and Butter Pickles, Home Canned Tomatoes, Favorite Kosher Dills, and Strawberry Jam.
Questions About Home Canned Salsa
Lots of people have asked for a salsa recipe for canning without peeling tomatoes. I will say that you don’t have to peel the tomatoes when making salsa. However, some varieties of tomatoes have skins that become tough and bitter during cooking. Also, many times, the peel will separate from the tomatoes while cooking, causing you to end up with a salsa full of floating tomato skins. So, my advice is to always take the time to peel the tomatoes.
Most freshly made tomato salsa recipes contain lime juice. However, lime juice does not have adequate acidity to make salsa safe for canning and storage without refrigeration. That’s why vinegar is used.
You could. Just be aware that once thawed, your tomatoes will not have the same texture. However, you can give it a quick blitz with a stick blender or in the food processor and turn the mixture into a smooth salsa.

Have a question or thought to share?
If you have a question about the recipe or if you’ve made it and want to share how it turned out, I would truly enjoy hearing from you. Just scroll down to leave a comment or add your star rating.
Thank you for stopping by. It means a lot to have you here.
Recipe
Want to save this recipe?
Enter your email below and get it sent straight to your inbox.
Easy Basic Salsa Canning Recipe
Ingredients
- 3 pounds tomatoes peeled and chopped
- 3 medium onions finely chopped
- 1 ½ green bell peppers chopped
- 3 medium sized jalapeno peppers halved, seeded and chopped (may use up to 9 medium sized jalapenos)
- 9 cloves garlic minced
- 1 ½ cups tomato sauce
- 1 ½ cups white distilled vinegar 5% acidity
- 1 tablespoon granulated sugar (may use up to 2 tablespoons total)
- 1 ½ teaspoons pickling salt
- 1 ½ teaspoons ground cumin
- 1 ounce Italian parsley chopped (about 1/2 bunch)
- 1 ounce cilantro chopped (about 1/2 bunch)
Instructions
Prep Work:
- Before you start, get everything you need together. All your jars, lids, kitchen towels, produce, knives, canner, funnel.
- Prepare the jars, lids, and rings.
- Fill the canner about ⅔ to ¾ with water, bring it to the boil and hold it there until ready to fill the jars. Add your empty clean jars into the canner and let them sterilize while you prepare the salsa.
Cook the Salsa:
- Chop the tomatoes, onions, green pepper, and jalapenos. Finely mince the garlic, parsley, and cilantro. Combine all the ingredients in a stainless steel or enamel saucepan.3 pounds tomatoes, 3 medium onions, 1 ½ green bell peppers, 3 medium sized jalapeno peppers, 9 cloves garlic, 1 ½ cups tomato sauce, 1 ½ cups white distilled vinegar, 1 tablespoon granulated sugar, 1 ½ teaspoons pickling salt, 1 ½ teaspoons ground cumin, 1 ounce Italian parsley, 1 ounce cilantro
- Bring the mixture to a boil over high heat. Reduce the heat and boil gently, uncovered, for 25 minutes or until desired consistency, stirring frequently.
Fill and Process Jars:
- Working with one jar at a time, carefully remove a jar from the canner and ladle in the hot salsa to within ½ inch of the rim (headspace). Wipe the jar rim with a moist paper towel and apply a lid and ring (just finger tight).
- Return the filled jars to the canner and lower them into the boiling water. Begin timing when the water returns to a boil. Process pints for 10 minutes at 1-1,000 ft. (20 minutes at 1,001 to 6,000 ft. and 25 minutes above 6,000 ft).
- Remove the hot, processed jars from the canner and set them on a kitchen towel. Let them sit until completely cool – at least 8 hours, preferably overnight. Test to make sure you have complete seals and then store the jars in a cool, dry place until ready to use.
- Allow the salsa to sit for four weeks before using. This will allow the flavors to mellow. Use within one year of canning.
Notes
- You may use any variety of tomatoes for this recipe. I prefer Roma (or paste) tomatoes.
- I prefer white vinegar because it has a more neutral flavor; it’s possible to use apple cider or other vinegars but the acidity MUST be at least 5%.
- The sugar in the recipe helps to mellow and off-set the vinegar flavor – taste after cooking the salsa and add more if needed (up to 1 additional tablespoon).
- If you want to add additional vegetables such as black beans or corn to the salsa, add those after you open the jars for use. Do not add additional items to the recipe. This can throw off the pH balance and make your salsa unsafe for canning.
Nutrition Information
Nutrition information is calculated by software based on the ingredients in each recipe. It is an estimate only and is provided for informational purposes. You should consult your healthcare provider or a registered dietitian if precise nutrition calculations are needed for health reasons.
— This post was originally published on September 10, 2010. It has been updated with new photos and additional information.

I’m Lana Stuart, an award-winning cookbook author, food blogger, and lifelong cook raised deep in Southwest Georgia. I started Lana’s Cooking in 2009 to share the tried-and-true recipes I grew up with. Around here, the food is full of flavor, the traditions run deep, and there’s always room at the table.
Thanks
Keep the recipes coming!
Can I use store bought cans of stewed tomatoes to make the salsa ?
I don’t have any information on how to substitute canned stewed tomatoes in this recipe. No idea what the pH of them might be or how they would affect the outcome.
Lana I am in a low salt diet. I wanted to make my own salsa with no salt. Is that possible
Yes, you can. Salt isn’t necessary for preservation in this recipe. It’s for flavor only.
I’m getting ready to make this salsa… do I need to drain the tomatoes after I peel and chop them or just leave the liquid?
No need to drain them, just leave the liquid.
This is going to be my salsa recipe! It’s gòt the perfect mix of heat, tang, and sweetness, and the tomato sauce gives it richness and body. I can’t wait to see how it is in four weeks.
So glad you like it, Heather! I usually make it once a year to have on hand for winter. You’ll love having those fresh flavors on cold days.
Lana,
Do you blanche the tomatoes before peeling and chopping them up?
Excited to make your recipe :)!
Tresa
It’s optional. I do blanch them to make them easier to peel. It’s the first step I show in the body of the post. If you don’t want to blanch, that’s fine, but they should be peeled.
I planted the small tomatoes. Can I leave the Skin on and use the food processor to chop everything?
Do you mean cherry tomatoes? I haven’t used a processor for this recipe, but you could give it a try. Just be sure not to chop too finely or you’ll wind up with tomato sauce. A word of warning about about cherry tomatoes — they have lots of seeds.
I have a salsa recipe that I make in small amounts that is usually consumed in a few days, but I would like to try canning it. However, due to my lack of experience in canning, I’m not sure how to accomplish it. My recipe has no pickling salt or vinegar, but it does have regular table salt and lime juice. If I can this recipe, how can I ensure that the proper Ph is maintained?
Canning is very exact science. It requires a specific pH level in the food in order for it to be shelf-stable and free from botulism. To be honest, you’d need to have a food lab test the recipe to determine whether it is appropriate for canning. All the canning recipes I post are from USDA approved sources.
I tried this recipe today for the first time. I had a small amount left over that wouldn’t fill a full jar so I tried it with some tortilla chips. It was delicious. It has a very nice flavor but the vinegar is very prominent. Does this mellow after being in cans for awhile?
Sheryl
The taste doesn’t change significantly during storage. Interesting, though, I’ve never noticed a predominant vinegar taste with this salsa.
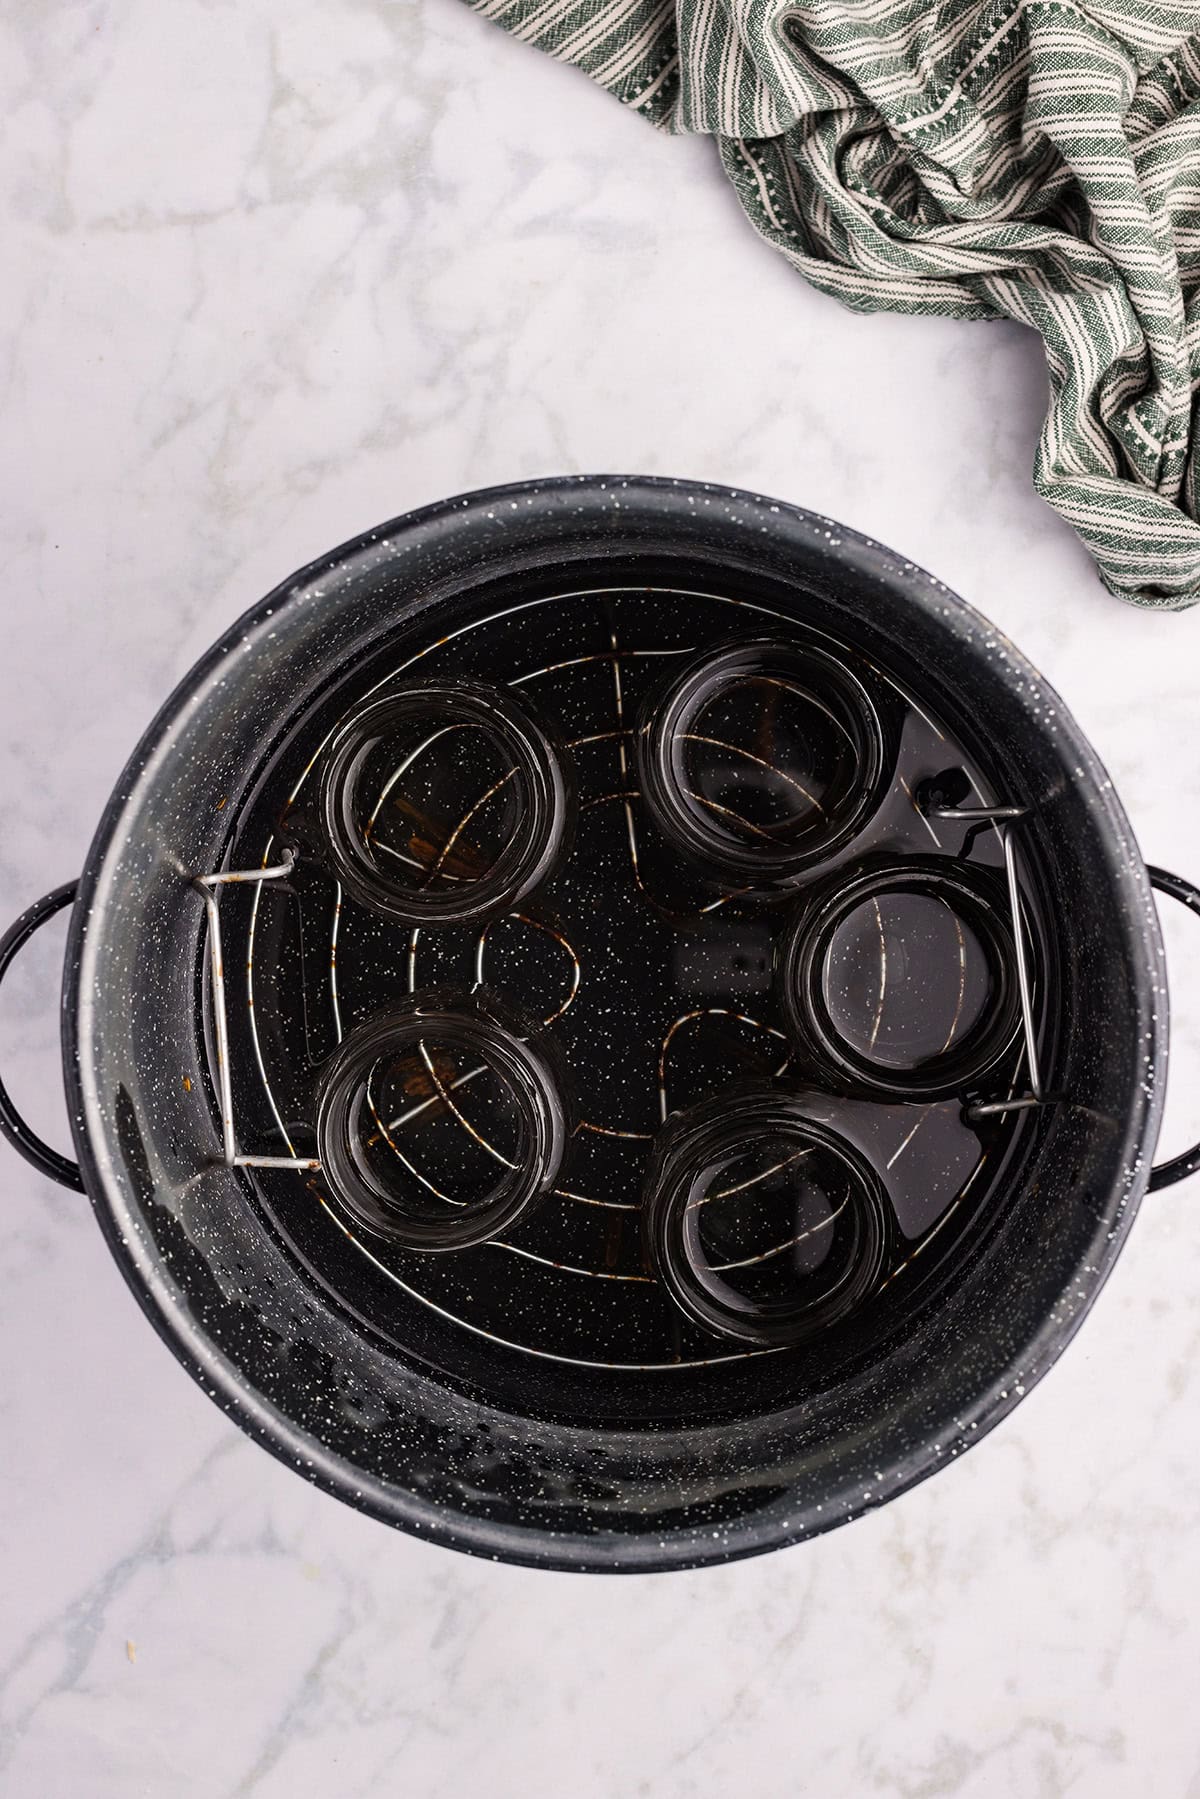
Hi! I have a question about the water bath photo. I always make sure the water is over the jars by at least 2 inches. Your photo looks like the top half of the jars are above the water and not completely submerged. Can you explain this to me? If that’s the method I should use for canning anything with tomatoes it would explain why I sometimes get water inside my sauce jars. Thanks!
Hi Bernie – yes, I can see how that photo would be confusing. The jars are sitting in the rack which is hooked over the sides of the canner. They haven’t been lowered into the water yet. The standard is that the tops of the jars should covered by at least 1″ of water and they would be when lowered into the canner.
For the amount of tomatoes…
Is this 3 lbs before they are peeled and chopped, or is 3 lbs the quantity needed after they are peeled and chopped? Past experience peeling tomatoes for canning tells me you can lose a lot of “product” during that process.
It’s 3 pounds before peeling. I lose very, very little in the peeling and chopping.
First time making this recipe. Great recipe and the finished product is worth the process.
So glad you enjoyed making it, Sonya! I love having this fresh salsa for the winter.
Hi there! Just finished canning this recipe and it looks delish! Just wondering what the shelf life is and the best way to store the jars? :-)
Lehran, you should store the jars in a cool, dry place and use the salsa within one year.
I just made this today, my goodness it smelled delicious!!!! I just started canning a few months ago and this is my first attempt at salsa. Can’t wait to try it. Thanks
Hope you enjoy the salsa, Deborah. It’s a long-time favorite recipe of ours.
I am wondering if it’s possible to use cider vinegar, as that is what I have used in the past. I don’t know the recipe anymore but I do remember that I used cider vinegar. Thanks in advance for your help!
If your vinegar is at least 5% acidic then it’s safe to use for canning. It will, however, change the taste of the salsa quite a lot.
Quick question. You use the water bath method for canning. Can you just put steaming hot salsa in a jar and seal the jar that way, without boiling the jars at the end? Thanks!
Jason – You can do that, but after the jars and contents cool down (about 24 hours) you’ll have to store them in the refrigerator and use them within a month or so. To keep them in the pantry not under refrigeration they must be sealed using a water bath. Water bath sealed jars are safe to store out of the refrigerator for up to a year.
This salsa sounds so good. Could I add some black beans and yellow corn to it without changing the ph for canning?
Sharon – Sorry but either black beans or yellow corn would make this recipe unsafe for water bath canning. You could, however, make the salsa according to the recipe and add those when you open a jar for use.
I love salsa and I love your pics. great post!
Can I use this canning process for Cherry Salsa also?
Mary, It would depend on whether the recipe for your Cherry Salsa is safe for canning. You should always use a USDA tested and approved recipe which will include the correct headspace, jar size and processing time.
This looks great! I have 7lbs of tomatoes that need to be used this week, so I’m going to try this tomorrow night.
Do you remove the seeds from the tomatoes? Does it matter whether they’re there or not? I’ve never made salsa before at all, but I’m sure I can do better than the store-bought stuff! Thanks!
Catherine – I don’t remove the seeds. Just peel and chop.
This looks amazing. I want salsa, on everything. I make it but in 2 jar amounts and never to can. I have been thinking of doing canning and I just got my hands on a Blue Book. Can’t wait to begin. I need more jars, and 2 other things that I saw at Ace last week. I am going back this weekend to get them.
This is a really nice, all-purpose mild salsa that is easy to make and can. I try to make a batch every summer when tomatoes are plentiful and it lasts us all year. Hope you enjoy it!
I just made this recipe!
No chopping problems with the Kitchen Aid food processor and a helpful husband.
Fabulous Recipe!!
I doubled the recipe…my only suggestion is adding a 6 oz. tin of tomato paste at the end of the cooking time to the salsa. This made the finished product thick & rich, like store bought.
I made homemade foccacia bread and we couldn’t wait for the salsa to cool down to sample it….we devoured this wonderful full flavoured salsa with the bread. YUM!
Thanks Lana,
Edie
Hi Edie – so glad you enjoyed the recipe. Your suggestion for adding tomato paste probably does make a richer product, but it alters the pH balance of the recipe making it questionable for home canning. With the additional tomato paste, I’d store it in the refrigerator.