

These mini No Bake Cheesecake Cups are a great choice for any occasion from a family dinner to a buffet style party. They use basic ingredients and take just 10 minutes of prep time. The hardest part of this recipe is waiting for the cheesecakes to chill!
If you’re looking for an easy no bake dessert, then I have a great recipe right here. These No Bake Cheesecake Cups take just 10 minutes to assemble and use simple ingredients with no fancy equipment needed. If you can hold an electric mixer, you can make this recipe!
Doesn’t everyone like cheesecake? I sure do! The only problem with standard cheesecakes is that you need a springform pan, sometimes a water bath, and there’s that whole issue with the top cracking. Hmm. Gotta be an easier way, right? That’s where my no bake cheesecake recipe comes into play.
Whether you’re looking for something special to serve on Valentine’s Day or just for a family dinner, you’ll definitely want to try this mini cheesecakes recipe. It’s delicious and looks gorgeous, too.
Recipe Snapshot: No Bake Cheesecake Cups
Prep Time: 10 minutes
Chill Time: 4 hours
Total Time: 4 hours 10 minutes
Servings: 6
Cuisine: American
Cooking Method: N/A
Primary Ingredients: Graham cracker crumbs, brown sugar, butter, cream cheese, condensed milk, whipped topping
Skill Level: Easy
DO MORE WITH CHATGPT
WHAT PEOPLE ARE SAYING …
⭐⭐⭐⭐⭐
“This is how I like a cheesecake, easy to make in no time and sweet enough for my taste buds.”
— Amanda
What Makes This Recipe Special
- Ten minutes prep time! You do have to wait for it to chill, but if you have ten minutes to spare, you can get this done.
- Variety! Make it your own with different toppings and garnishes.
- It’s so easy – just mix up a few ingredients, spoon the cheesecake mixture into cups, and refrigerate.
Key Ingredients
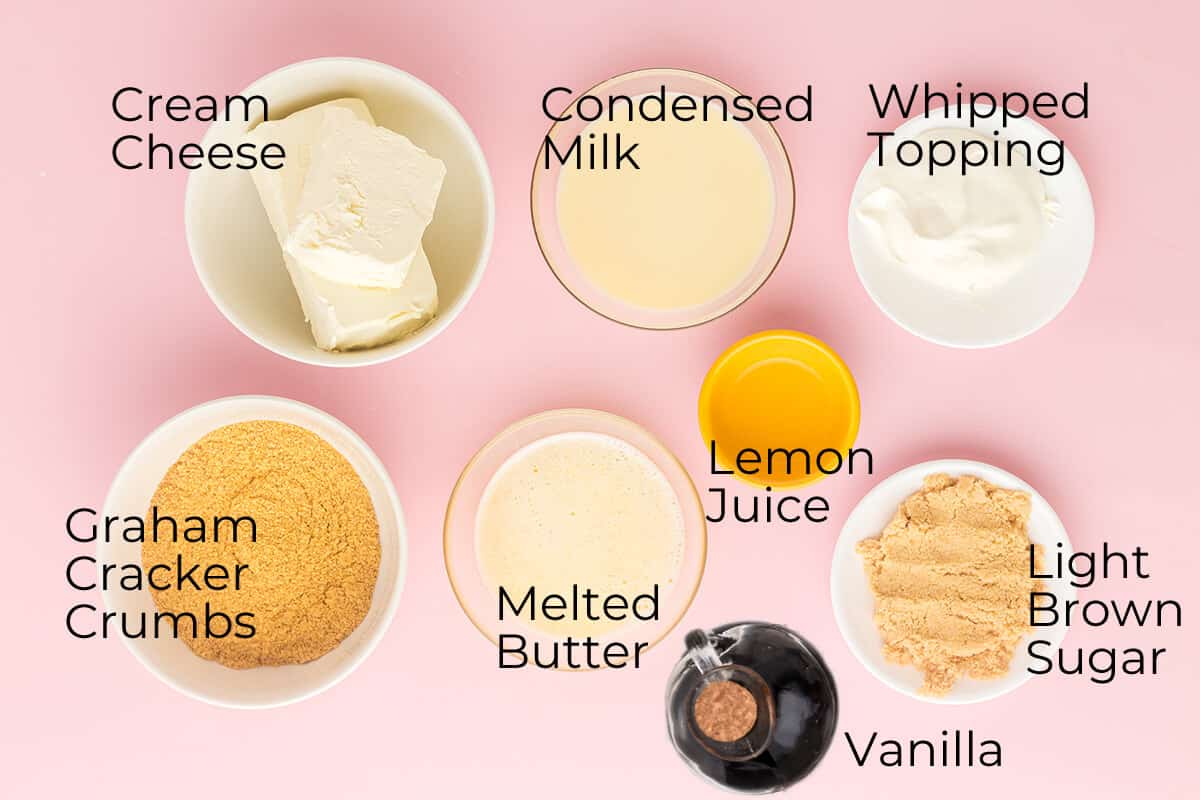
- Graham Cracker Crumbs — Packaged graham cracker crumbs are available in grocery stores or can be easily made from whole graham crackers (see notes below).
- Cream Cheese — Make sure the cream cheese is at room temperature.
- Sweetened Condensed Milk — Such as Eagle Brand. No added granulated sugar is needed in this recipe because of the sweetness of the milk.
- Whipped Topping — The whipped topping should be thawed. I recommend Cool Whip brand.
- Lemon Juice — Freshly squeezed is best.
- Garnish — Fresh berries, fruit pie filling, and more.
The complete ingredient list with detailed measurements is included in the printable recipe card at the bottom of this post.
How to Make No Bake Cheesecake Cups
- Set aside 6 small cups (6–7 ounces each). Use small dessert cups or half-pint mason jars.
- In a medium mixing bowl, stir together the graham cracker crumbs, brown sugar, and melted butter until thoroughly combined.
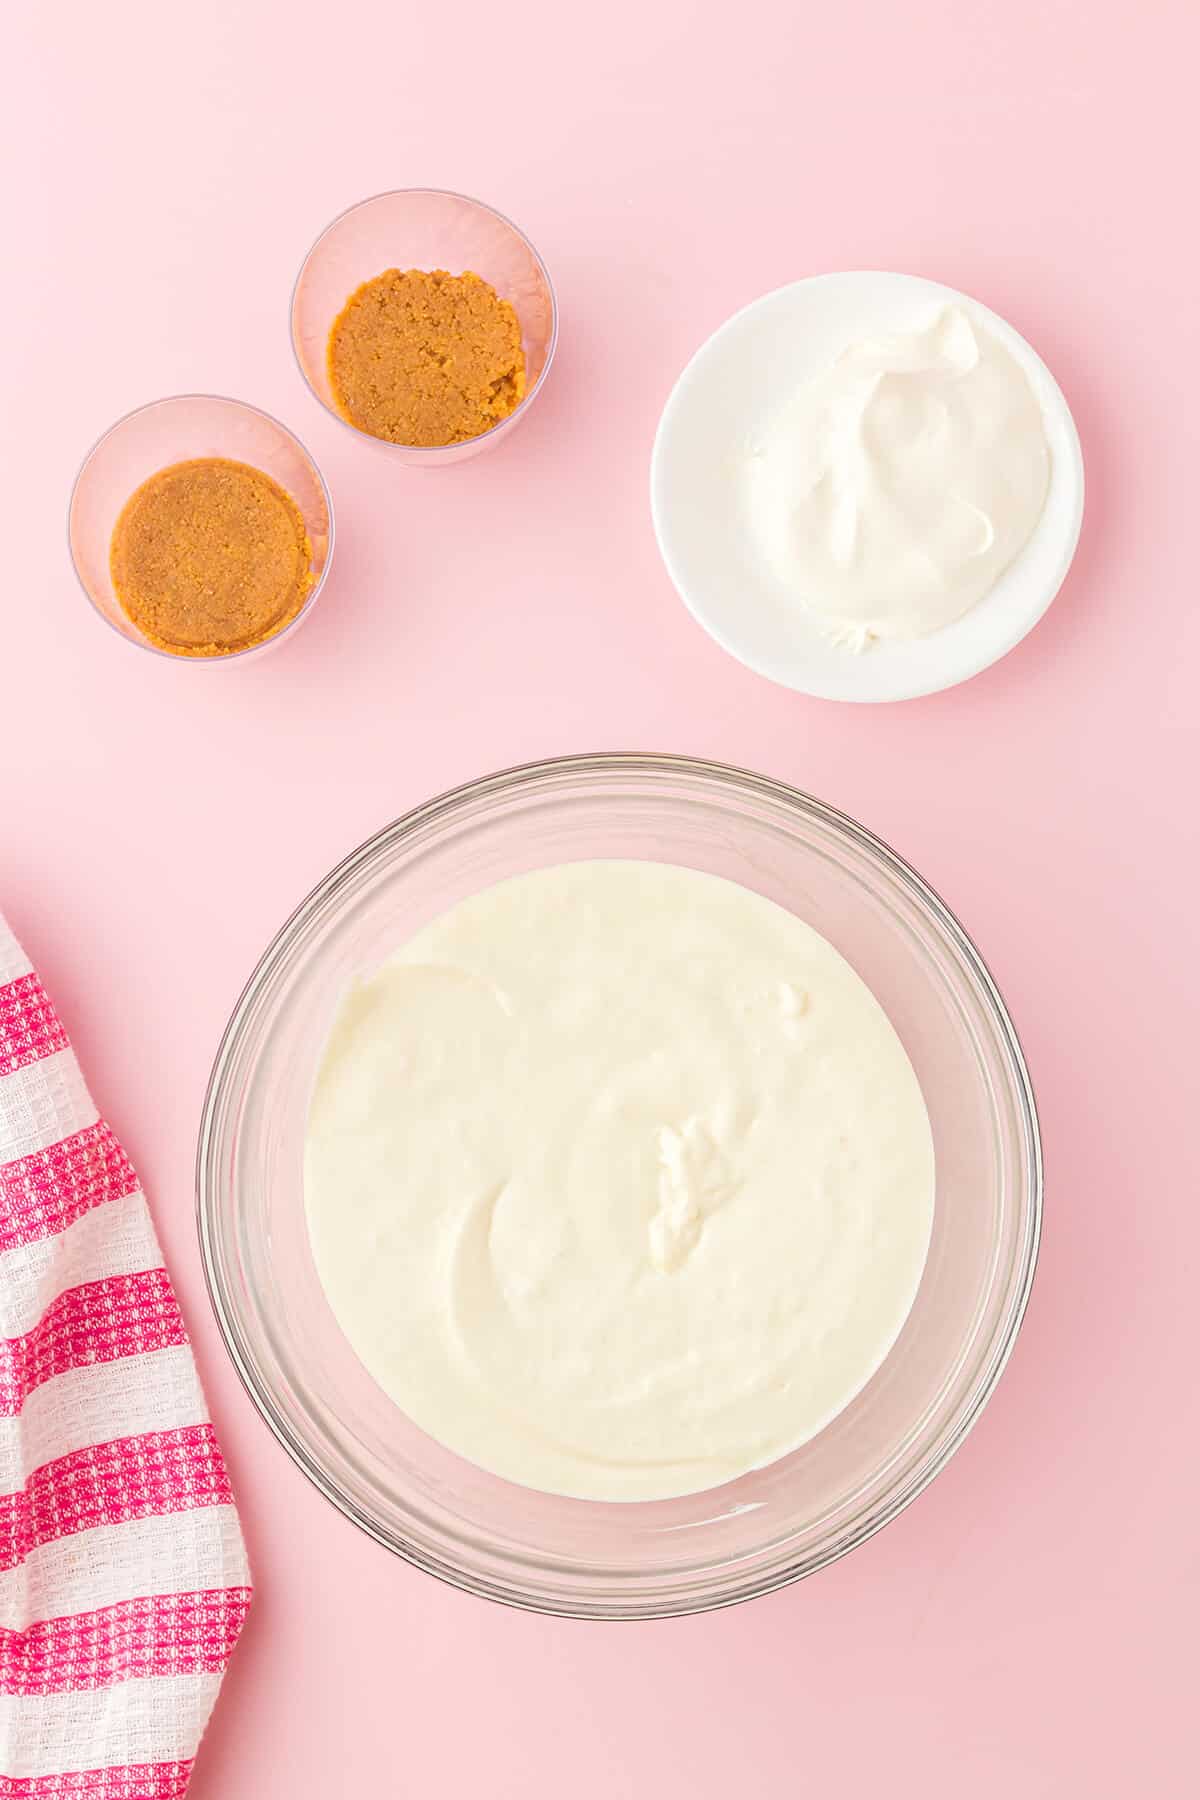
- Press the cracker mixture evenly into the bottom of each cup.
Want to save this?
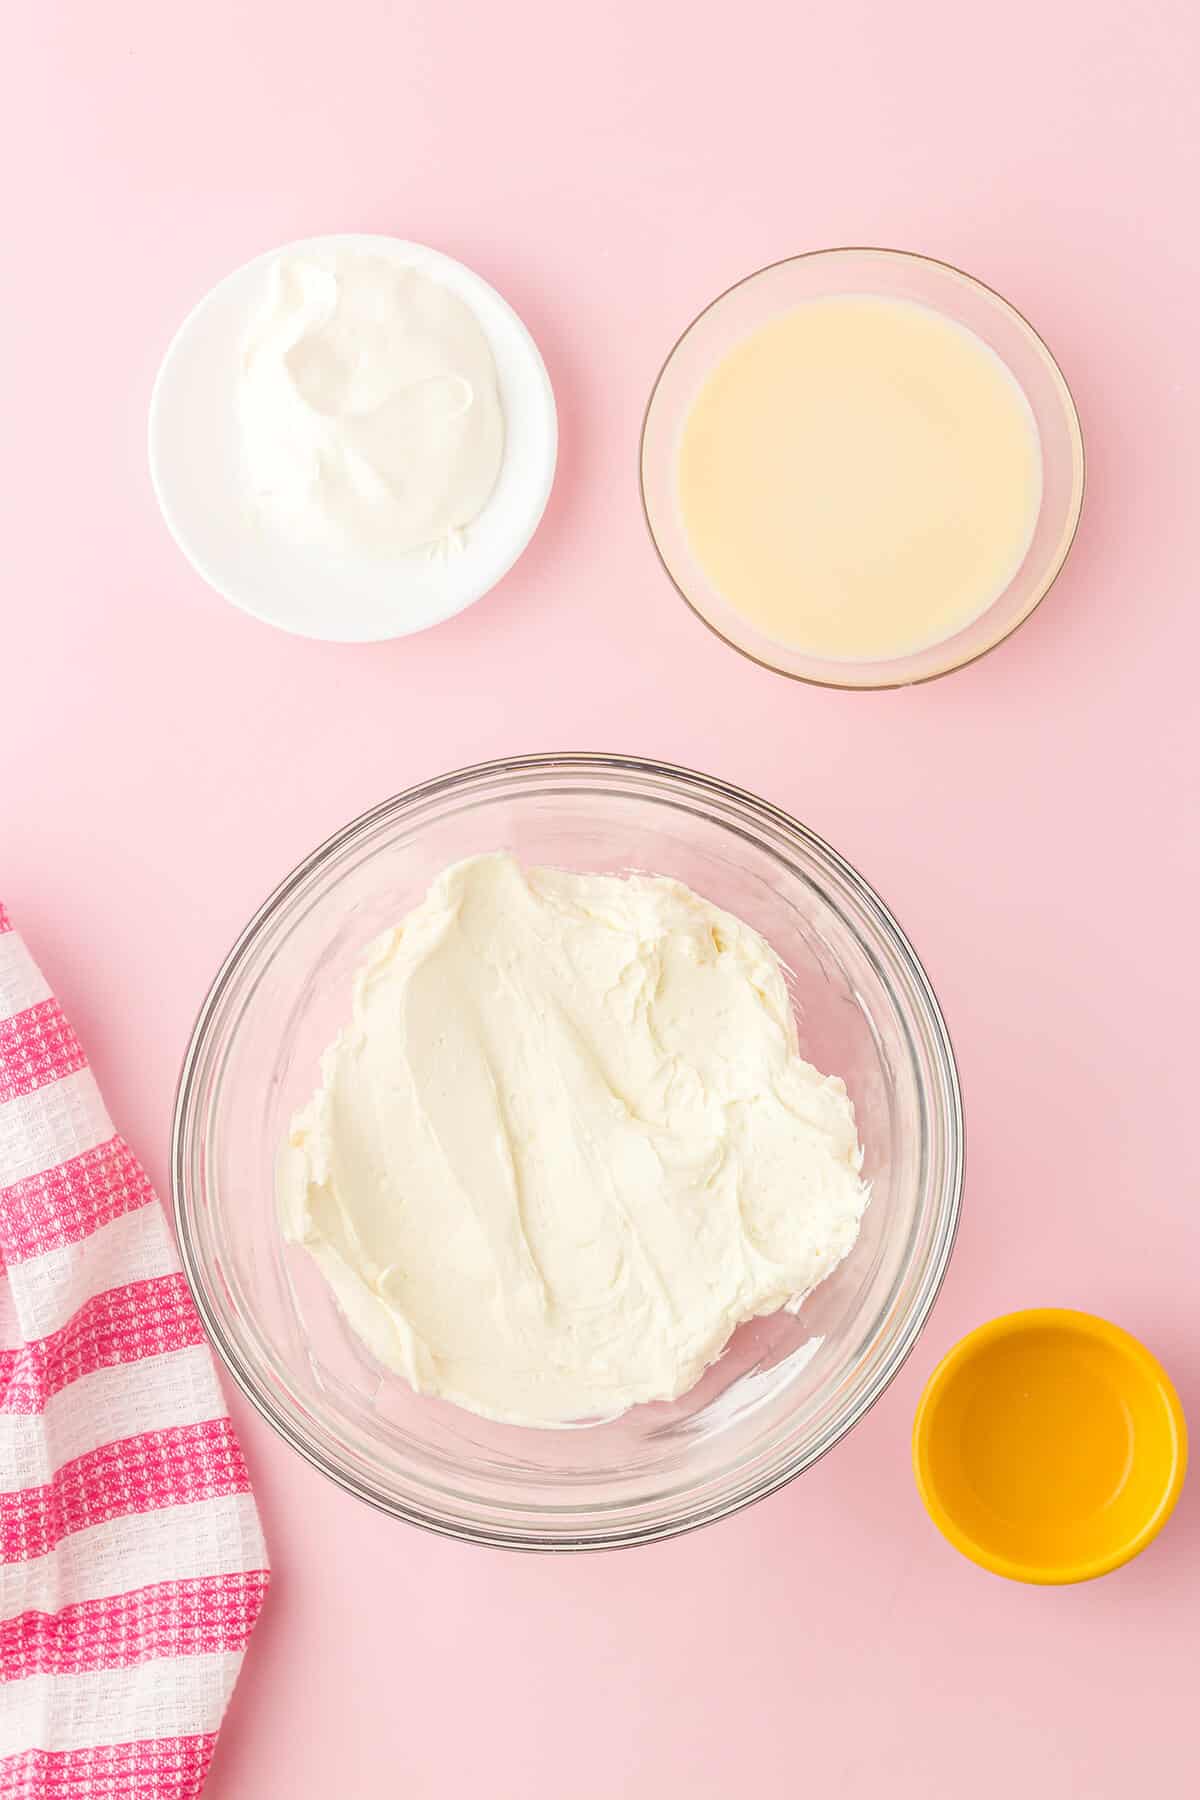
- In a separate large bowl, use an electric mixer at high speed to beat the cream cheese until smooth.
- Add the sweetened condensed milk, lemon juice, and vanilla. Continue beating 4-5 minutes until the mixture is fluffy.
- Stir in the whipped topping.
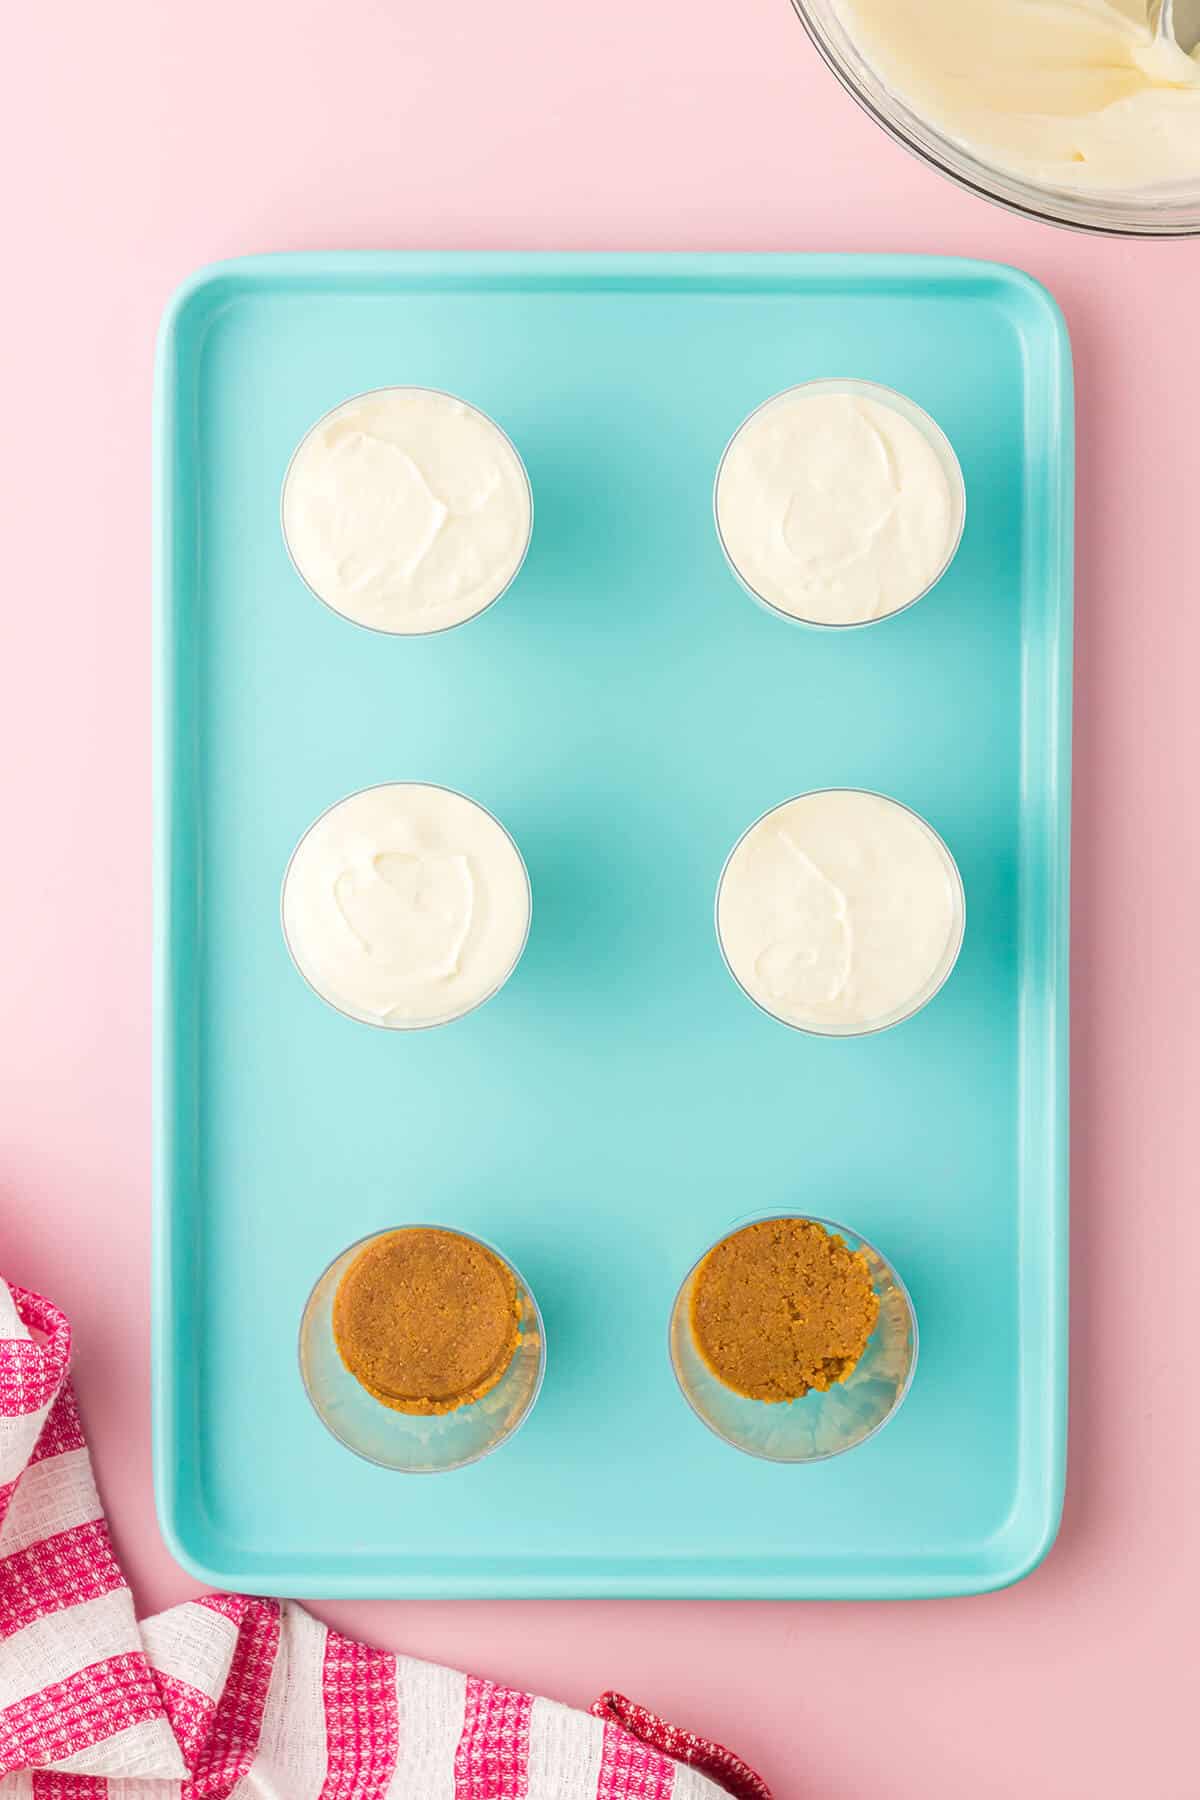
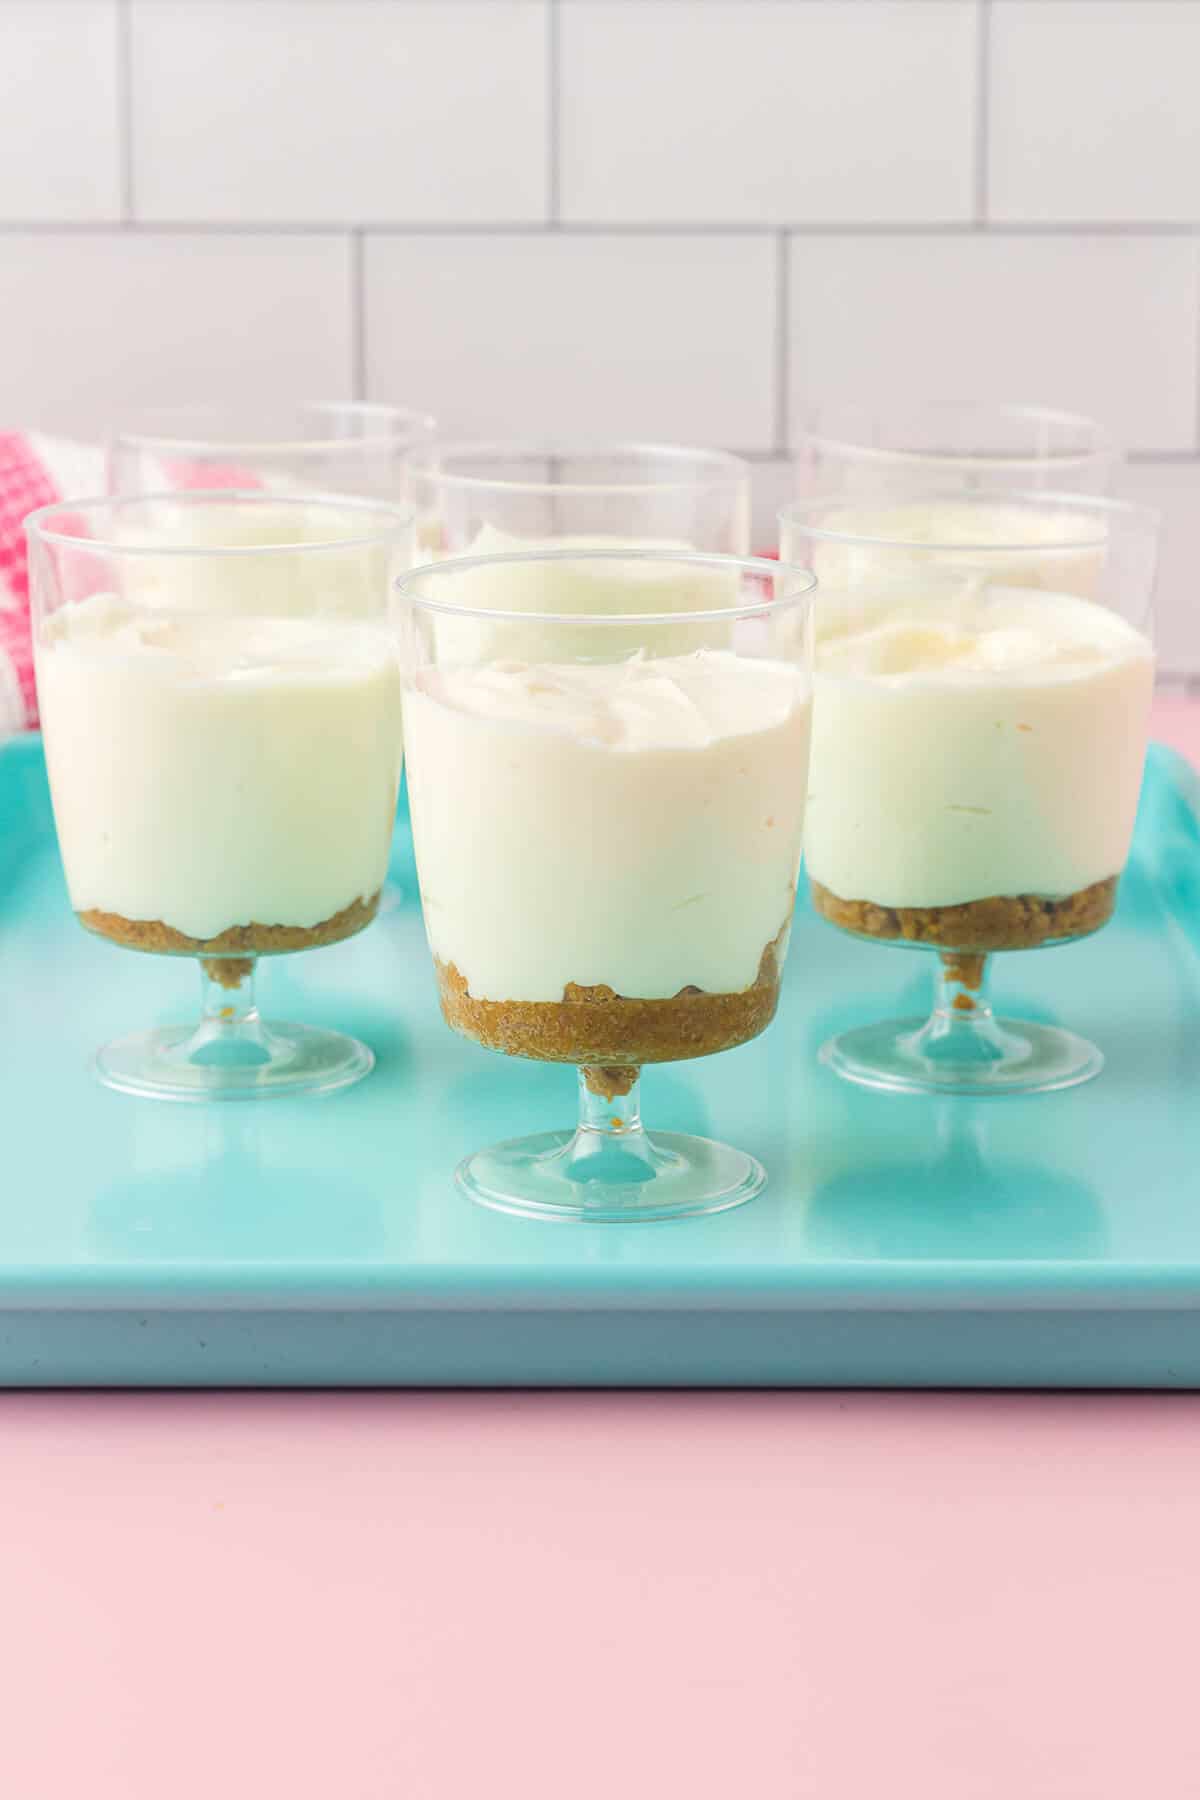
- Divide the cheesecake mixture evenly between the dessert cups.
- Cover and refrigerate for at least 4 hours before topping with desired garnishes.


Pro Tip: How to Make Graham Cracker Crumbs
Packaged graham cracker crumbs are available in most grocery stores, but you can easily make them at home. For one cup of crumbs, you’ll need 8 whole graham crackers (one whole graham cracker is one “sheet” containing four little rectangles with perforated edges). Place the crackers in a resealable bag and roll with a rolling pin or use a heavy meat mallet or heavy pan to crush the crumbs. Pour into a bowl and proceed with the recipe.
Some great substitutes for graham crackers include gingersnaps, vanilla wafers, animal crackers, biscoff cookies, and digestive biscuits. You could also use your favorite cereal (honey nut cheerios are delicious!), crushed ice cream cones, or pretzels.
Recipe Tips
- You’ll need six cups that hold about six ounces for the recipe. You could choose Pyrex custard cups, half-pint canning jars (without the lids), small drink glasses, or disposable plastic dessert cups.
- If planning for a crowd, this recipe easily doubles.
- This is completely optional and will add a few minutes to your overall time, but I often cook my crust very briefly. It will taste great either way, but if you want to really set the crust, you can pop the cups filled with the crust mixture in the oven at 350°F for about 5 minutes. Obviously, you wouldn’t do this if you’re using plastic cups!
- Use your fingers, a spoon, a tart tamper, or even a cocktail muddler to create an even layer of crust.
- Use a piping bag or a zip top bag with one corner cut to easily fill the cups with cheesecake mixture.
Topping Options
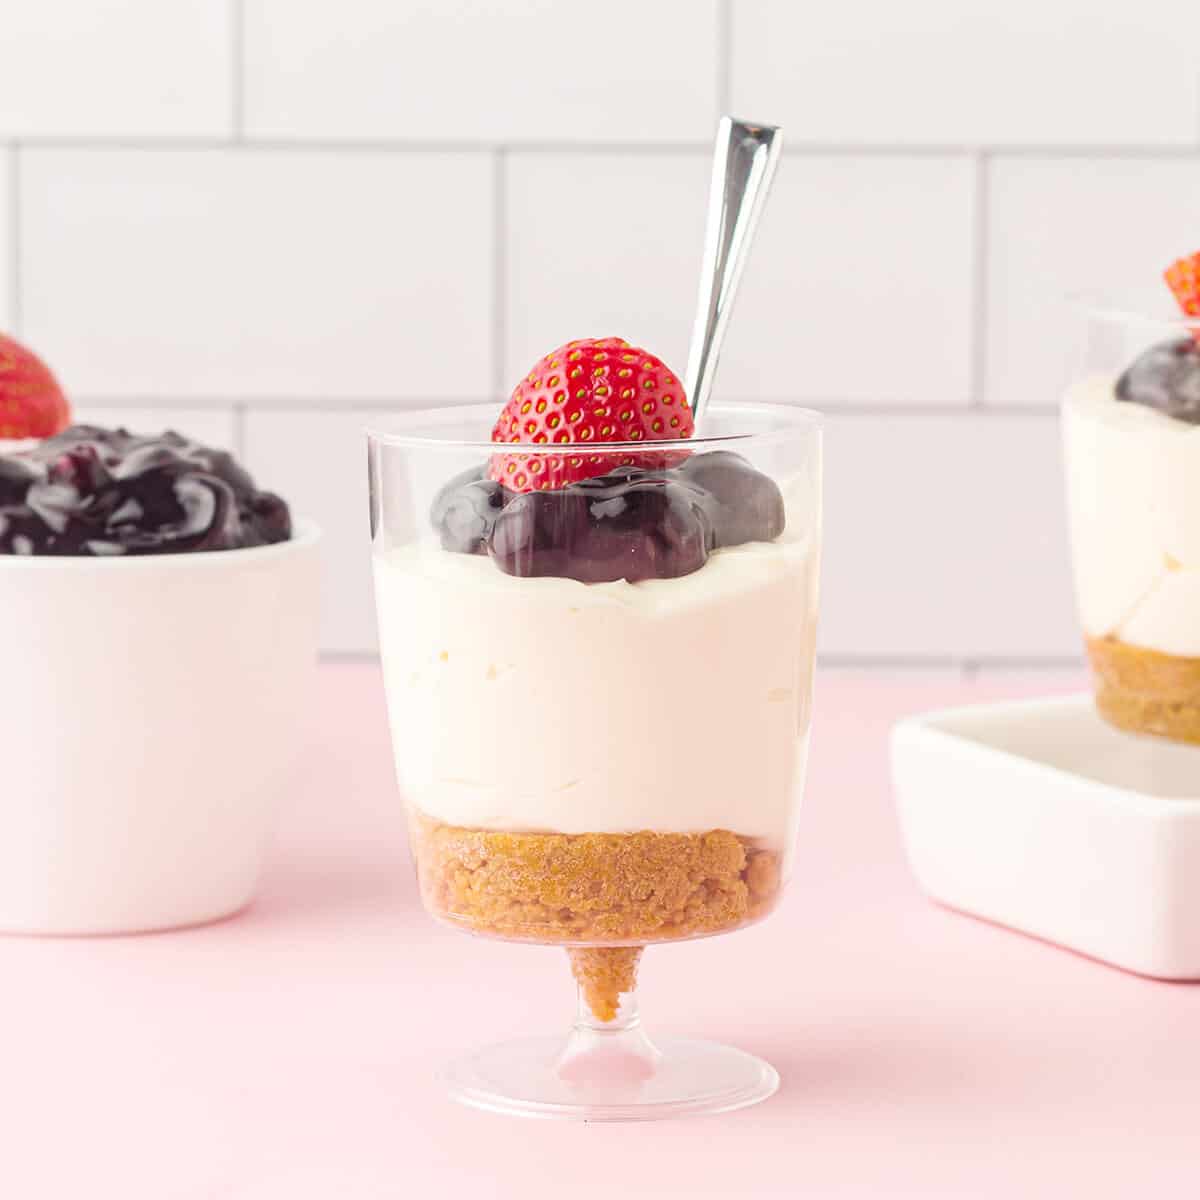
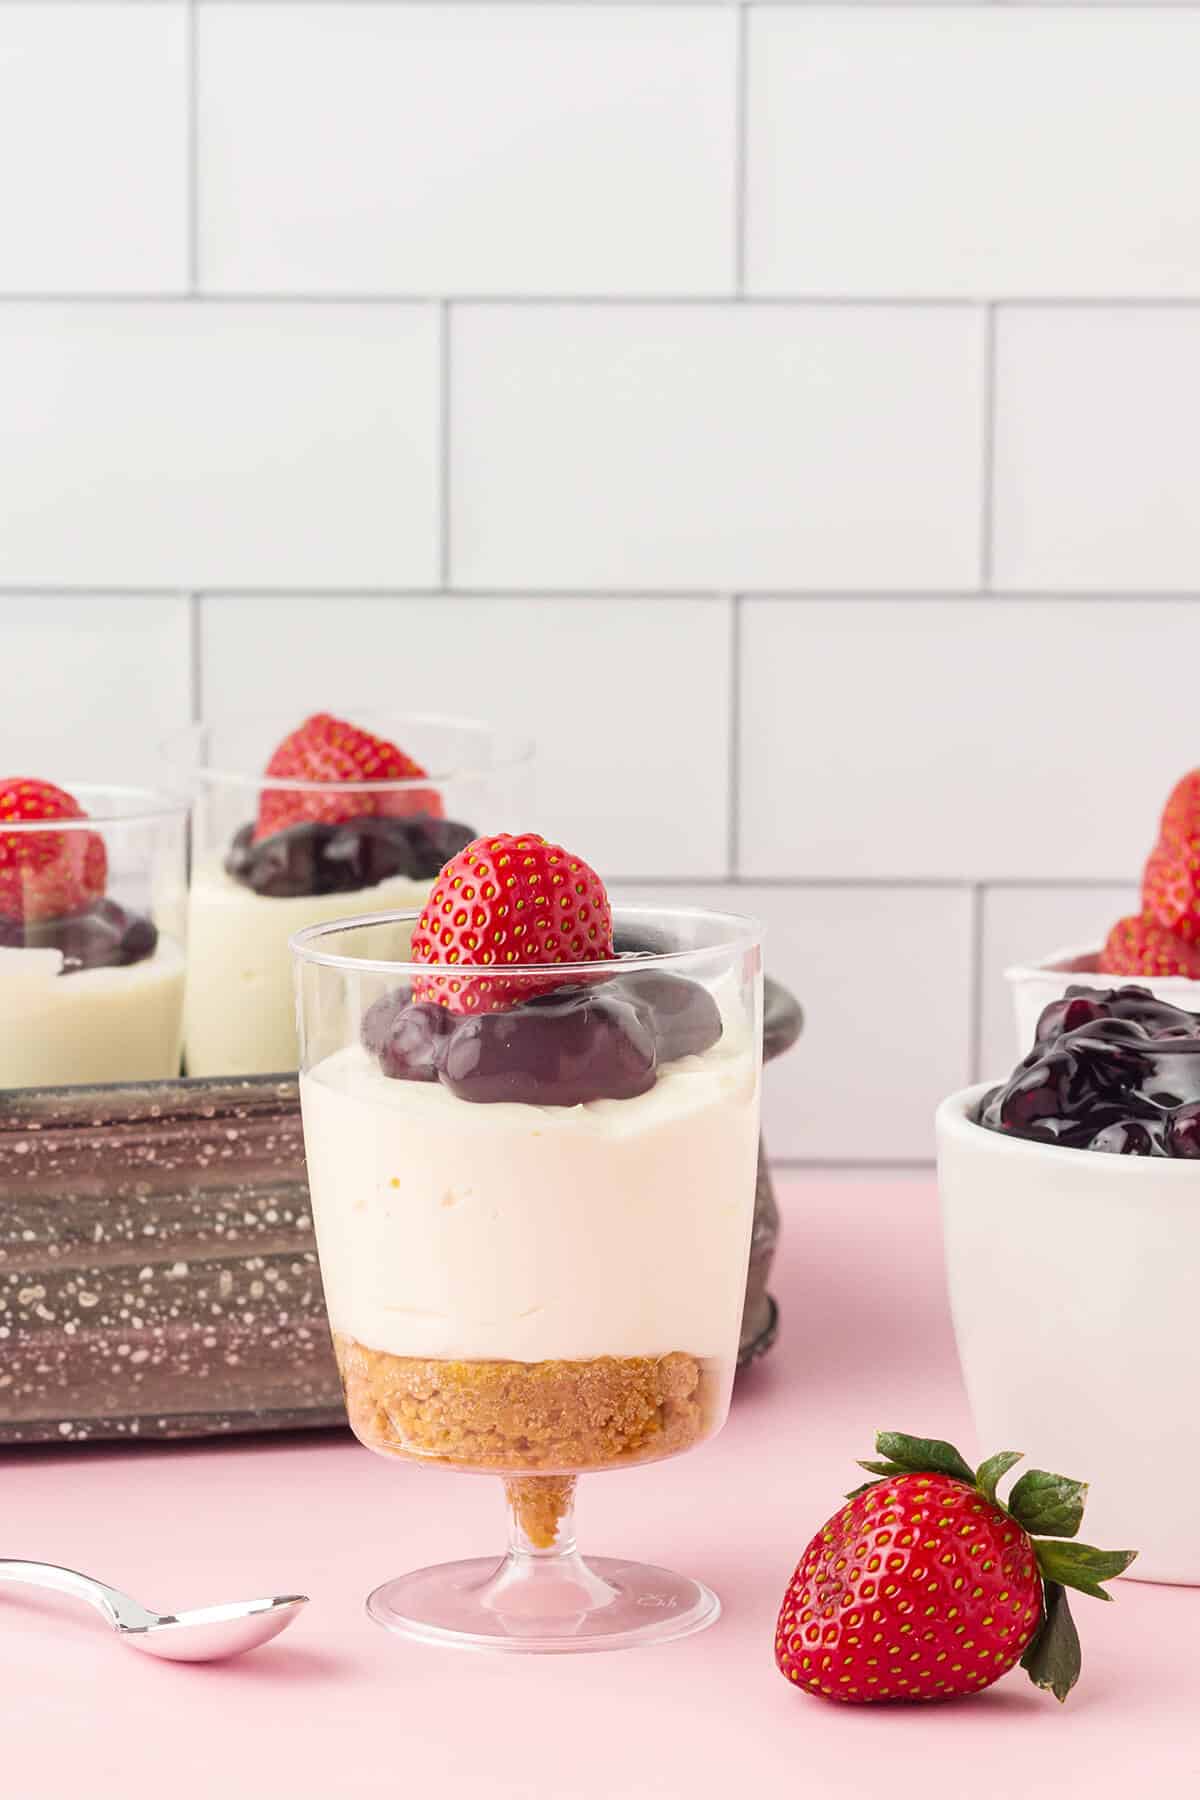
The cheesecake cups in the photos are topped with a dollop of cherry pie filling and a beautiful fresh strawberry. You could also choose one of these options:
- Chocolate ganache with raspberries
- Lemon curd with fresh blueberries
- Caramel topping with banana slices
- Apricot jam with peach slices
- A swirl of whipped cream and toasted nuts or sliced fresh fruits
Storage Information
The recipe can be prepared several days in advance and stored in the refrigerator for up to four days. Cover each individual cup with plastic wrap or place all cups in a large sealable container. This recipe isn’t meant for freezer storage.
If serving for a party, the cups can sit out at room temperature for about two hours, but are best served while still chilled from the refrigerator. Remember, they’re uncooked, so the cream cheese won’t hold up to room temperature for as long as a baked cheesecake would.
Questions About No Bake Cheesecake Cups
Sweetened condensed milk is milk that has been cooked down until about 60% of the water has been removed. It also has sugar added, thus the “sweetened.” Eagle Brand is a popular choice. It’s different from evaporated milk in that evaporated milk doesn’t have added sugar. Don’t substitute evaporated milk in this recipe.
Cold cream cheese tends to form lumps and will not blend well into the batter. When it’s at room temperature, it mixes in smoothly.
The graham cracker crust of any no bake cheesecake tends to become a little soggy when refrigerated for more than a few hours. If you want to keep a crispier base, you can add a very light egg wash over top of the base and bake it briefly (350 for 5 minutes). The egg wash will form a barrier between the base and the filling, preventing any sogginess. If you do choose to take this step, make absolutely sure the base is completely cool before adding the cream cheese mixture.
Of course, you can use reduced or low-fat cream cheese. The dessert just won’t be as rich tasting.
You can substitute whipped heavy cream instead of cool whip if you like.

Have a question or thought to share?
If you have a question about the recipe or if you’ve made it and want to share how it turned out, I would truly enjoy hearing from you. Just scroll down to leave a comment or add your star rating.
Thank you for stopping by. It means a lot to have you here.
Recipe

No Bake Cheesecake Cups
Ingredients
- 1 cup graham cracker crumbs
- ¼ cup light brown sugar packed
- ¼ cup unsalted butter melted
- 14 ounces cream cheese room temperature
- 8 ounces sweetened condensed milk
- 1 tablespoon fresh lemon juice
- ½ teaspoon vanilla extract
- ¼ cup whipped topping thawed
- Garnishes: fresh berries; fruit pie filling (optional)
Instructions
- Set aside 6 small dessert cups.
- In a medium bowl, stir together the graham cracker crumbs, brown sugar, and melted butter until well mixed.1 cup graham cracker crumbs, ¼ cup light brown sugar, ¼ cup unsalted butter
- Press the cracker mixture evenly into bottom of each cup.
- In a separate large bowl, use an electric mixer at high speed to beat the cream cheese until smooth.14 ounces cream cheese
- Add the sweetened condensed milk, lemon juice and vanilla. Continue beating 4-5 minutes until the mixture is fluffy.8 ounces sweetened condensed milk, 1 tablespoon fresh lemon juice, ½ teaspoon vanilla extract
- Stir in the whipped topping.¼ cup whipped topping
- Divide the cheesecake mixture evenly between the dessert cups.
- Cover and refrigerate for at least 4 hours before topping with desired garnishes.Garnishes: fresh berries; fruit pie filling (optional)
- Serve chilled. May be stored refrigerated for up to 4 days.
Notes
- You’ll need six cups that hold about six ounces for the recipe. You could choose Pyrex custard cups, half-pint canning jars (without the lids), small drink glasses, or disposable plastic dessert cups.
- May be prepared several days in advance and stored in the refrigerator for up to four days.
Nutrition Information
Nutrition information is calculated by software based on the ingredients in each recipe. It is an estimate only and is provided for informational purposes. You should consult your healthcare provider or a registered dietitian if precise nutrition calculations are needed for health reasons.
Yum and easy! Perfect dessert!
these look super easy and quick! Can’t wait to try them
This is how I like a cheesecake, easy to make in no time and sweet enough for my taste buds.
Love the step by step photos for this great recipe, they are super helpful for new cooks!