
Looking for a quick and easy dinner recipe that’s packed with flavor? Try this Tender Oven Baked Chicken Breasts recipe! With just a few simple ingredients, you’ll have juicy and delicious chicken on the table in no time.
Are you tired of making the same old chicken dishes every week? If you’re looking for a new recipe to add to your dinner rotation, you have to try this Tender Oven Baked Chicken Breasts recipe! This dish is a game-changer when it comes to creating juicy, tender chicken breasts that are bursting with flavor.

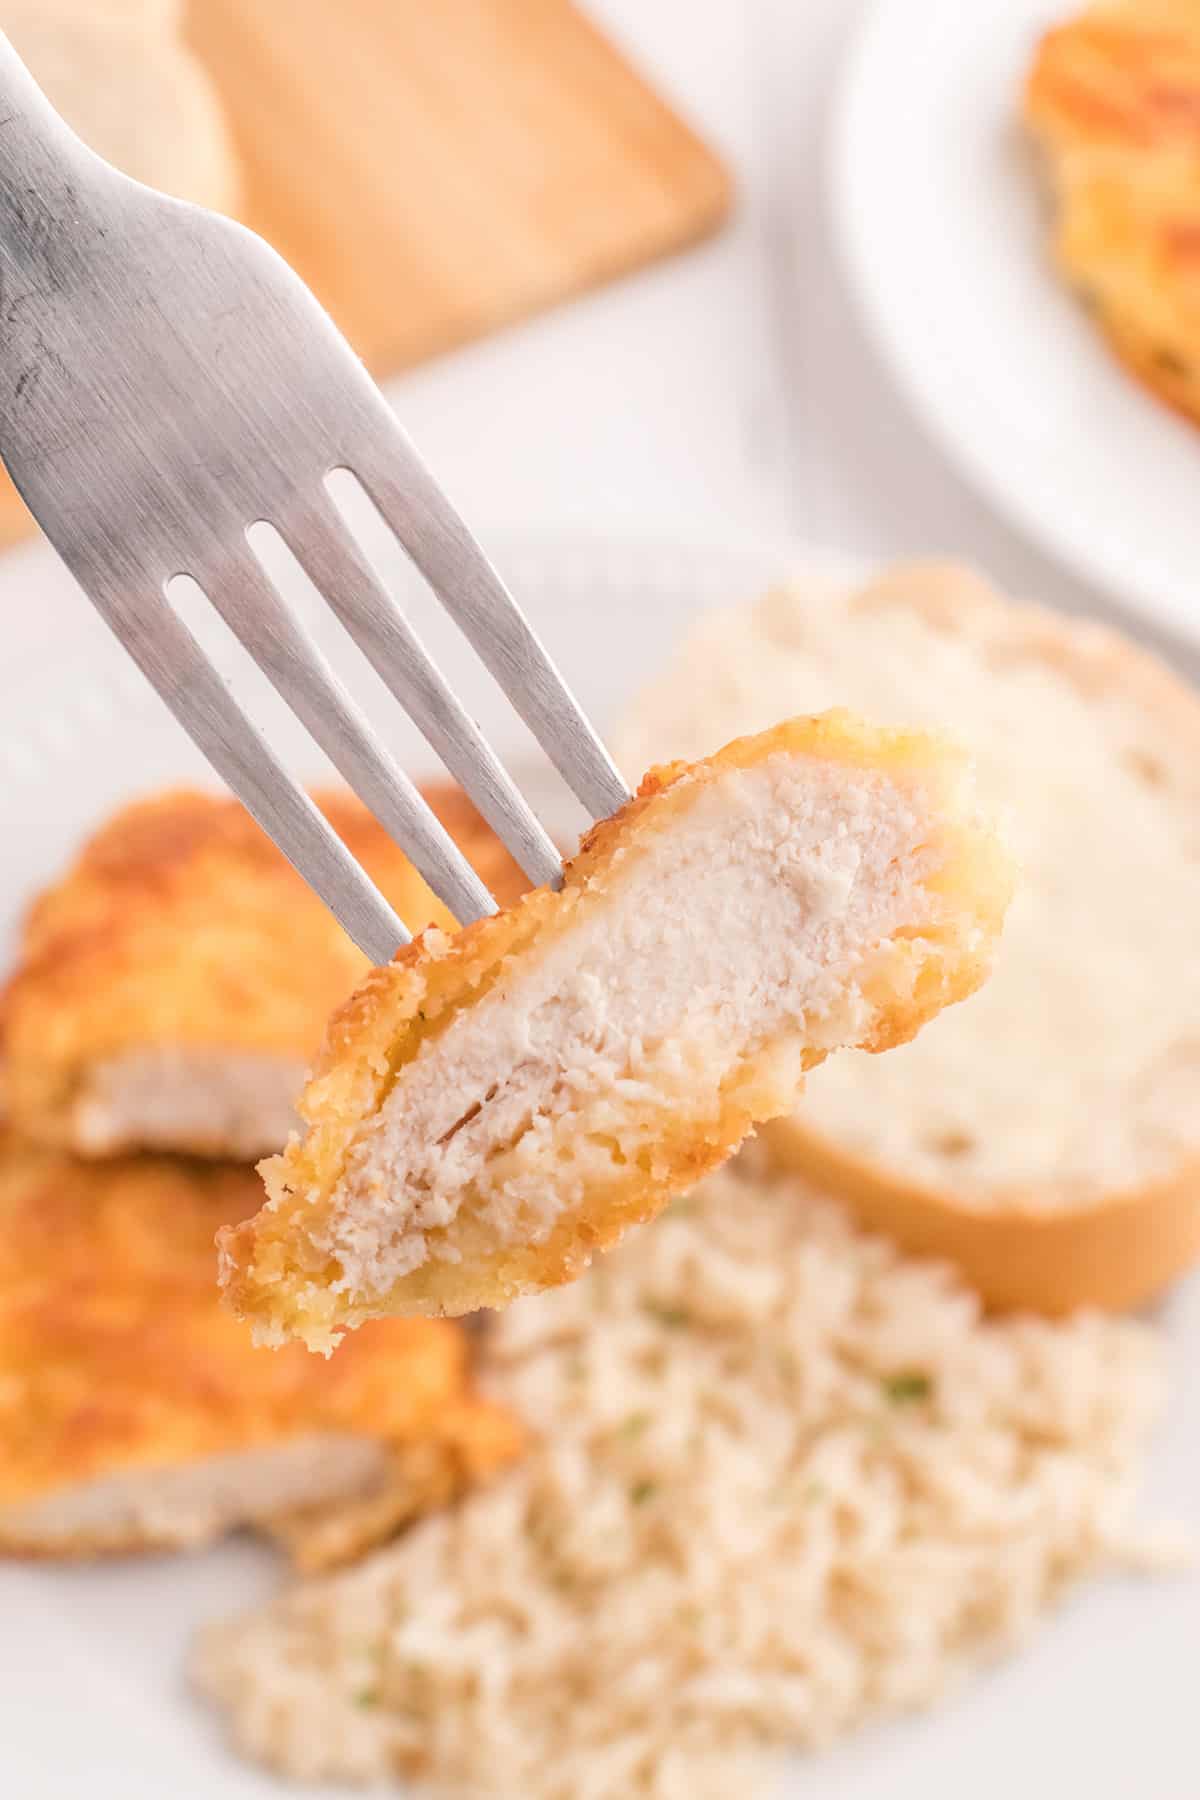
The secret to this recipe is the milk marinade, which tenderizes the chicken and makes it extra moist. The seasoned biscuit mix coating gives the chicken a crispy, flavorful crust that you won’t be able to resist. With just a few simple ingredients, this recipe is perfect for busy weeknights or casual get-togethers.
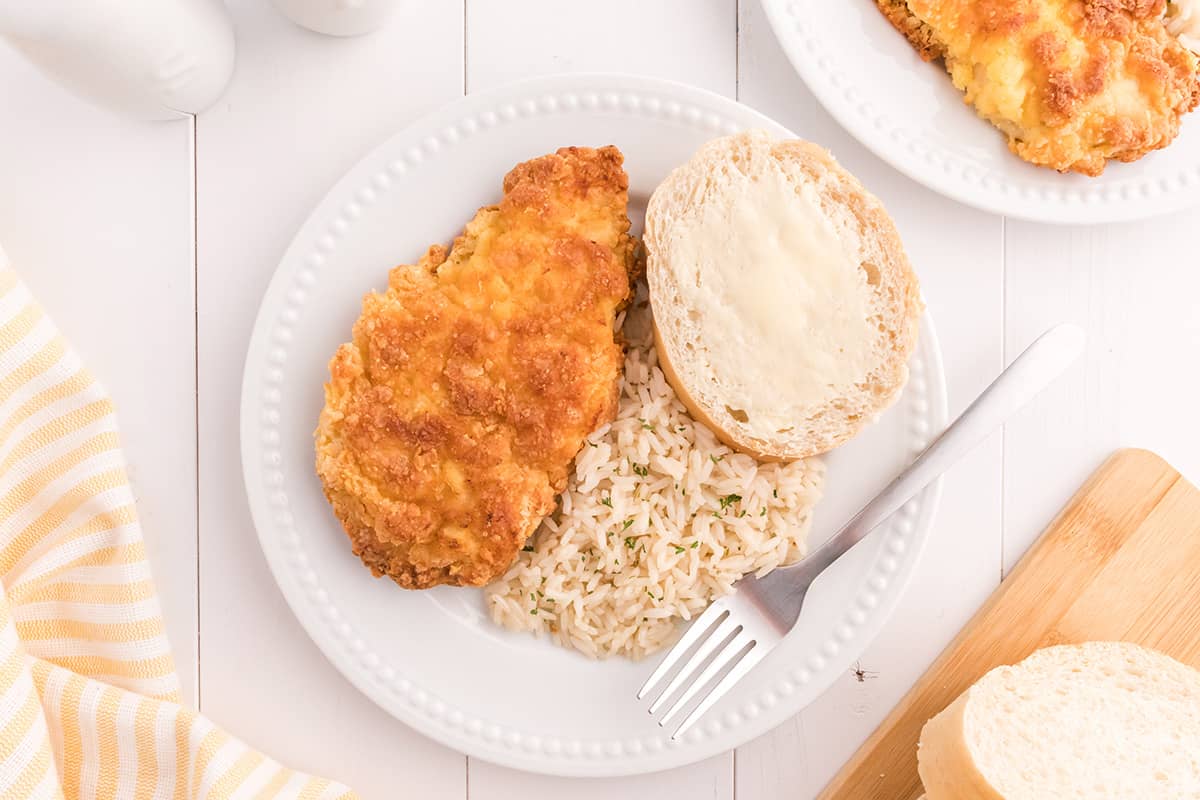
This versatile recipe pairs well with many side dishes from mashed potatoes and roasted vegetables to a fresh green salad. And you can use the leftovers to make chicken sandwiches, salads, or even tacos.
❤️ Why You’ll Love This Recipe
- It’s so juicy and tender!
- The crispy coating from the biscuit mix is delicious.
- It’s so easy to make with just a few simple ingredients and easy-to-follow instructions.
🍳 Tools You’ll Use
This post may contain affiliate links. Lana’s Cooking is reader-supported and earns a tiny commission at no extra cost to you when you shop from our links.
No fancy equipment needed!
- Baking dish. A 9×13 (or larger) glass or ceramic dish.
- Bowls. For the milk, eggs, and biscuit mix.
- Whisk or Fork. For beating the eggs.
- Tongs. To turn the chicken while it’s baking.
- Measuring Cups and Spoons.
- Instant-Read Thermometer. While not absolutely necessary, a thermometer is one of the most helpful kitchen tools to check the temperature of meats.
🛒 Ingredient Notes
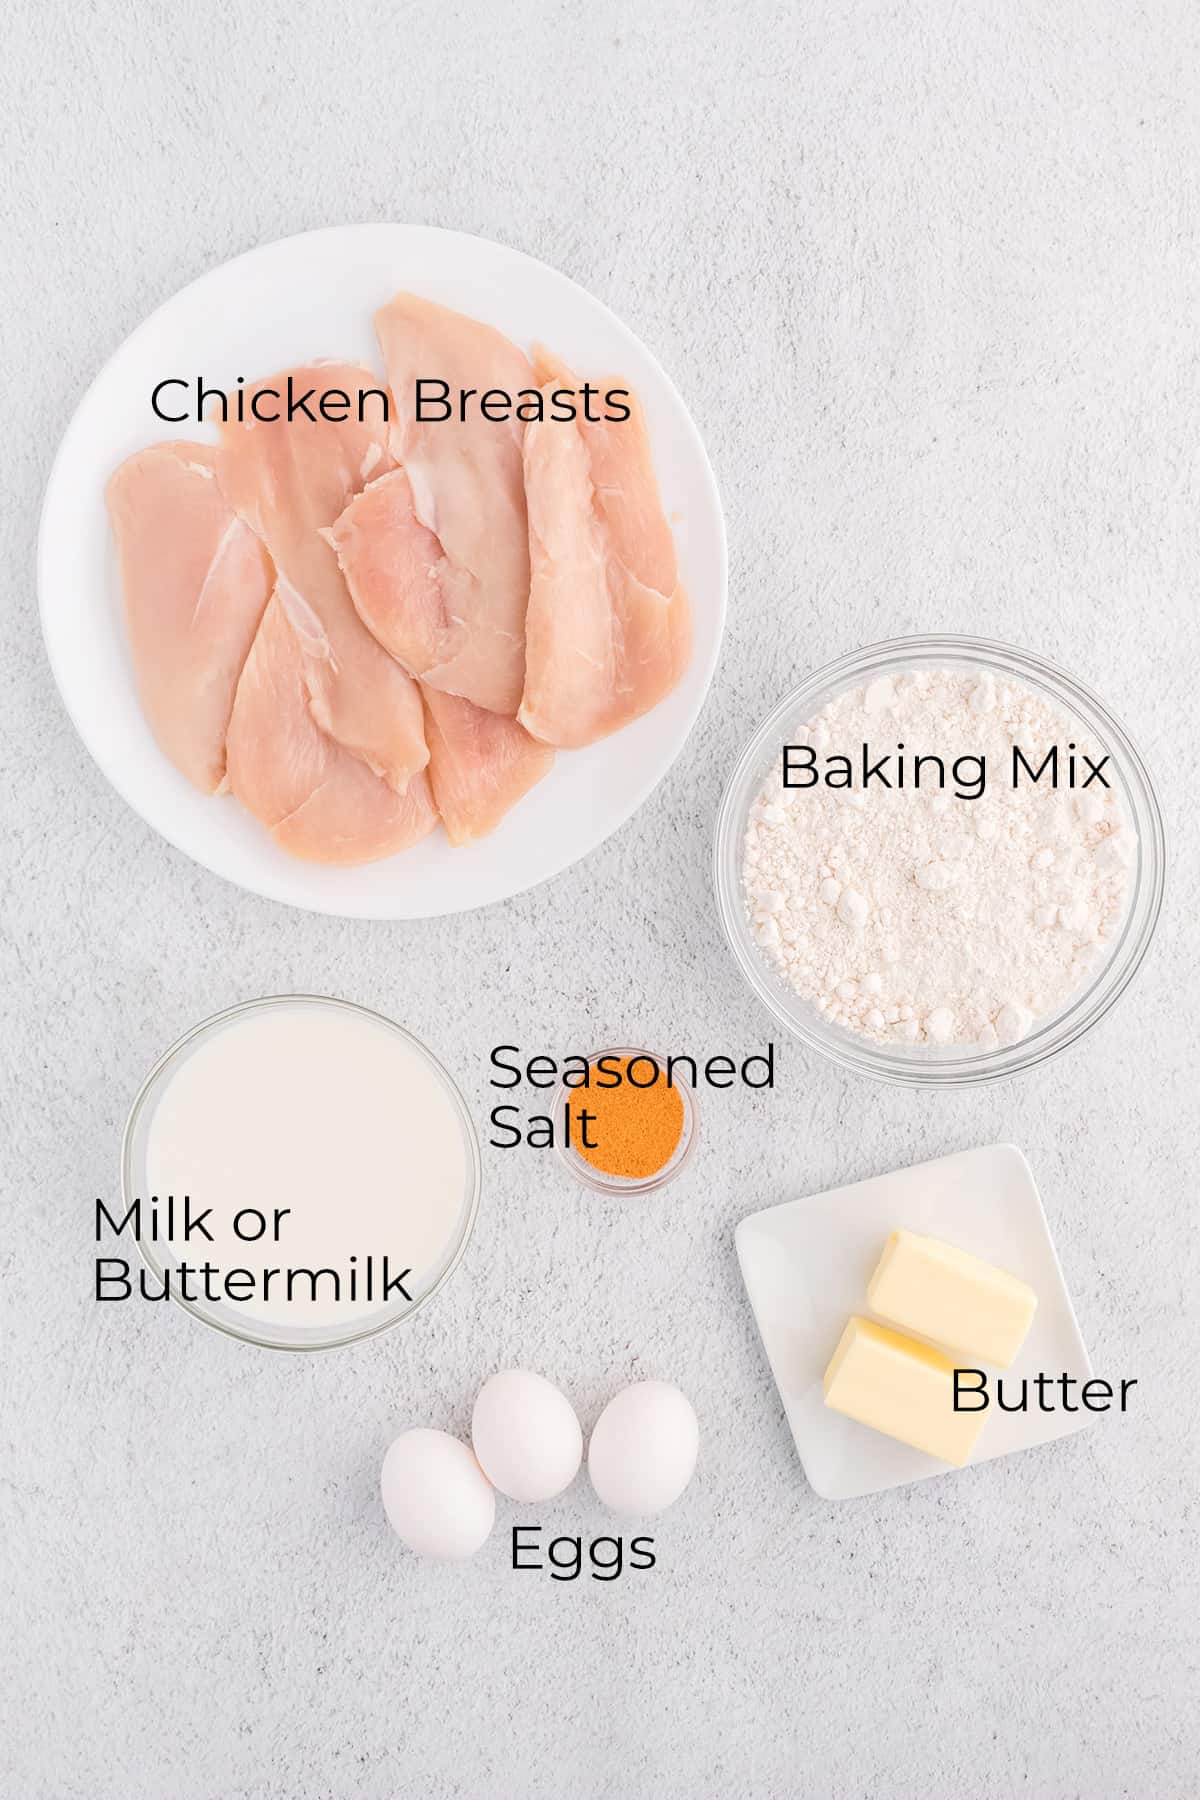
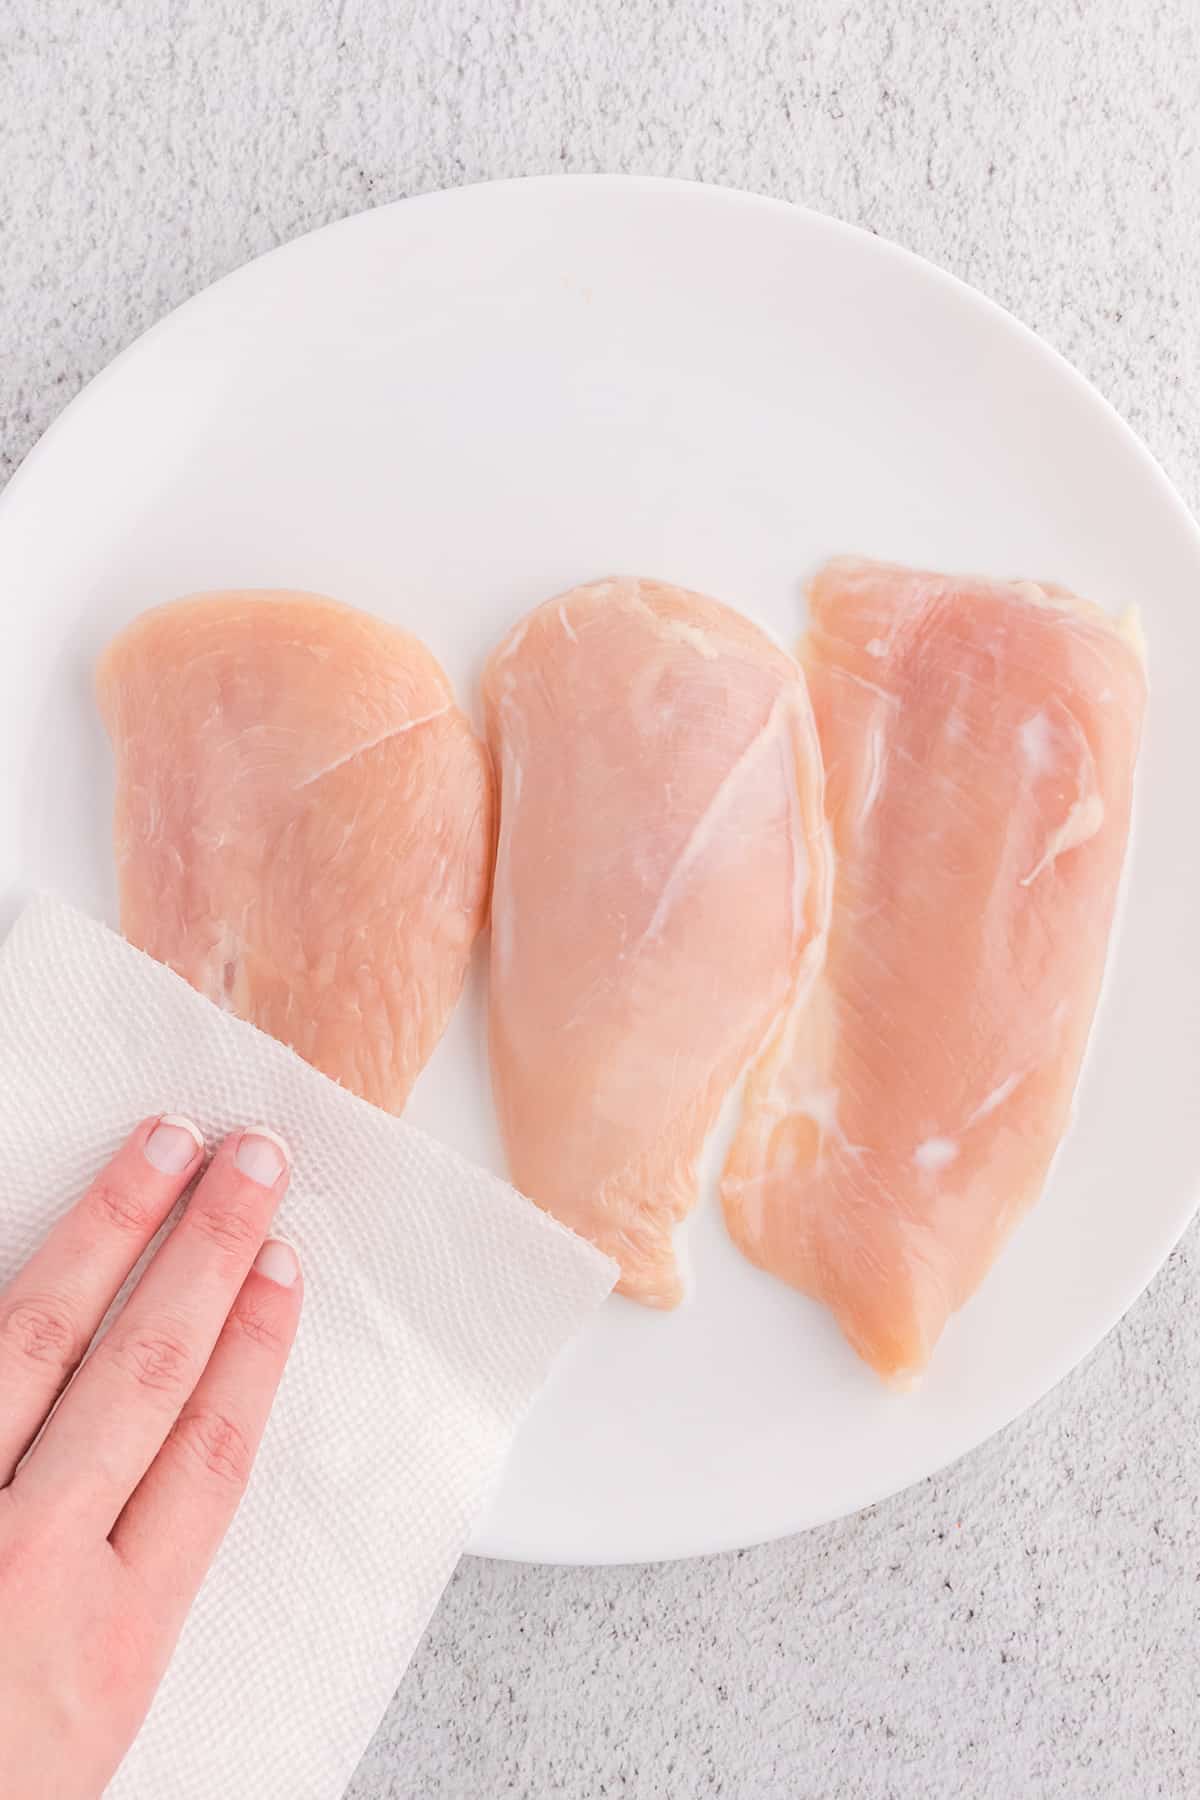
- Chicken Breasts – For this recipe, I use boneless, skinless chicken breasts that have been cut in half lengthwise so that they cook more evenly and quickly. If you choose bone-in chicken breasts, do be aware that they may take longer to cook.
- Milk or Buttermilk – A quick marinade in milk or buttermilk helps to tenderize the meat and ensure you’ll have juicy chicken breasts. Milk will impart a milder flavor while buttermilk will add a bit of “tang” to the recipe.
- Biscuit Baking Mix – I use Bisquick brand baking mix, but there are other good brands available. If you don’t want to purchase packaged baking mix, there’s a great recipe on My Baking Addiction for a homemade substitute.
- Seasoned Salt – My personal favorite seasoned salt is Jane’s Crazy Mixed-Up Salt. However, you may prefer one of the other brands available such Lawry’s or Morton’s. If you don’t have seasoned salt on hand, you can make your own by combining salt, pepper, garlic powder, onion powder, and any other herbs or spices you like.
- Butter – In the south, we tend to use salted butter for everything. And I mean everything – even baking. However, if you have unsalted butter and want to use that, please do. I’ve honestly never found that it makes much difference. Maybe just my southern tastebuds 😊.
The complete ingredient list with detailed measurements is included in the printable recipe card at the bottom of this post.
Want to save this?
🔪 How to Make Tender Oven Baked Chicken Breasts
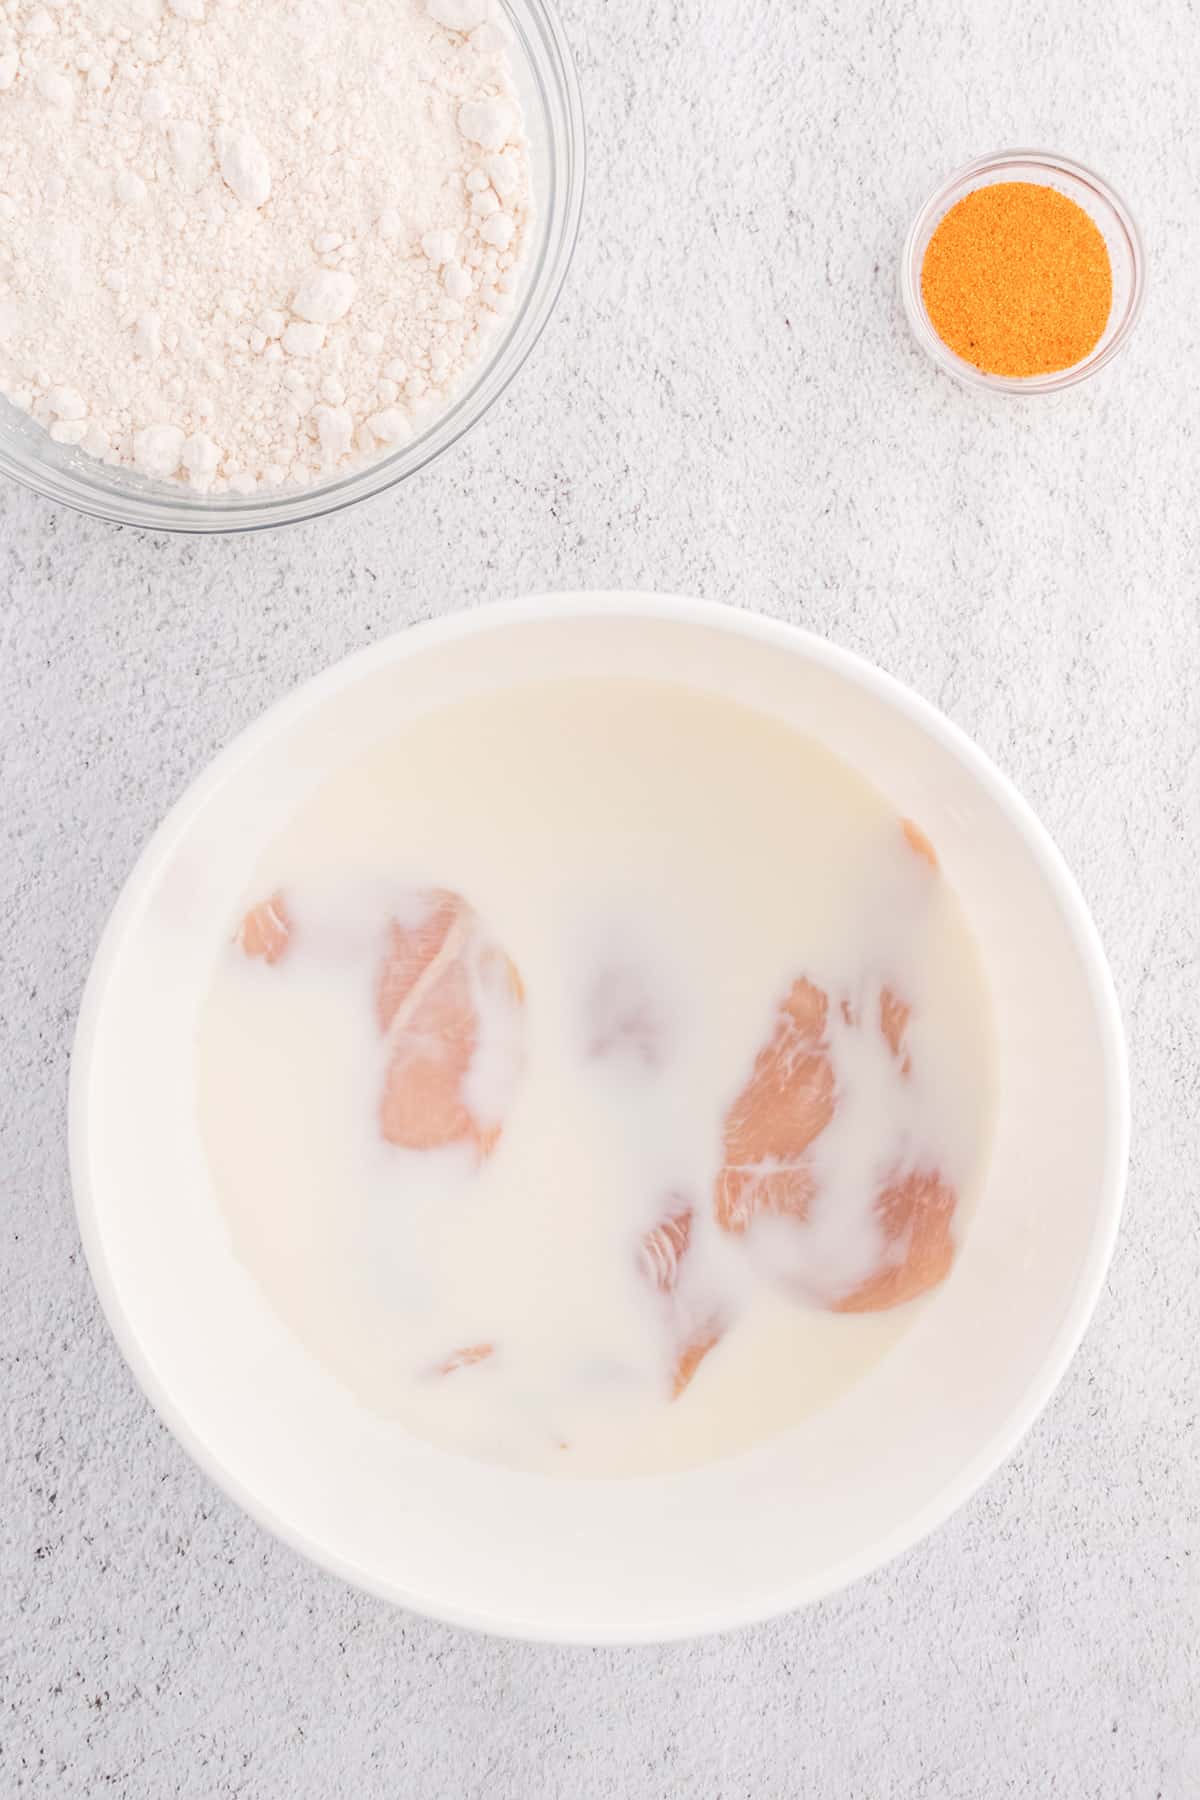
- Place the chicken pieces in a bowl and pour in enough milk or buttermilk to just cover them. Top the bowl with plastic wrap and place it in the refrigerator for at least 20 minutes for maximum tenderness.
- When ready to bake, preheat the oven to 425°F and remove the chicken from the refrigerator.
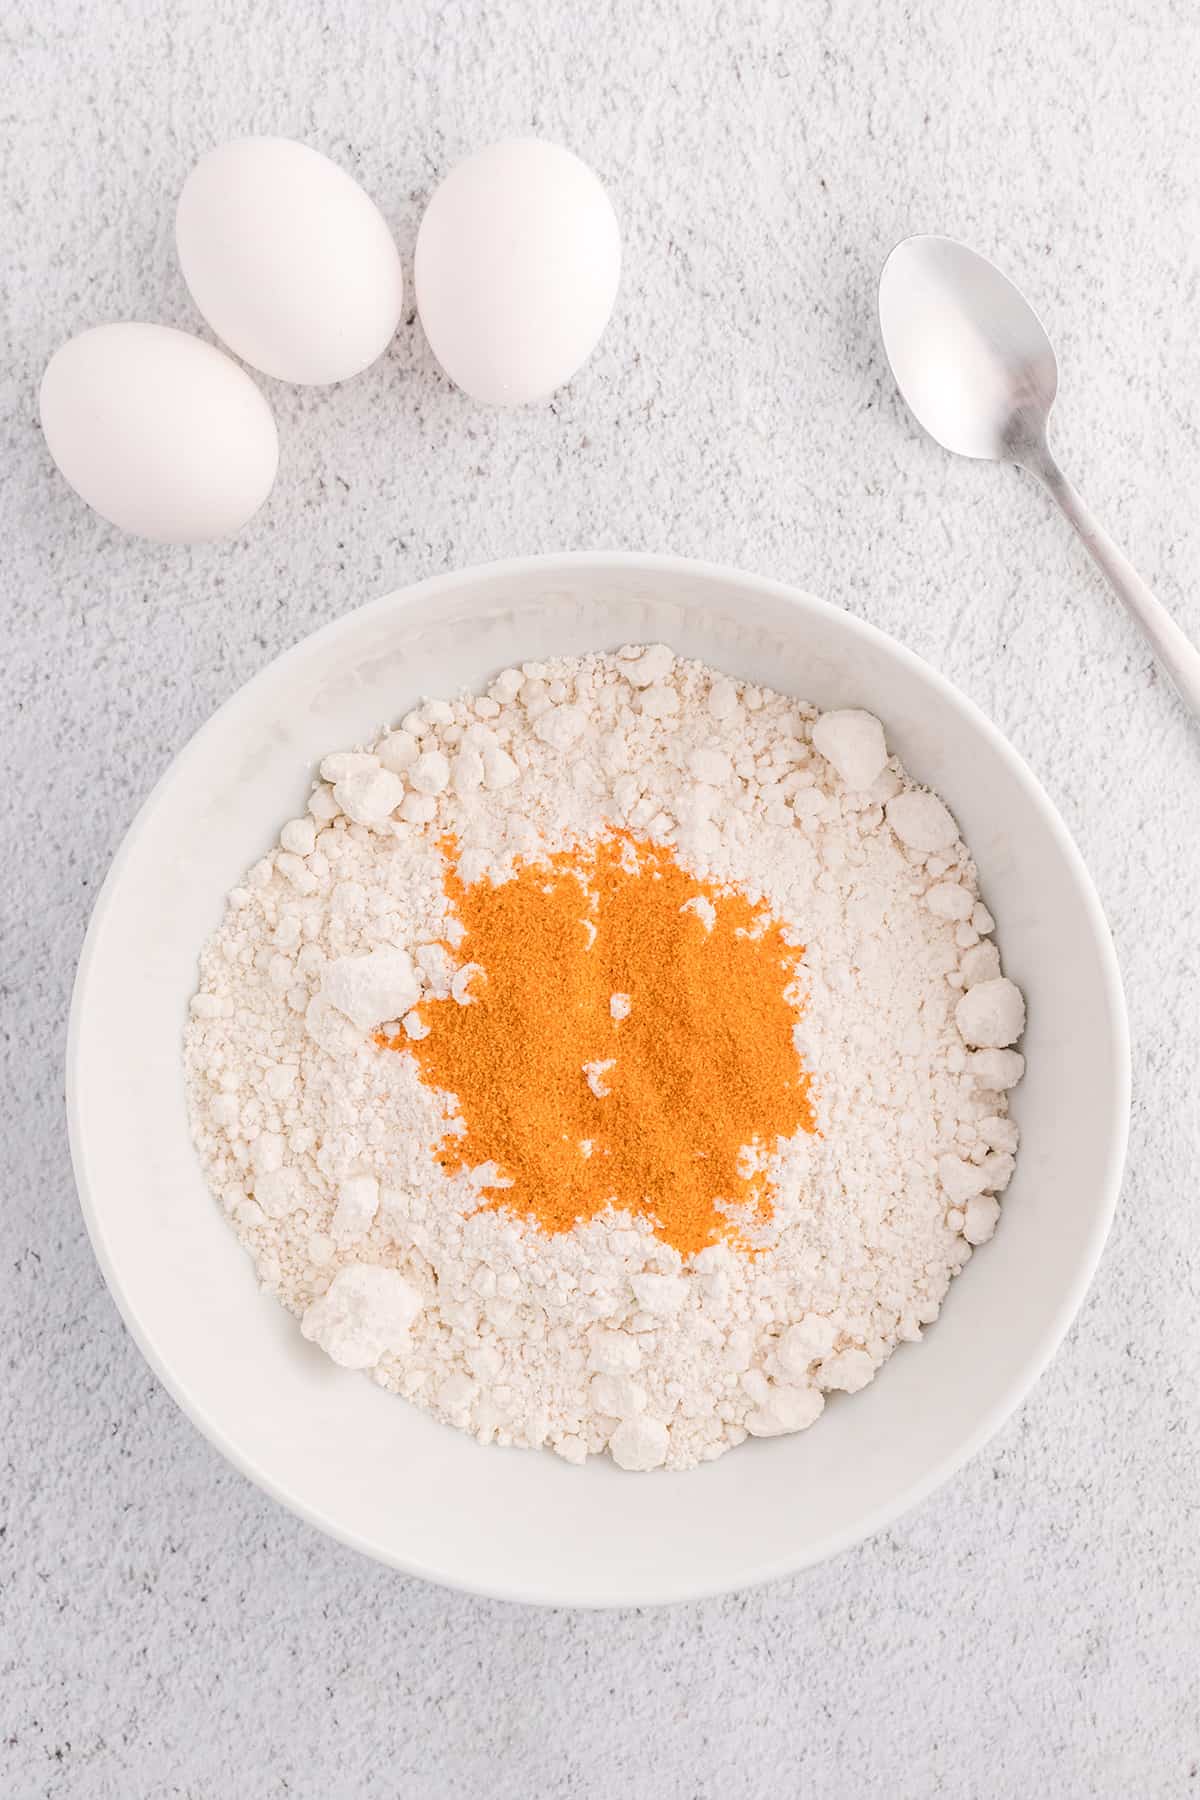
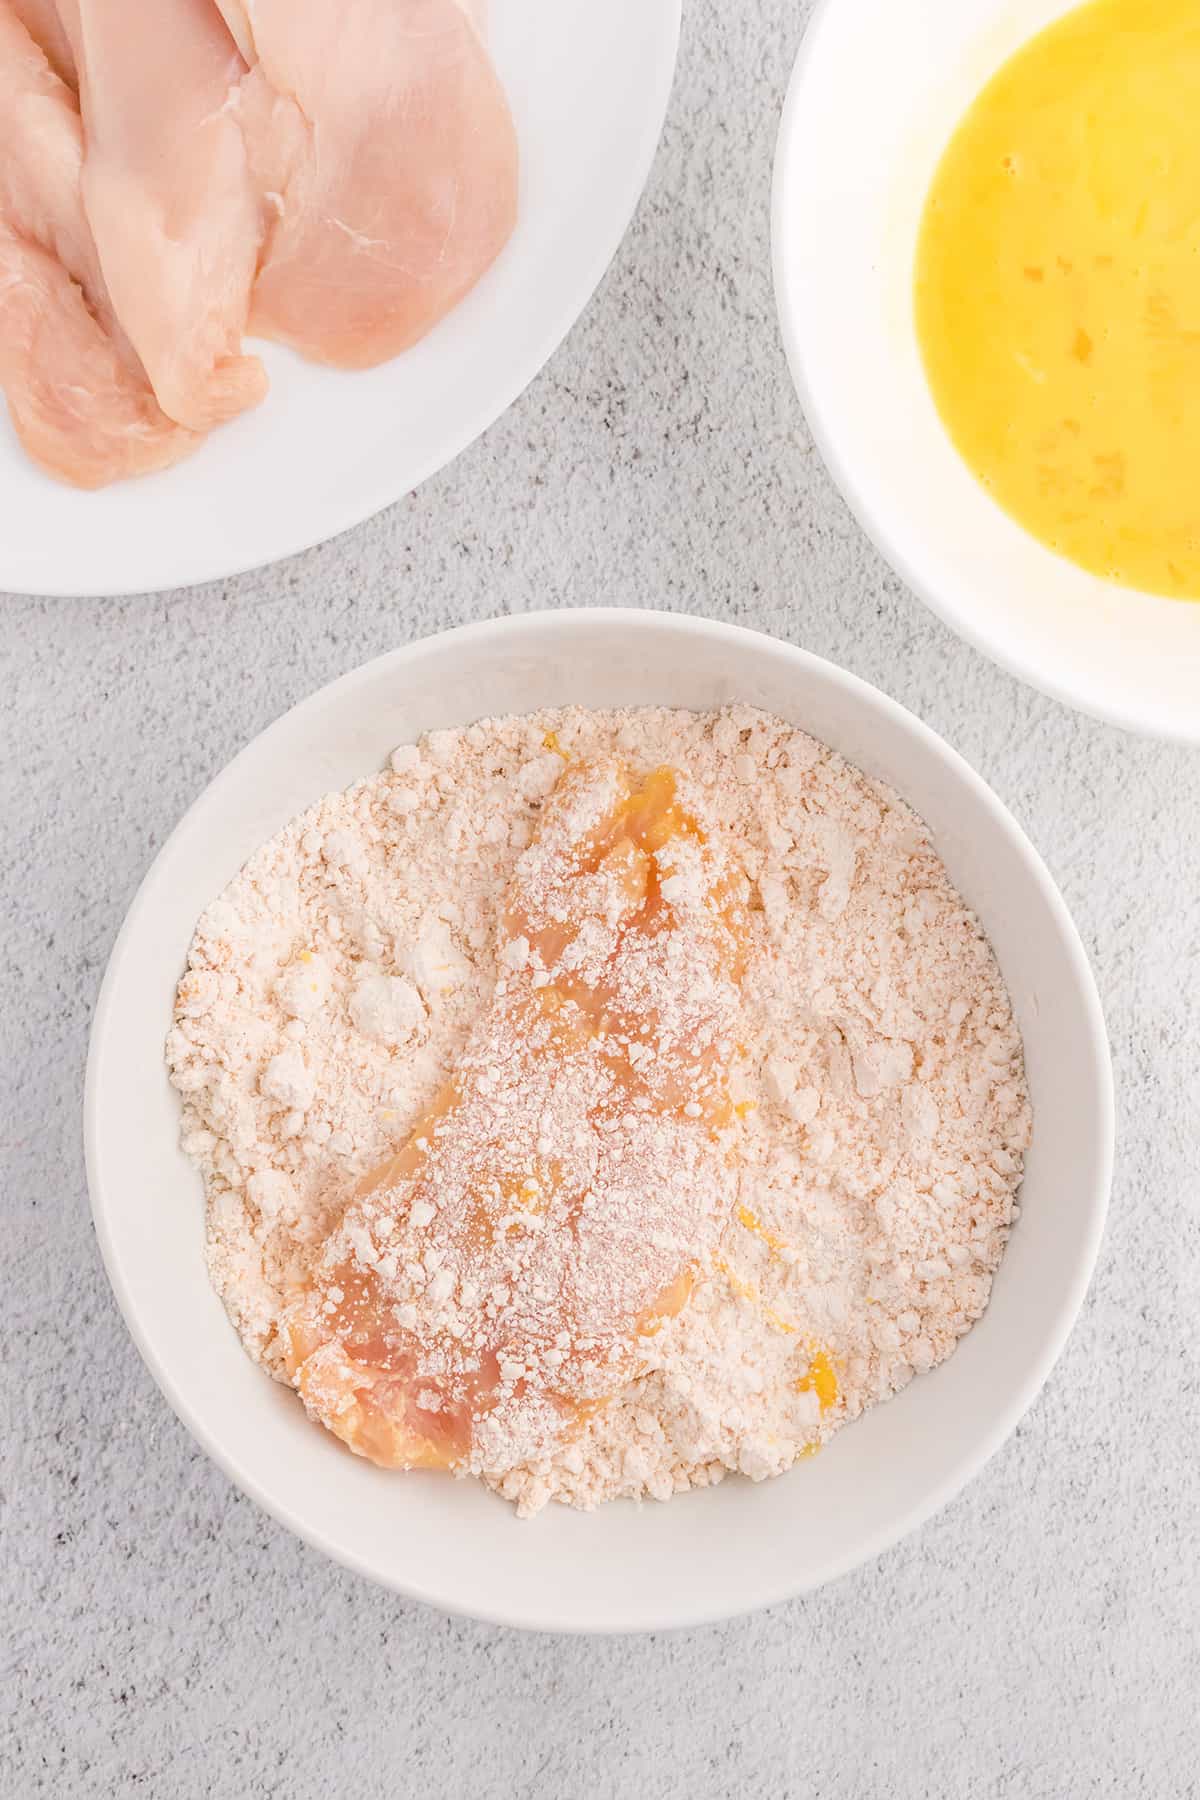
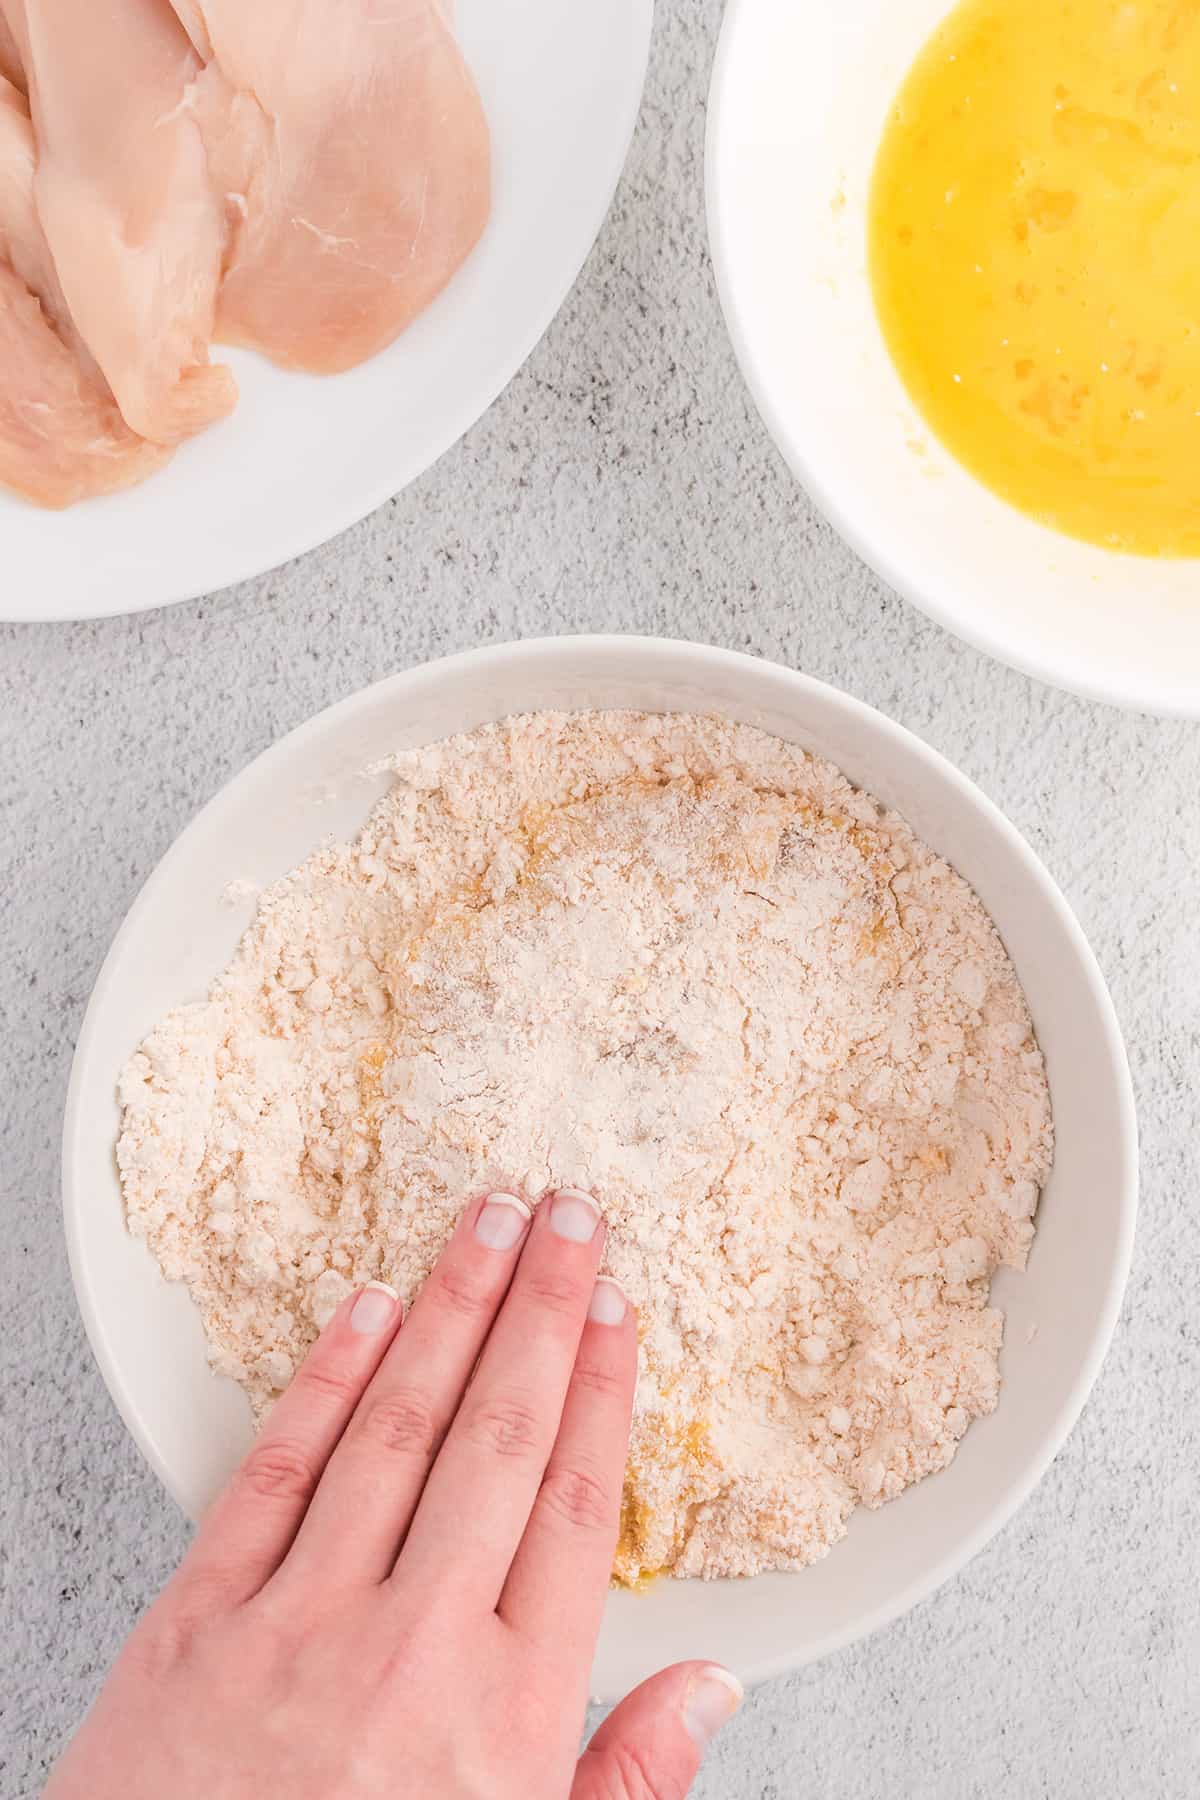
- In a medium bowl, stir together the baking mix and seasoned salt.
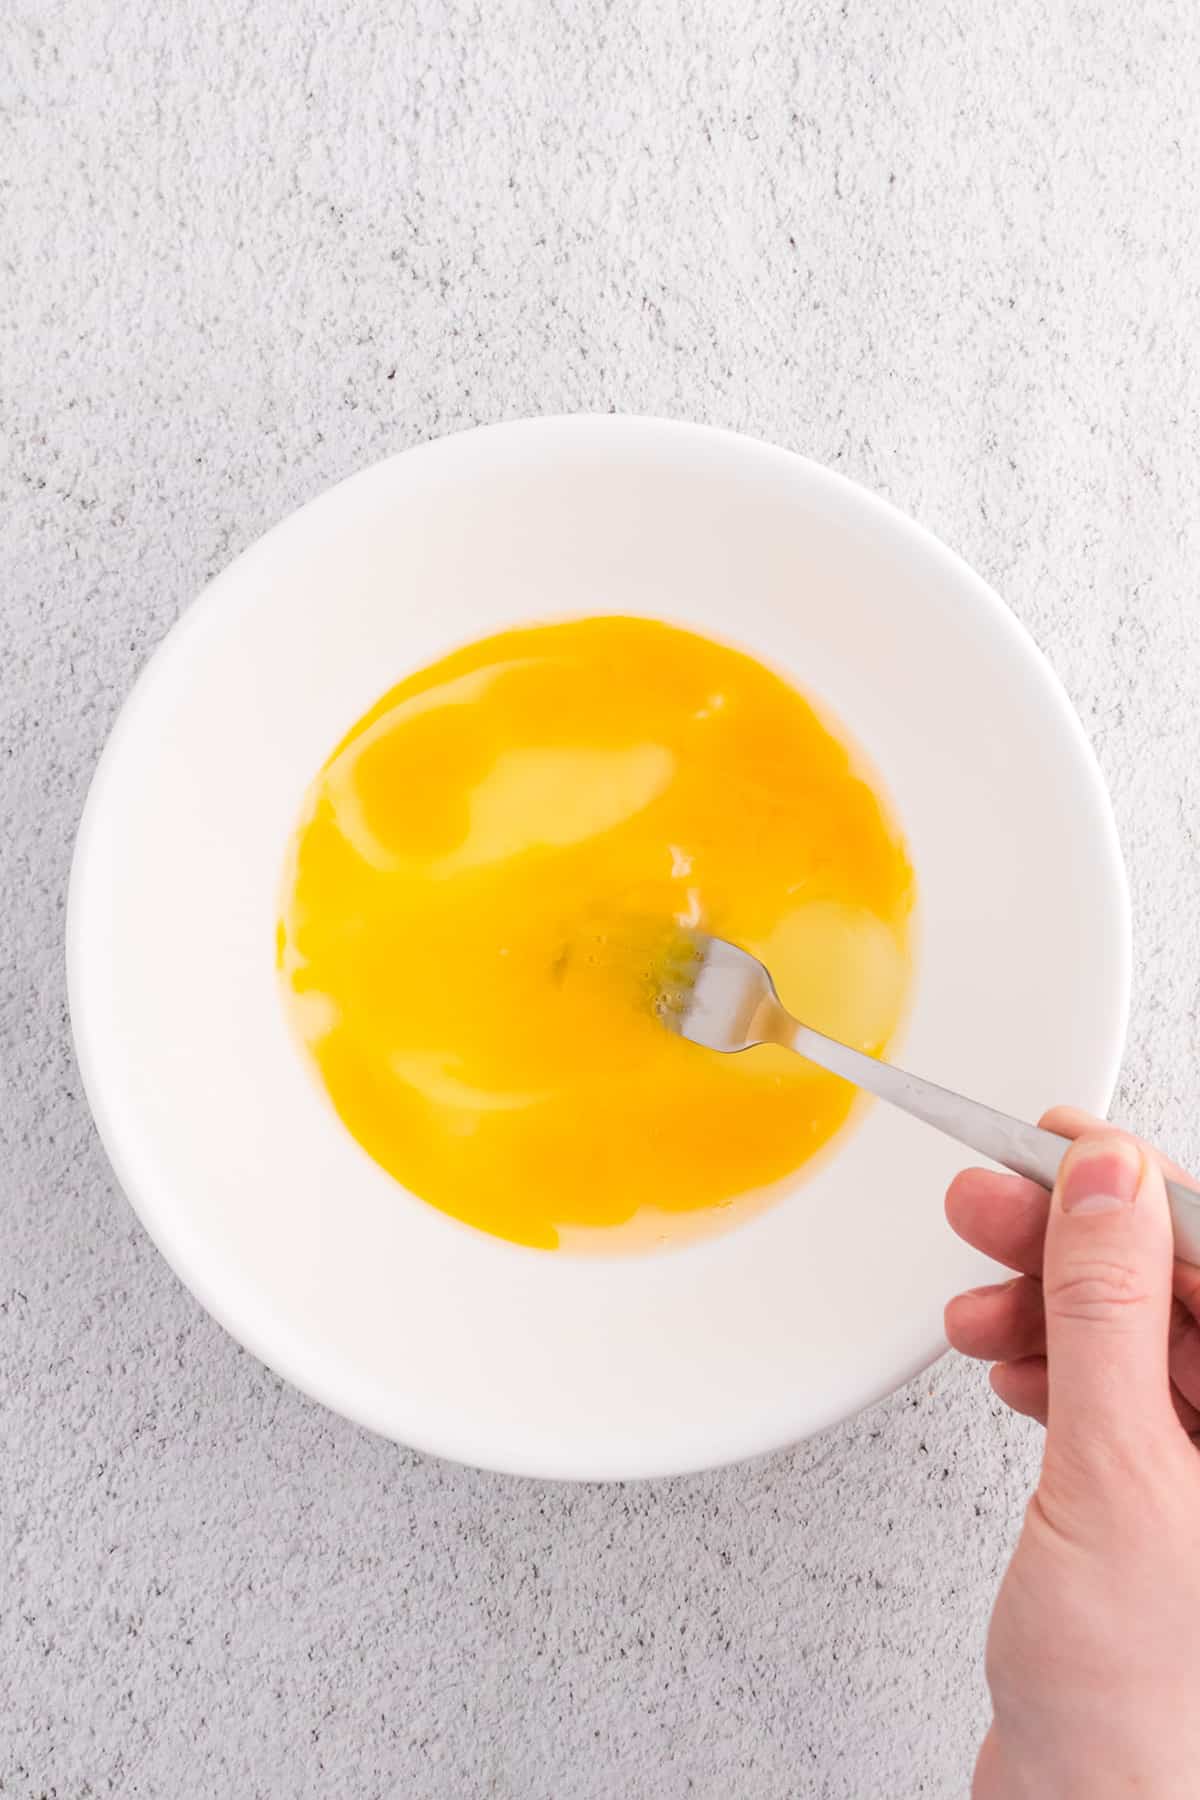
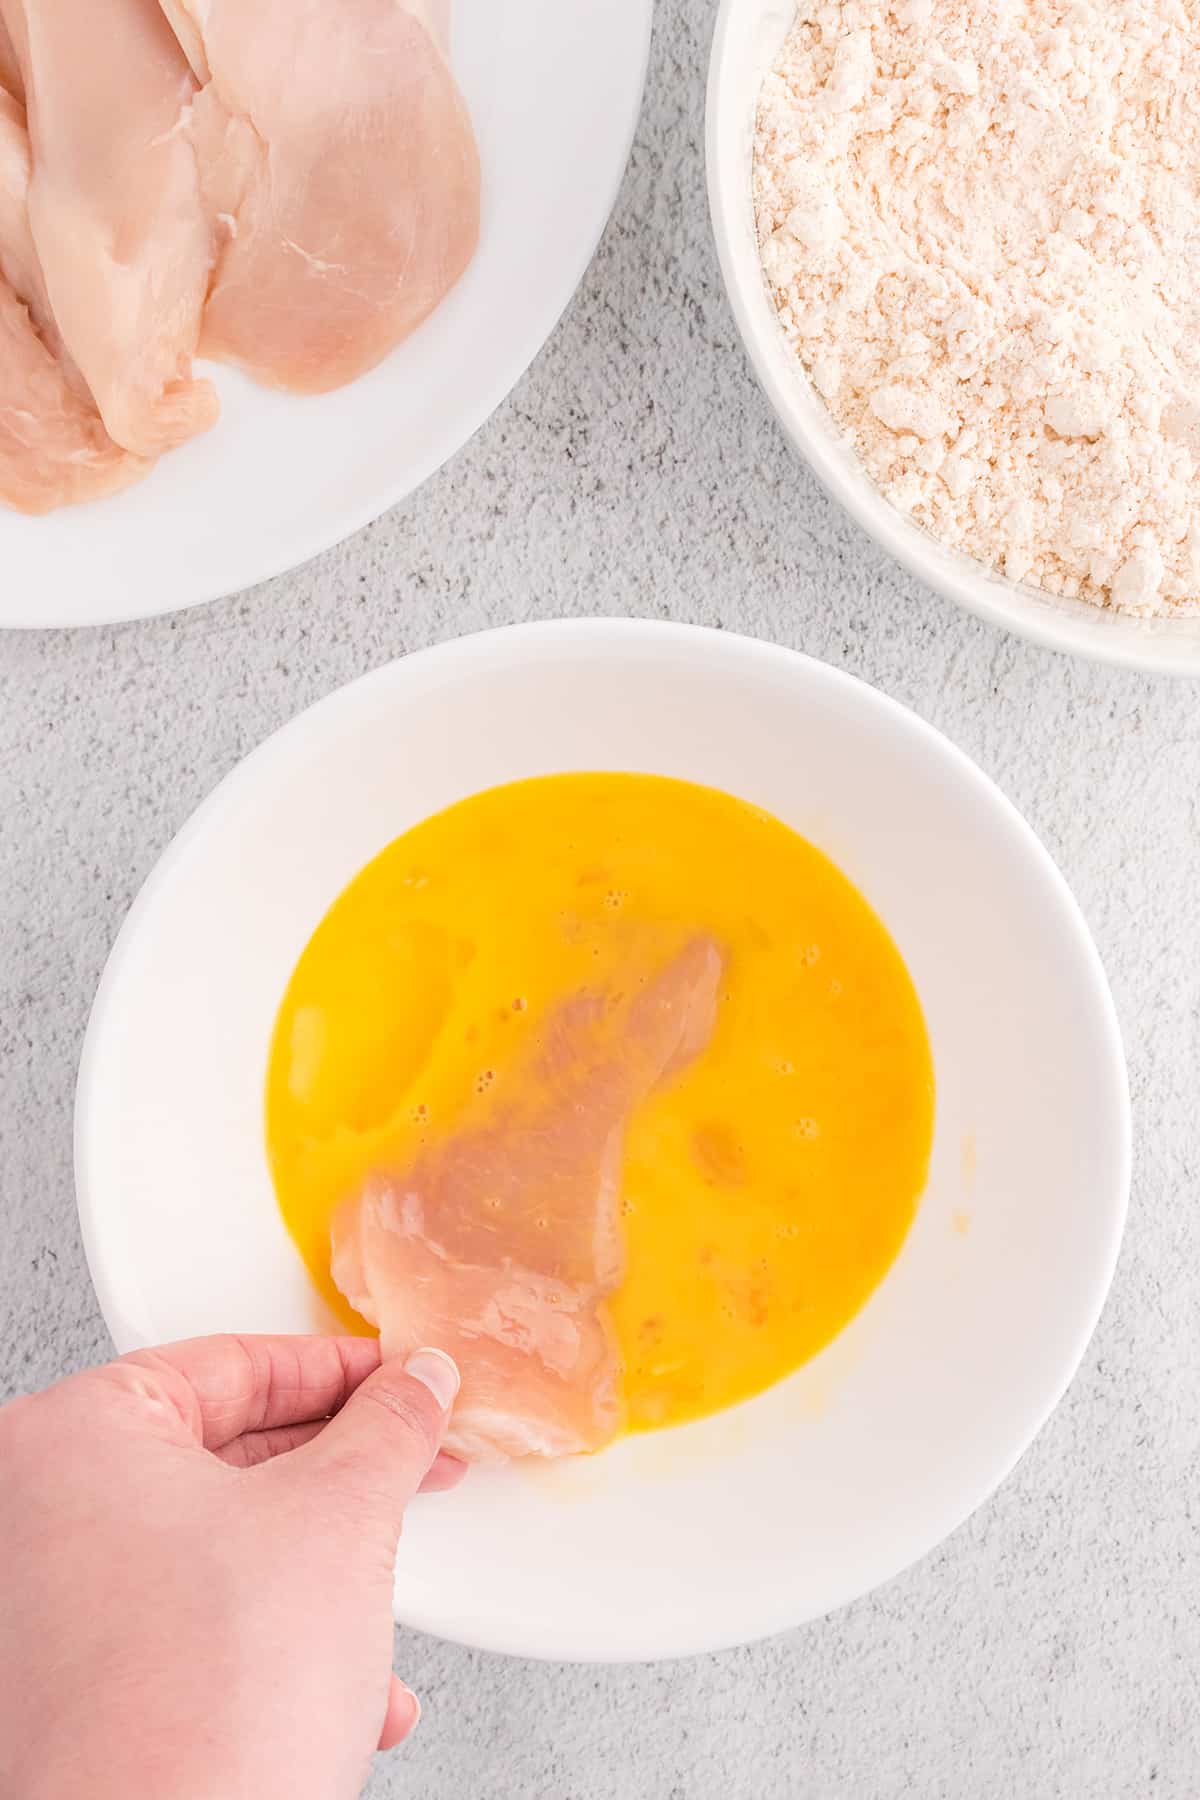
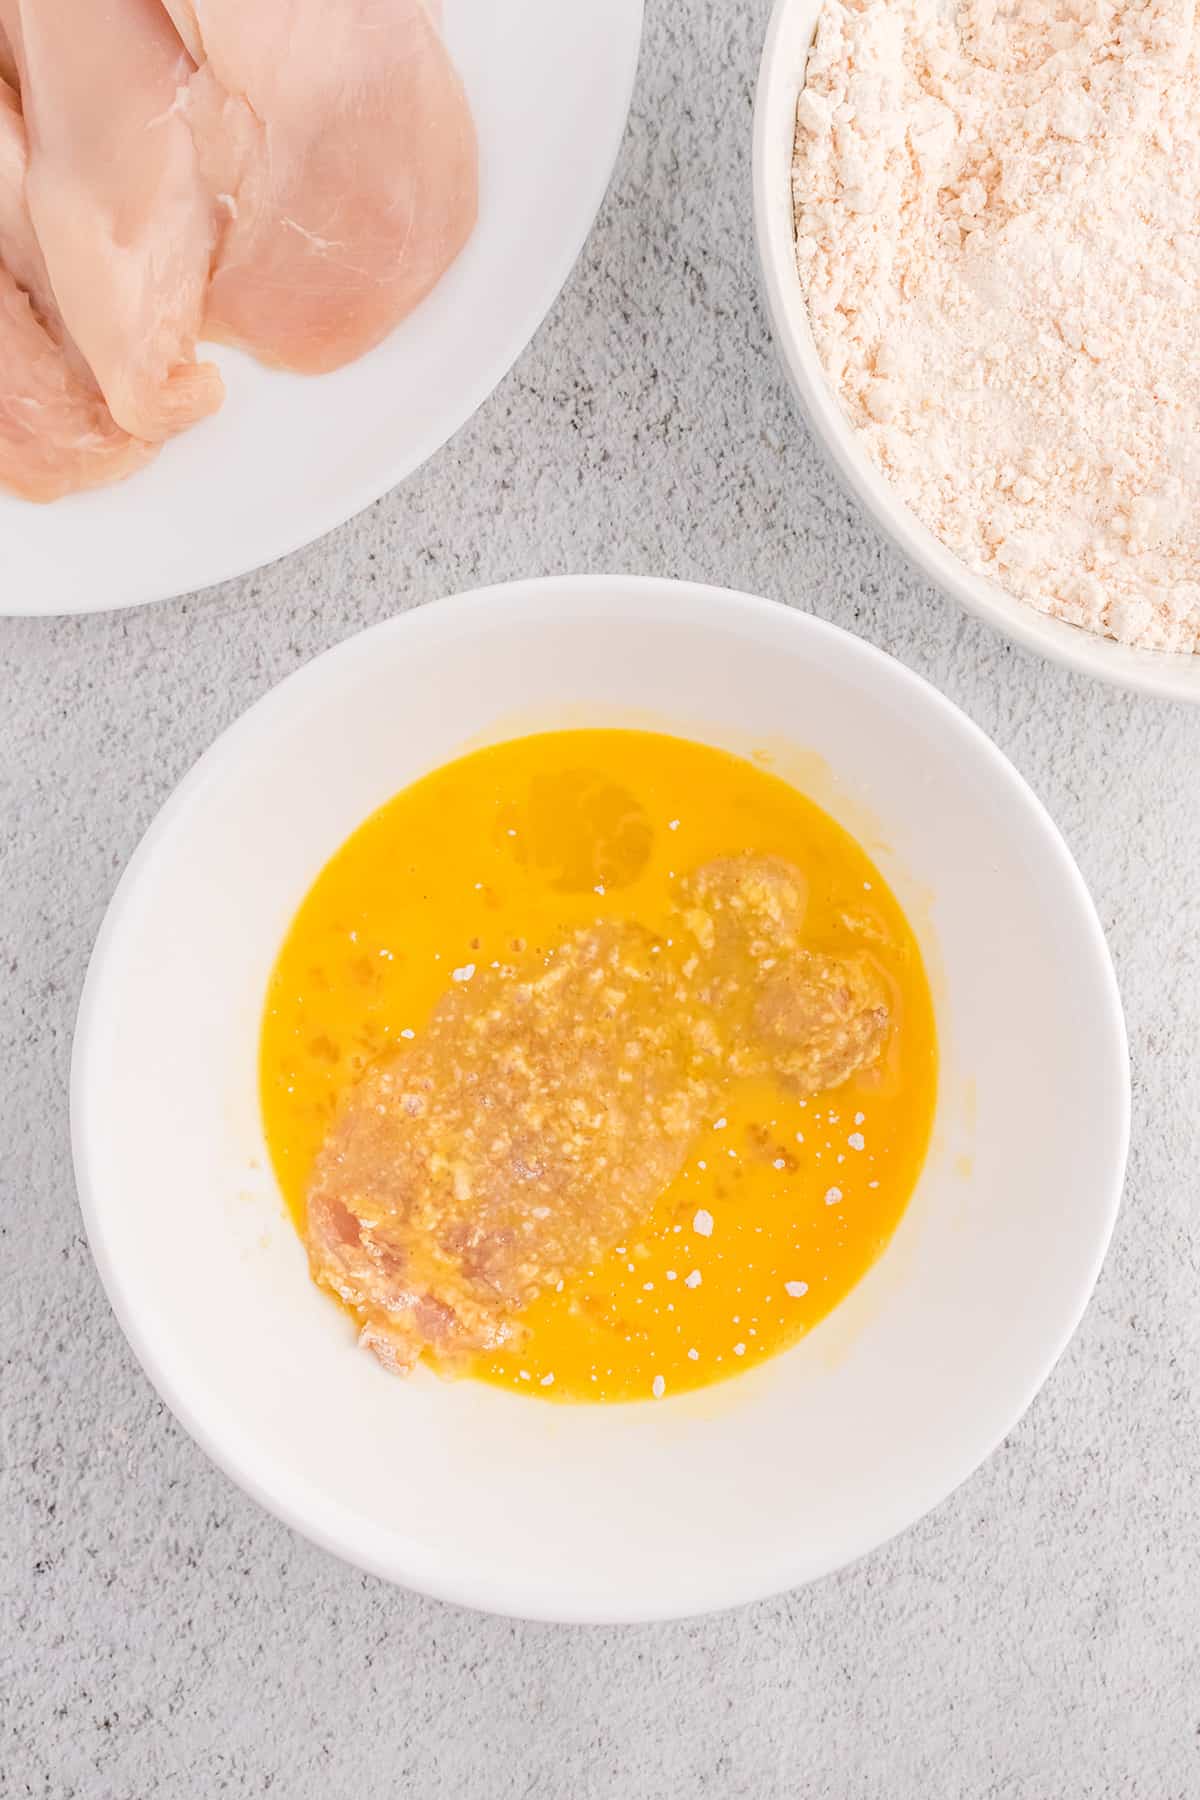
- In another medium bowl, lightly beat 3 eggs.
- Remove the chicken from the milk and pat it dry on all sides. Discard the milk or buttermilk.
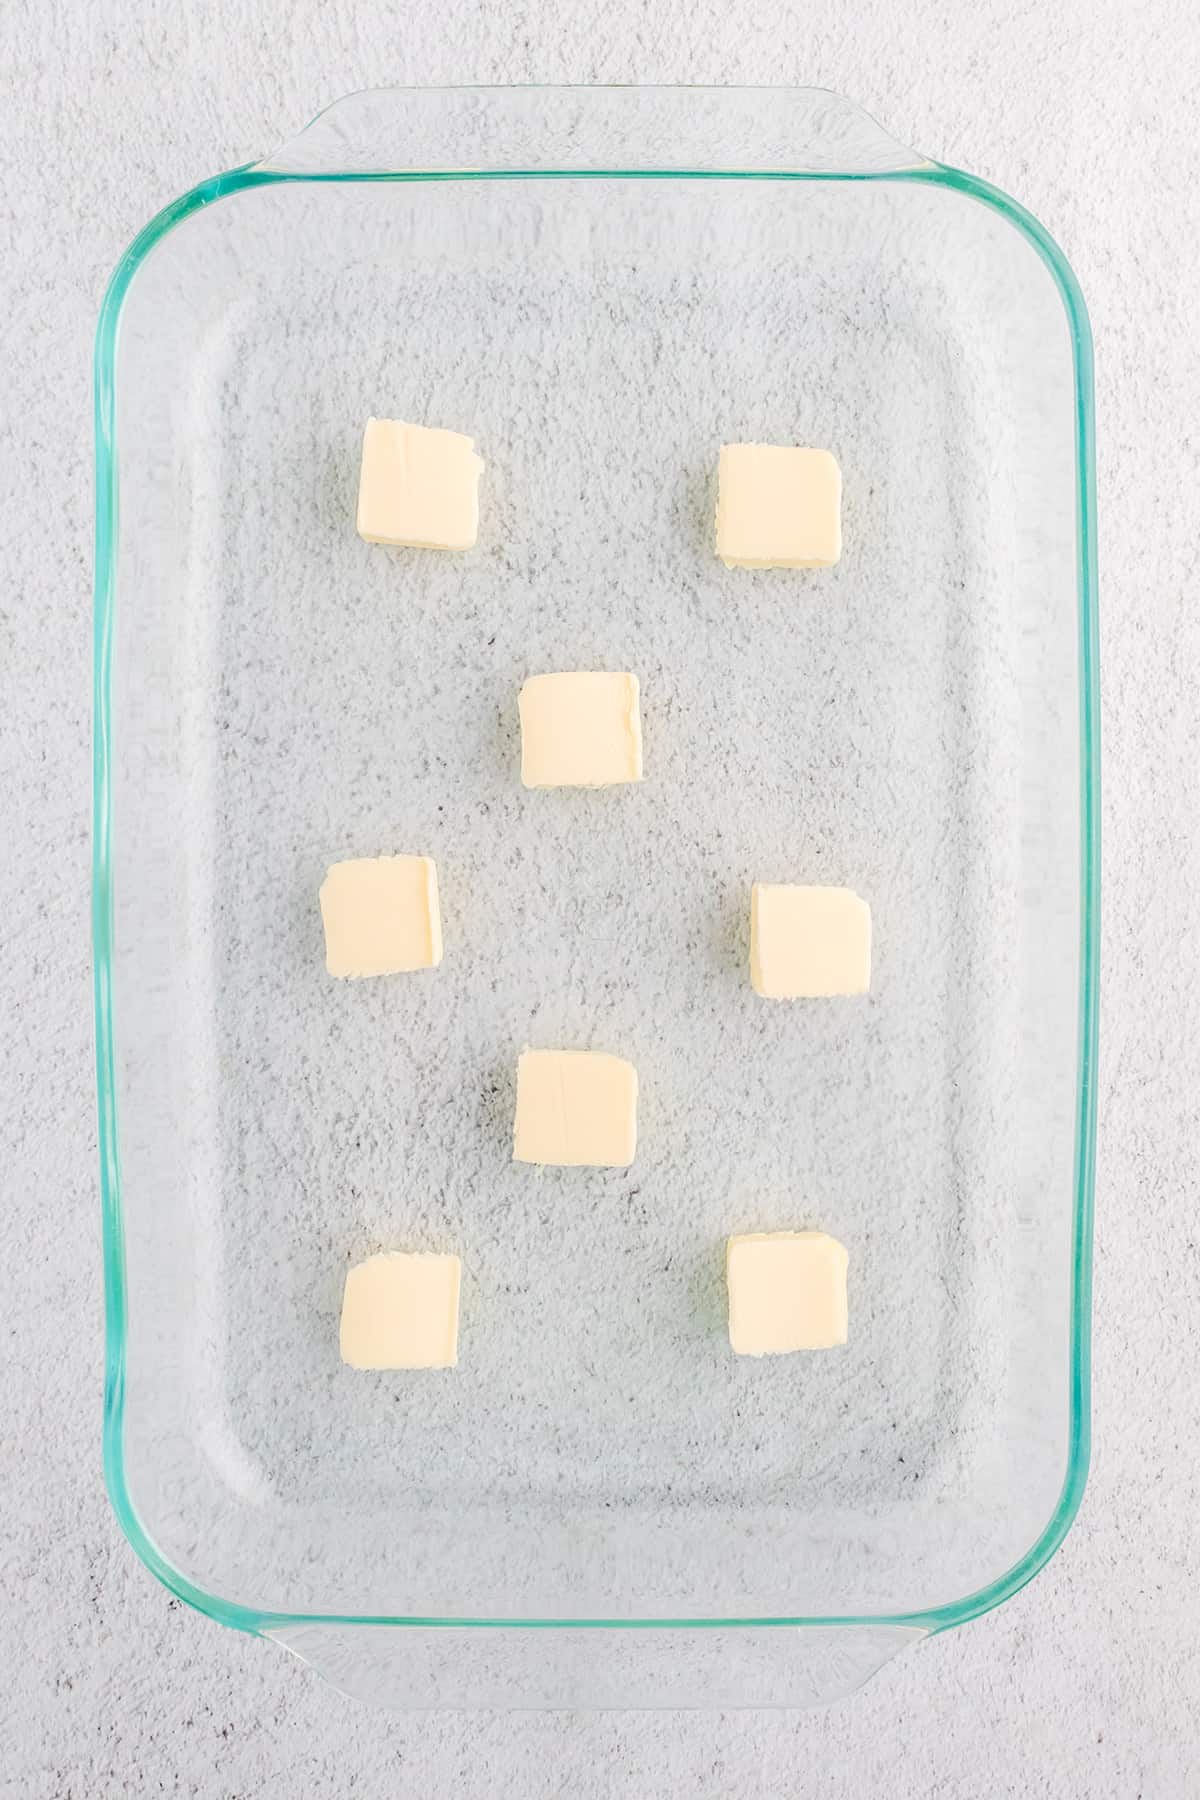
- Grease a 9×13 or larger glass baking dish with cooking spray or butter.
- Cut the butter into approximately eight pieces and add them to the prepared baking dish.
- Place the baking dish in the preheated oven for about 5 minutes or until the butter has melted.
- While the butter melts, prepare the chicken. Dredge each piece in beaten egg, then in the seasoned biscuit mix. Repeat a second time dredging each in egg again, followed by the biscuit mix once more, this time pressing the biscuit mix onto the chicken and shaking off any excess.
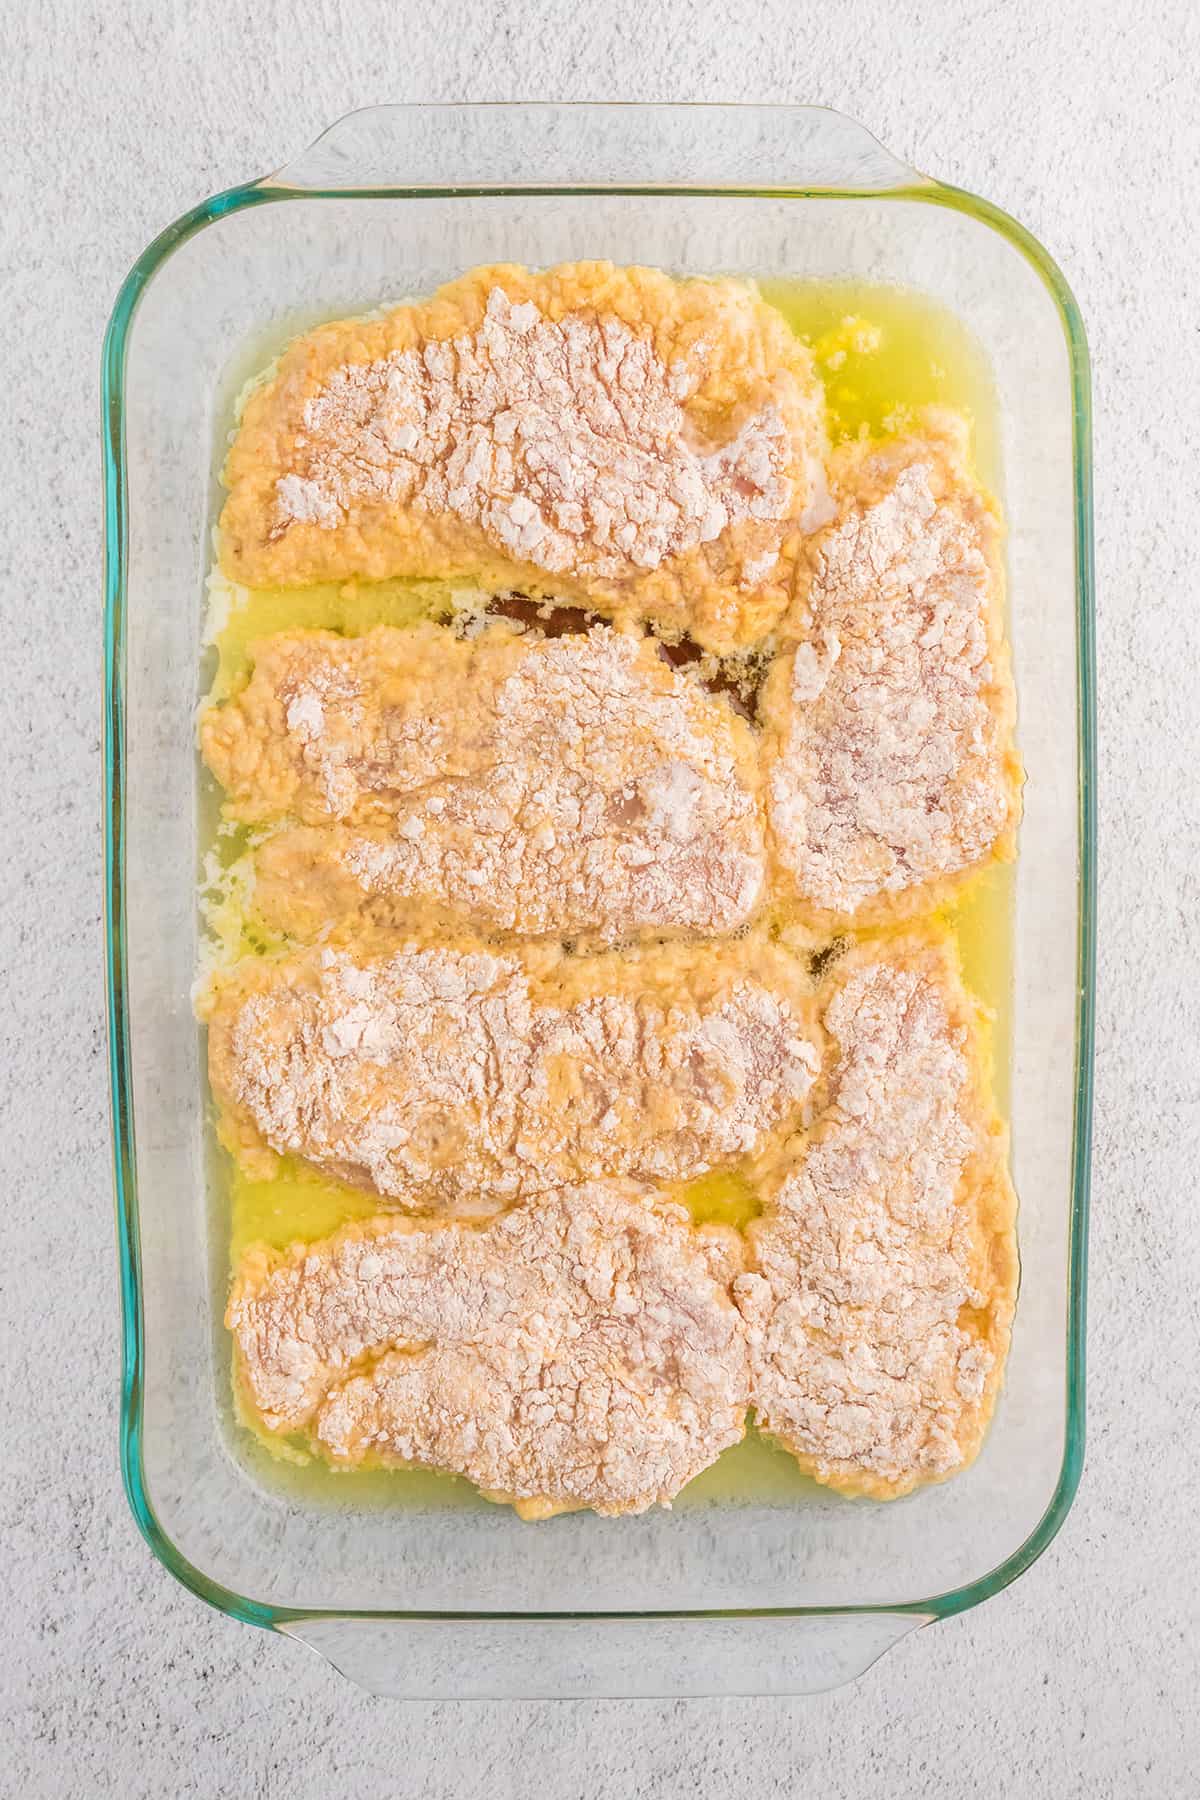
- Carefully remove the pan from the oven and add the chicken pieces.
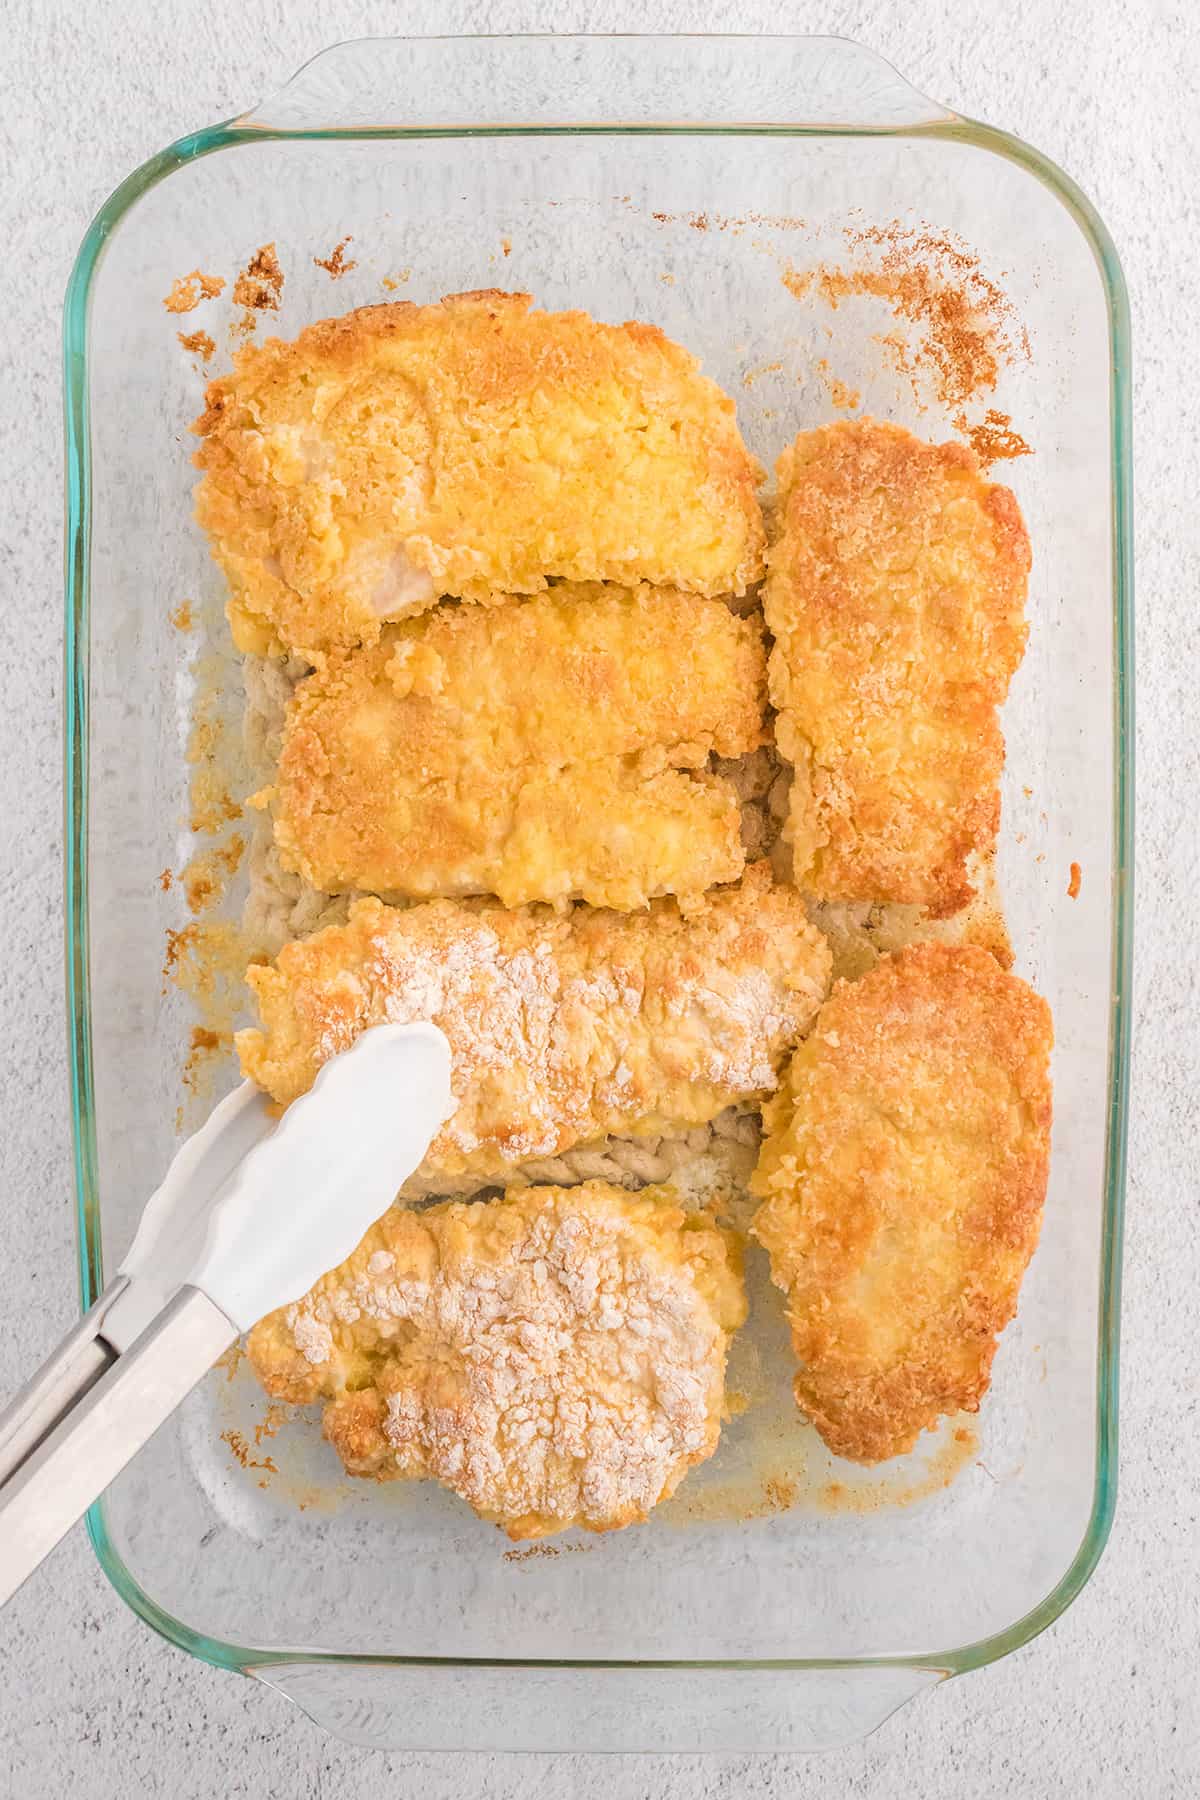
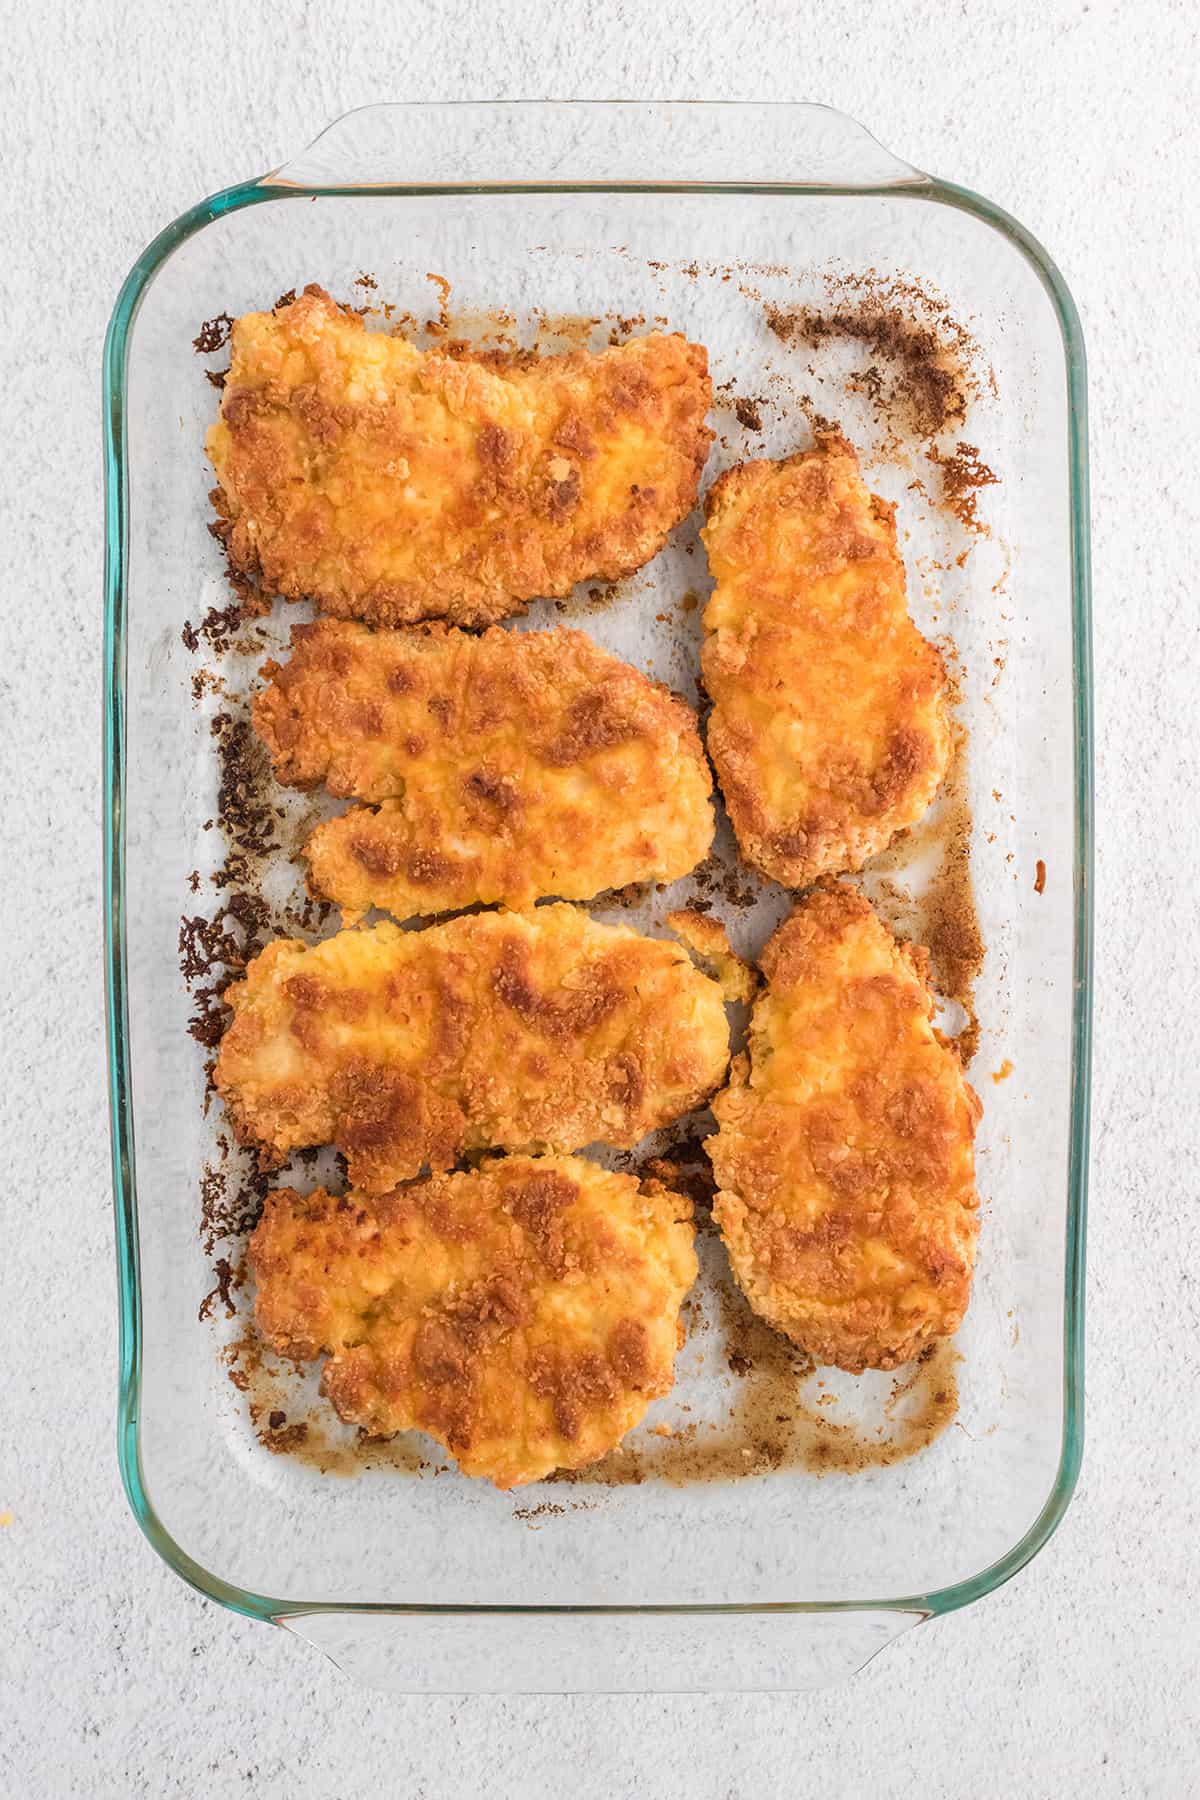
- Return the pan to the oven and bake for 10 minutes.
- Flip the pieces using tongs or a spatula and bake for another 10 minutes until the juices are no longer pink and the internal temperature reaches 165°F.
🍽️ Serving Suggestions
This recipe pairs well with a variety of sides, such as mashed potatoes, roasted vegetables, salad, and rice. Add some bread or rolls on the side and offer a light, refreshing pie for dessert!
🔀 Recipe Variations
- Add your favorite herbs and spices to the biscuit mix for extra flavor. Try adding garlic powder, paprika, dried thyme, or Italian seasoning.
- Try replacing the biscuit mix with crushed cornflakes, panko breadcrumbs, or even grated Parmesan cheese for a different texture and flavor.
- Who doesn’t love melted cheese? You can sprinkle shredded cheese on top of the chicken during the last 10 minutes of baking for a gooey, cheesy finish.
- Make it spicy by adding black pepper, chili powder, hot sauce, or chili flakes to the biscuit mix, or serve the chicken with a spicy dipping sauce.
🍚 Storing Leftovers
To store leftovers in the refrigerator, wait for the chicken to cool to room temperature before transferring it to an airtight container or a resealable plastic bag. Leftovers can be stored in the fridge for up to four days.
If you want to freeze the leftovers, wait for the chicken to cool down completely before wrapping it tightly in plastic wrap and then placing it in a resealable freezer bag. Make sure to label the bag with the date and the contents and store frozen for up to three months.
When you’re ready to serve, thaw in the fridge overnight and then reheat in the oven or microwave.
❗ Recipe Tips
- Don’t skip the milk marinade. Milk or buttermilk helps to tenderize the meat and make it juicier. This step makes a big difference in the final result.
- Use a meat thermometer. While the recipe gives a general cooking time, it’s always best to use a meat thermometer to ensure that the chicken is cooked to a safe internal temperature of 165°F.
- Let the chicken rest before serving. Allowing a resting time of about ten minutes before serving gives time for the juices to redistribute, making it even more flavorful.
❓ Questions About Tender Oven Baked Chicken Breasts
The cooking time for baking chicken breasts will depend on their size and thickness. A general rule of thumb is to bake them for 20-25 minutes at 425°F or until the internal temperature reaches 165°F. However, it’s always a good idea to use a meat thermometer to ensure they are fully cooked.
It’s not necessary to cover the pan for this recipe. In fact, the chicken will turn out much better if the pan is uncovered.
You can use a whole chicken, of course! You’ll just need to check periodically during baking to gauge when the chicken is done. Bone-in chicken takes a bit longer to cook.
It is possible to bake frozen chicken breasts, but they will take longer to cook and won’t hold the coating correctly. It’s best to thaw the chicken breasts first for more even cooking.

Have a question or thought to share?
If you have a question about the recipe or if you’ve made it and want to share how it turned out, I would truly enjoy hearing from you. Just scroll down to leave a comment or add your star rating.
Thank you for stopping by. It means a lot to have you here.
📖 Recipe

Tender Oven Baked Chicken Breasts
Ingredients
- 3 chicken breasts boneless, skinless (cut in half lengthwise)
- Milk or buttermilk as needed to cover chicken
- 2 cups baking mix (recommended: Bisquick)
- 1 tablespoon seasoned salt
- 3 eggs
- ½ cup butter (1 stick)
Instructions
- Place the chicken pieces in a bowl and pour in enough milk or buttermilk to just cover them. Top the bowl with plastic wrap and place it in the refrigerator for at least 20 minutes for maximum tenderness.3 chicken breasts, Milk or buttermilk
- When ready to bake, preheat the oven to 425°F and remove the chicken from the refrigerator.
- In a medium bowl, stir together the baking mix and seasoned salt.2 cups baking mix, 1 tablespoon seasoned salt
- In another medium bowl, lightly beat 3 eggs.3 eggs
- Remove the chicken from the milk and pat it dry on all sides. Discard the milk or buttermilk.
- Grease a 9×13 or larger glass baking dish with cooking spray or butter.
- Cut the butter into approximately eight pieces and add them to the prepared baking dish.½ cup butter
- Place the baking dish in the preheated oven for about 5 minutes or until the butter has melted.
- While the butter melts, prepare the chicken. Dredge each piece in beaten egg, then in the seasoned biscuit mix. Repeat a second time dredging each in egg again followed by the biscuit mix once more, this time pressing the biscuit mix onto the chicken and shaking off any excess.
- Carefully remove the pan from the oven and add the chicken pieces.
- Return the pan to the oven and bake for 10 minutes.
- Flip over the pieces using tongs or a spatula and bake for another 10 minutes until the juices are no longer pink and the internal temperature reaches 165°F.
Notes
- Store cooled leftovers in the fridge for up to four days or freeze for up to three months.
- Don’t skip the milk marinade. It helps to tenderize the meat and makes a big difference in the final result.
- Let the chicken rest for about 10 minutes before serving.
Nutrition Information
Nutrition information is calculated by software based on the ingredients in each recipe. It is an estimate only and is provided for informational purposes. You should consult your healthcare provider or a registered dietitian if precise nutrition calculations are needed for health reasons.


All of my breading came off 😟
What did I do wrong?
I’m sorry you had that problem, Sarah, but there are literally dozens of things that can cause that. It’s just not possible to trouble shoot it unless I was actually in the kitchen with you to see where it went wrong.