


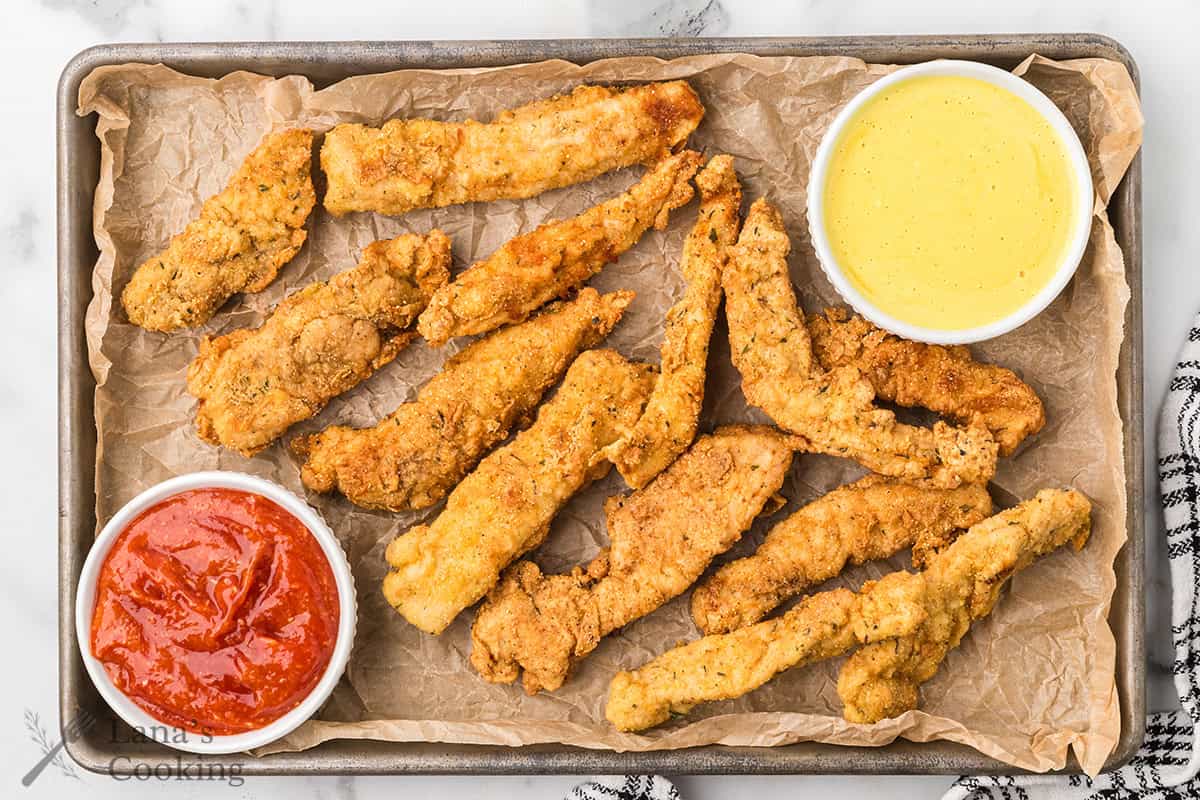
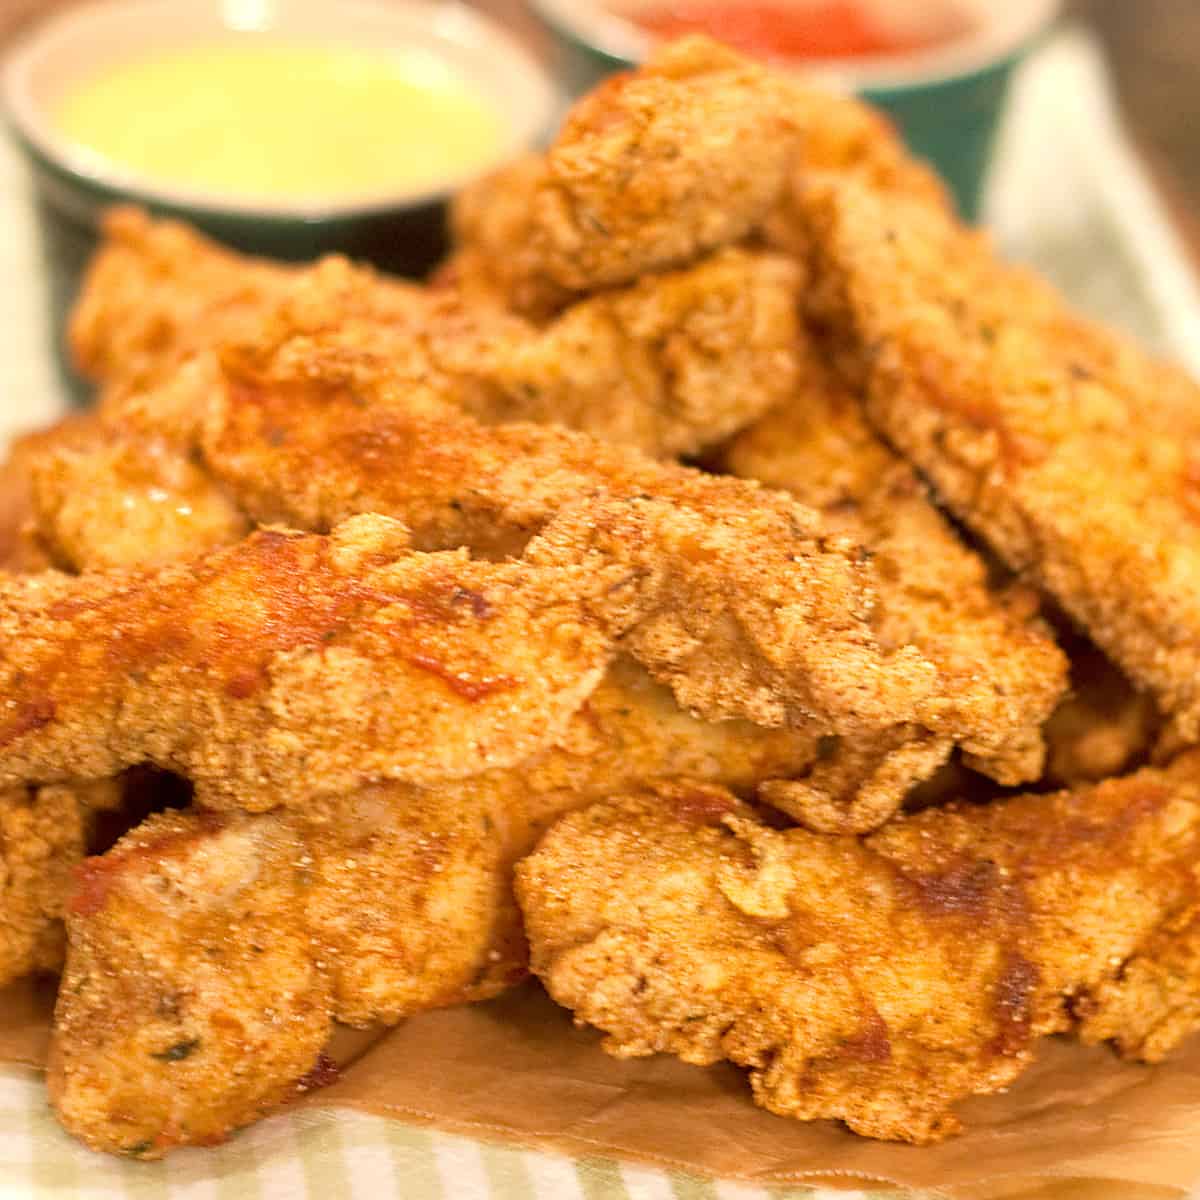
Is there anything better than crispy, crunchy fried chicken fingers? My recipe for Nana’s Crispy Fried Chicken Fingers is ridiculously easy to make, ready in just 30 minutes, and comes with two irresistible dipping sauces: honey mustard and spicy ketchup.
For years, whenever we’d grab a quick bite with our grandkids, I didn’t even have to ask my youngest what she wanted – it was always chicken nuggets. She’s a much more adventurous eater now, but back then, it didn’t matter where we were dining. It was always chicken nuggets. Even better if they came with a “prize” in the box.

Well, I can’t guarantee a prize with these, but I can guarantee that your kids (whether they’re 3 or 83) will love these homemade chicken fingers even more than the restaurant versions.
Let me be upfront: these aren’t baked. They’re gloriously fried in peanut oil. Even so, I’m not convinced that they’re all that bad. When I fry anything, I make sure the oil is plenty hot and drain everything well afterward. The result? Zero greasiness and maximum crunch – just a delicious, crispy coating that’ll have everyone coming back for seconds.
— This post was originally published on November 14, 2014. It has been updated with new photos and additional information.
Recipe Snapshot
Cuisine: American
Cooking Method: Stovetop
Total Time: 30 Minutes
Servings: 8
Primary Ingredient(s): Chicken, Egg, Cornmeal, Flour, Seasonings
Skill Level: Medium
What You’ll Like About This Recipe
- It takes about 30 minutes from start to finish.
- It has a perfectly seasoned, crispy coating with a secret cornmeal crunch.
- Two amazing dipping sauces are included.
- Air fryer instructions included, too!
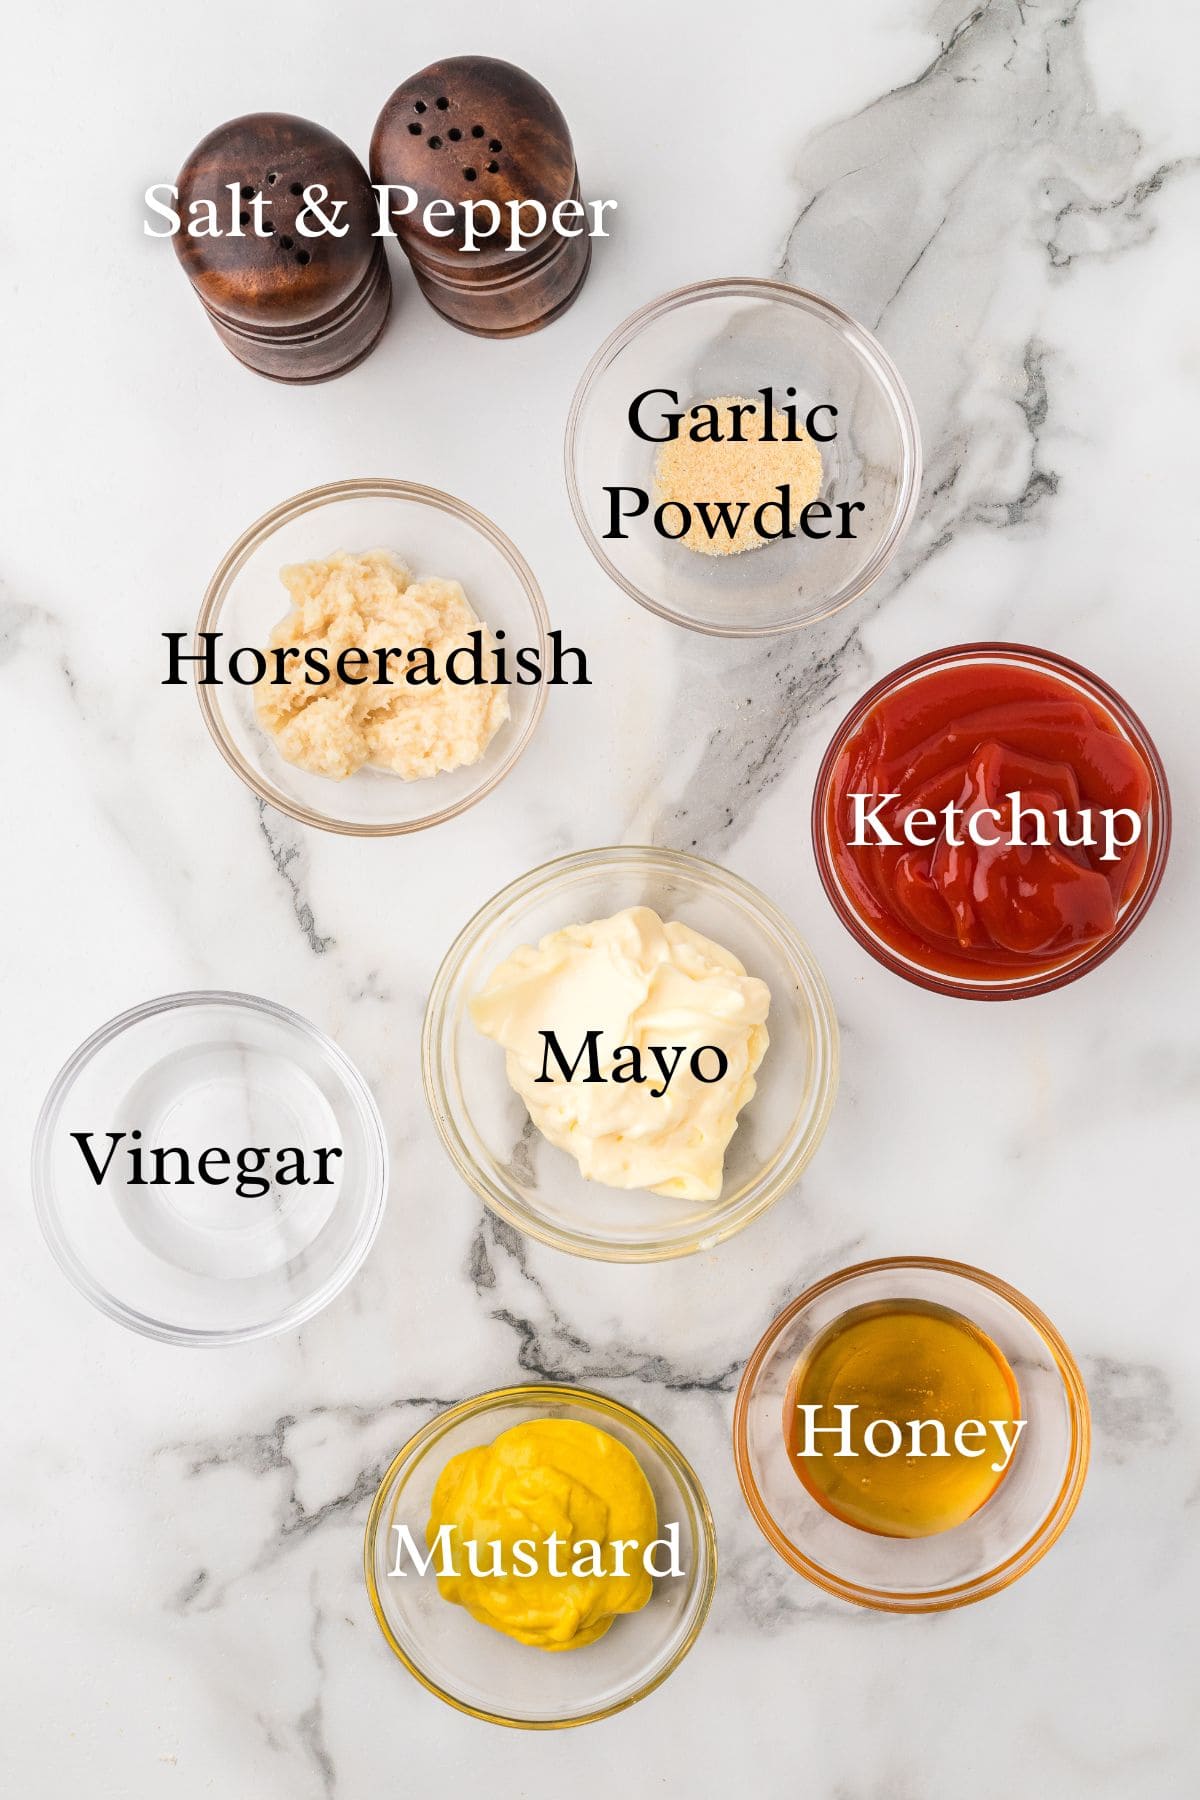
Ingredient Notes
Don’t let the number of ingredients in the photo scare you away! It’s basically chicken, egg, flour, and various spices. Plus some oil for frying. If you don’t have or don’t like any one of the seasonings, just leave it out. You could easily make chicken fingers with only flour, salt, and pepper.

This post may contain affiliate links. Lana’s Cooking is reader-supported and earns a tiny commission at no extra cost to you when you shop from our links.
- Chicken Breasts – Boneless, skinless breasts work best for uniform strips, but boneless thighs are an alternative if you prefer juicier, more flavorful meat.
- Egg Whites – Act as the “glue” that helps the coating stick to the chicken. Using just the whites (instead of whole eggs) creates a lighter, crispier coating. But don’t toss the yolks! Make scrambled eggs the next morning and add them in.
- Yellow Cornmeal – The secret to extra crunch! Adds texture that sets these apart from a flour-only coating.
- Peanut Oil – My preferred frying oil because of its high smoke point. That means perfectly crispy chicken without a burnt taste. Canola oil or vegetable oil can work as substitutes.
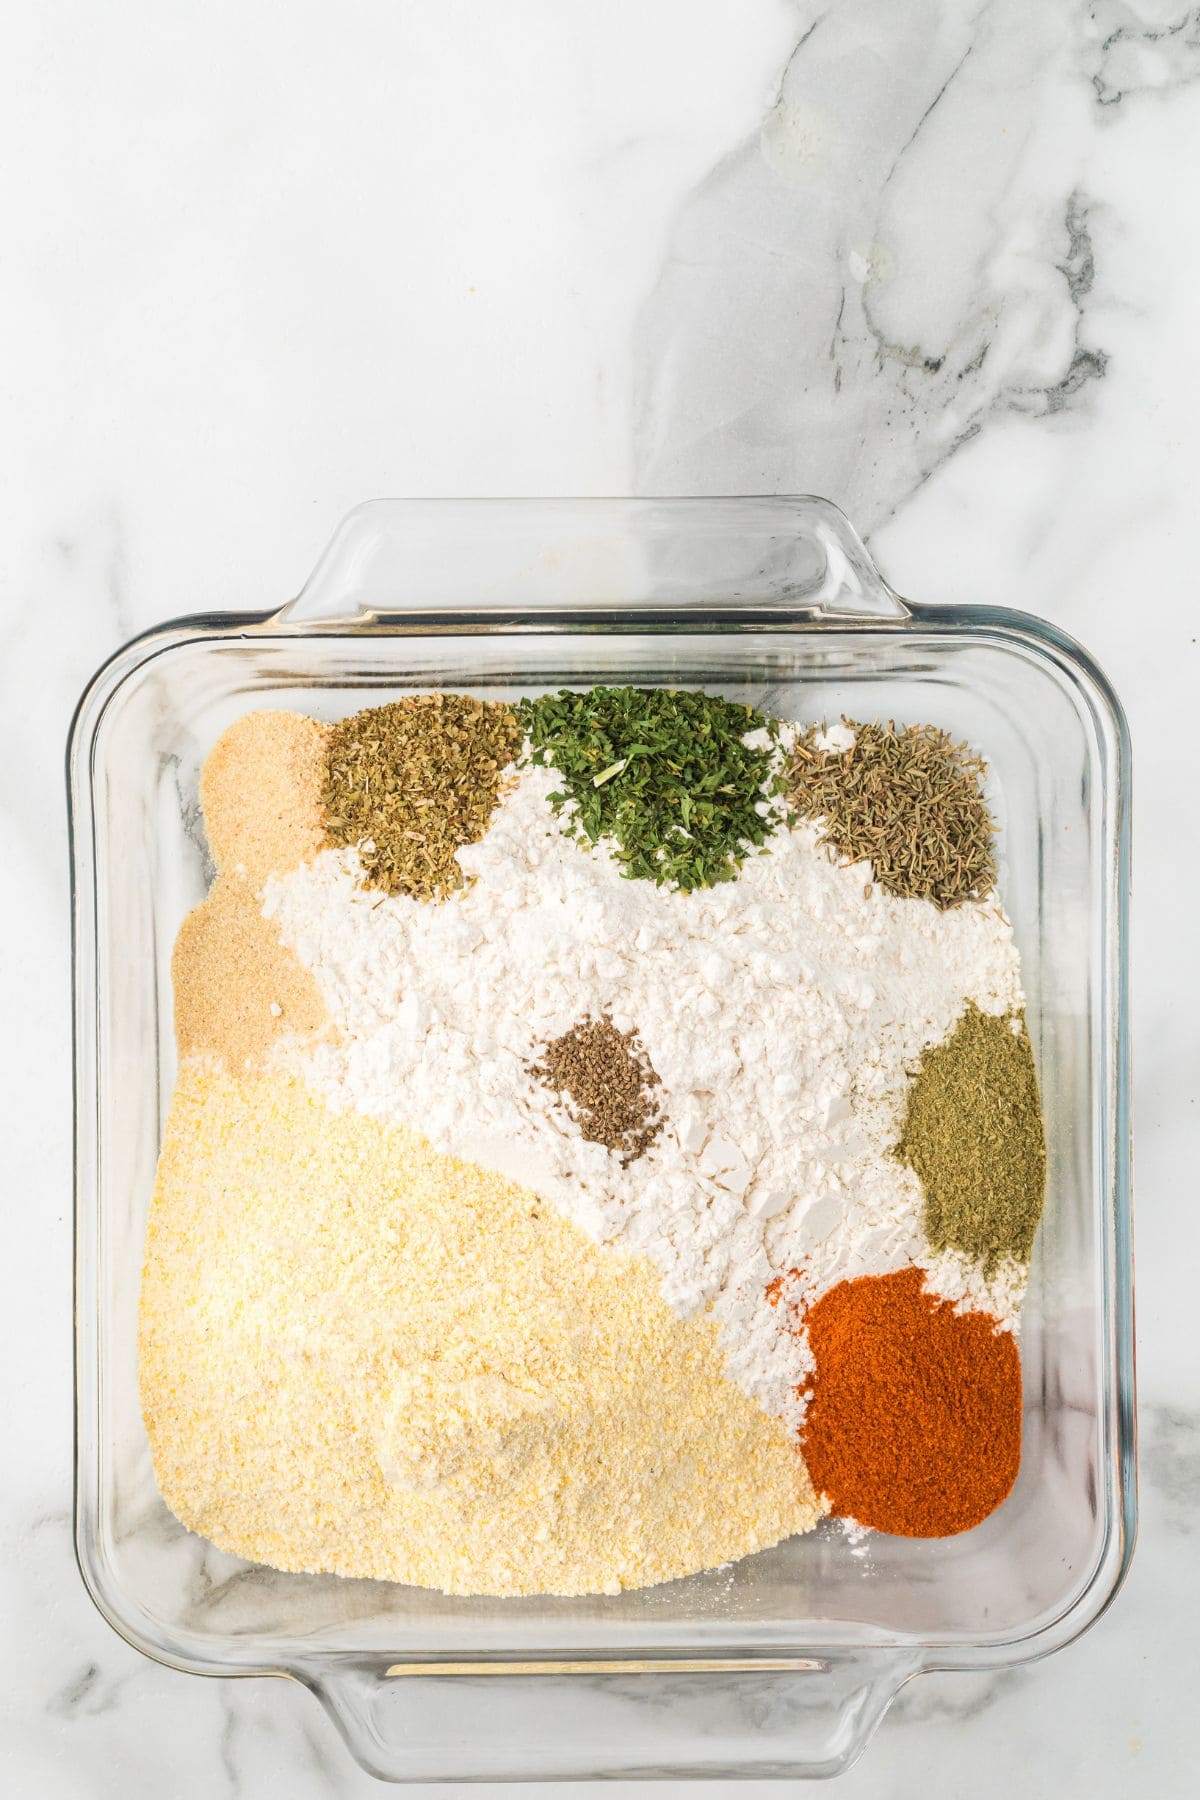
- Seasonings – The combination of paprika, poultry seasoning, thyme, oregano, garlic powder, onion powder, celery seed, and parsley creates a well-rounded, savory flavor that’s very much like restaurant-style chicken fingers.
Making the dipping sauces is entirely optional, but I wanted to include the ingredients for you.
For the Honey-Mustard Sauce
- Mayonnaise – Makes a creamy base that balances the mustard and honey
- Mustard – Your choice of either yellow or Dijon mustard. Yellow gives a milder flavor, while Dijon adds a bit more of a bite.
- Honey – Naturally sweetens the sauce and balances the sharp mustard.
For the Spicy Ketchup
- Ketchup – A very familiar flavor that kids (and adults) love.
- Prepared Horseradish – Give the ketchup a kick of heat that’s quite different from pepper. Start with less if you’re sensitive to heat. You can always add more!
The complete ingredient list with detailed measurements is included in the printable recipe card at the bottom of this post.
How to Make Fried Chicken Fingers
Frying chicken fingers does require a few steps, but I promise each one is simple, and the results are so worth it!
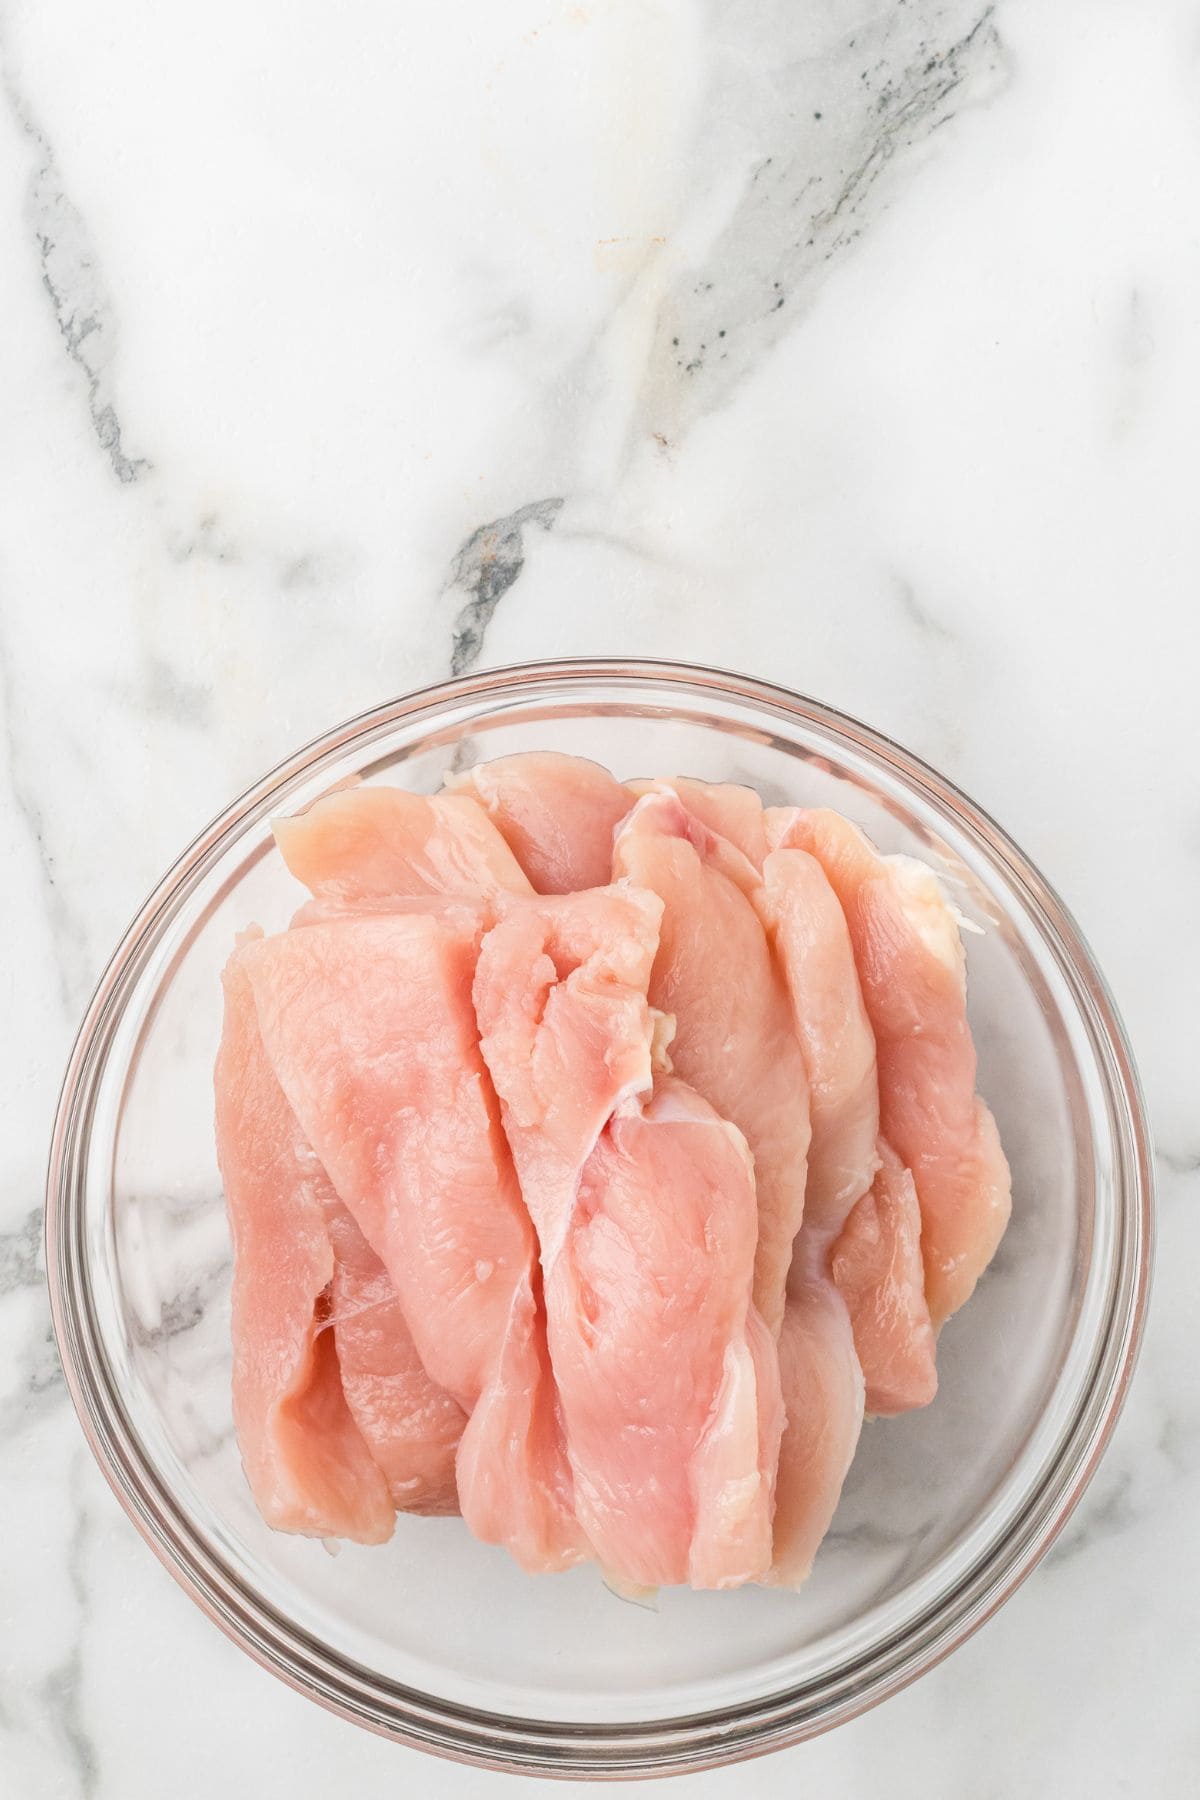
- Start by cutting the chicken breasts lengthwise into strips about 1 inch thick. Don’t worry about making them perfect. Rustic is totally fine here!
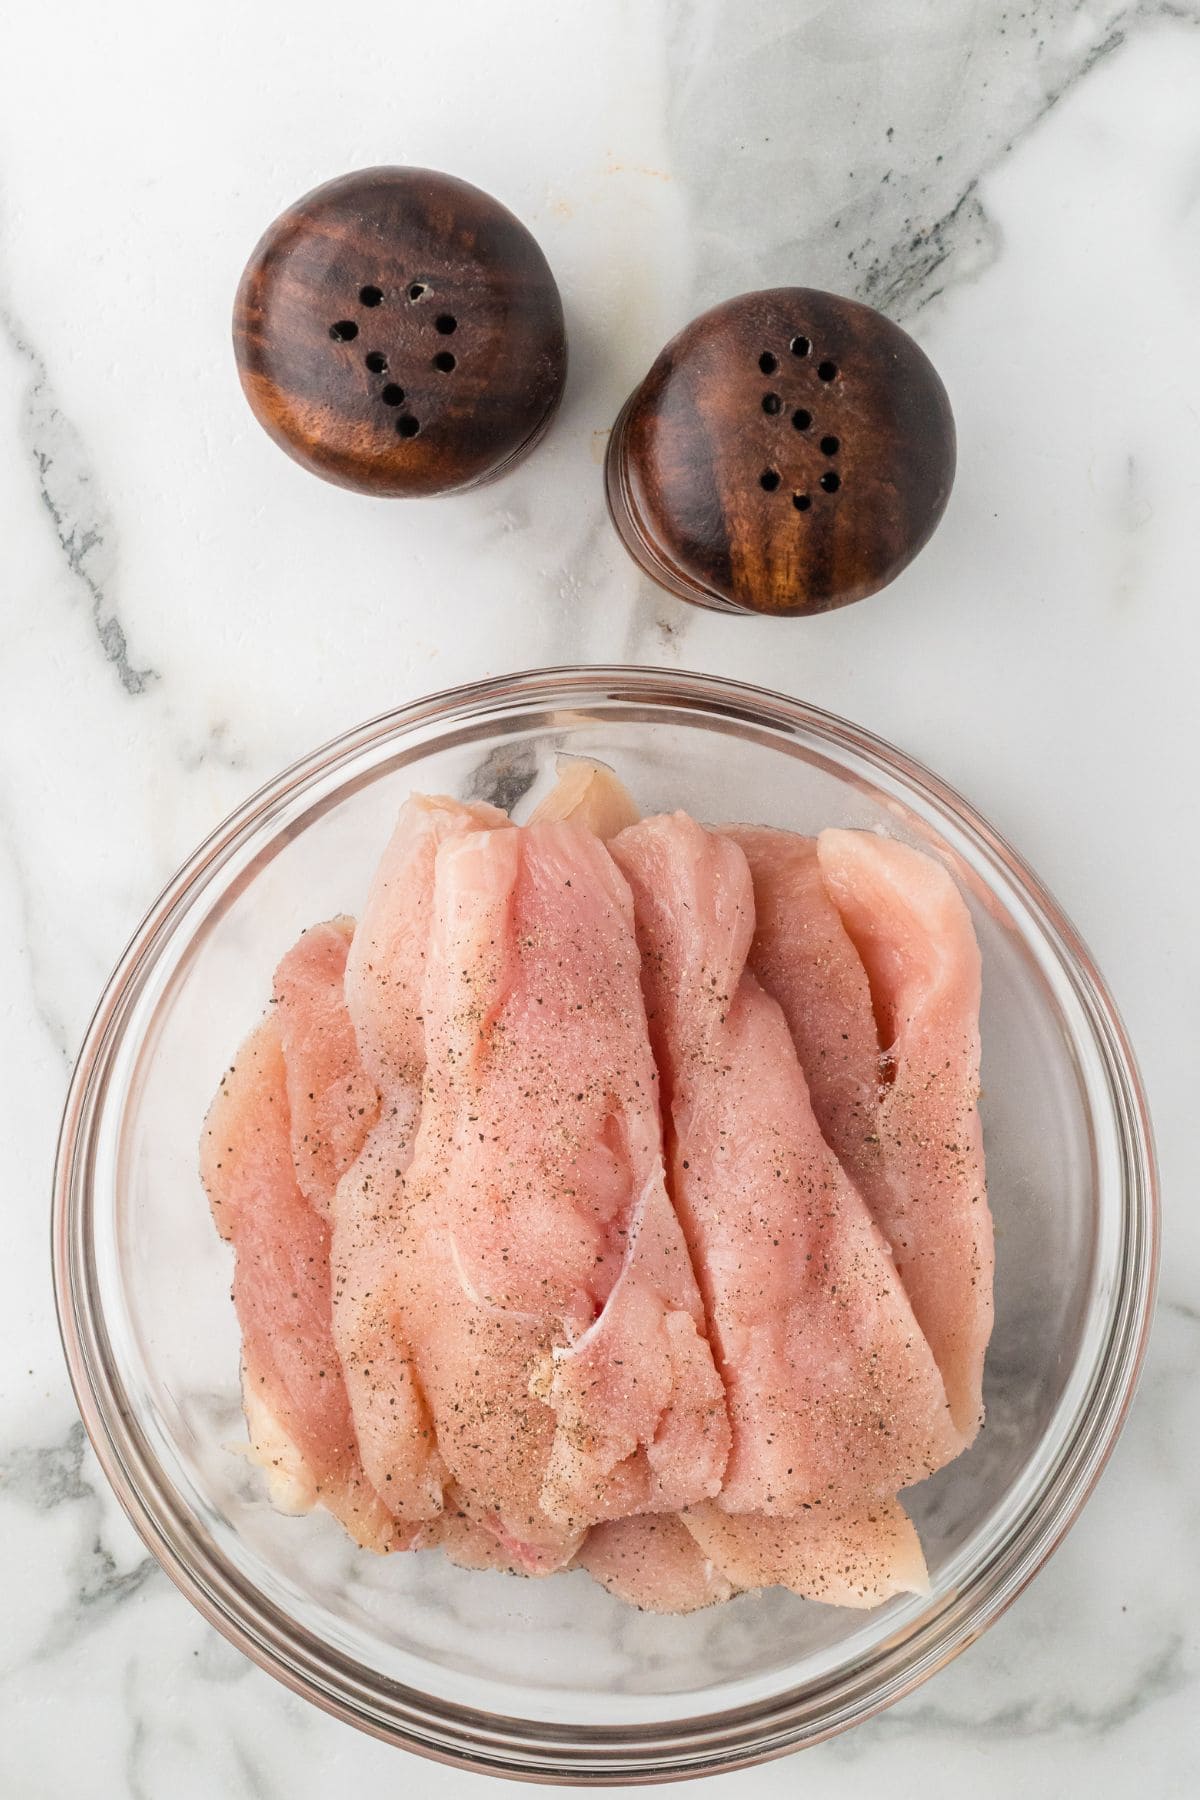
- Season the chicken tenders with salt and pepper on all sides. Be generous! You want lots of flavor in every bite.

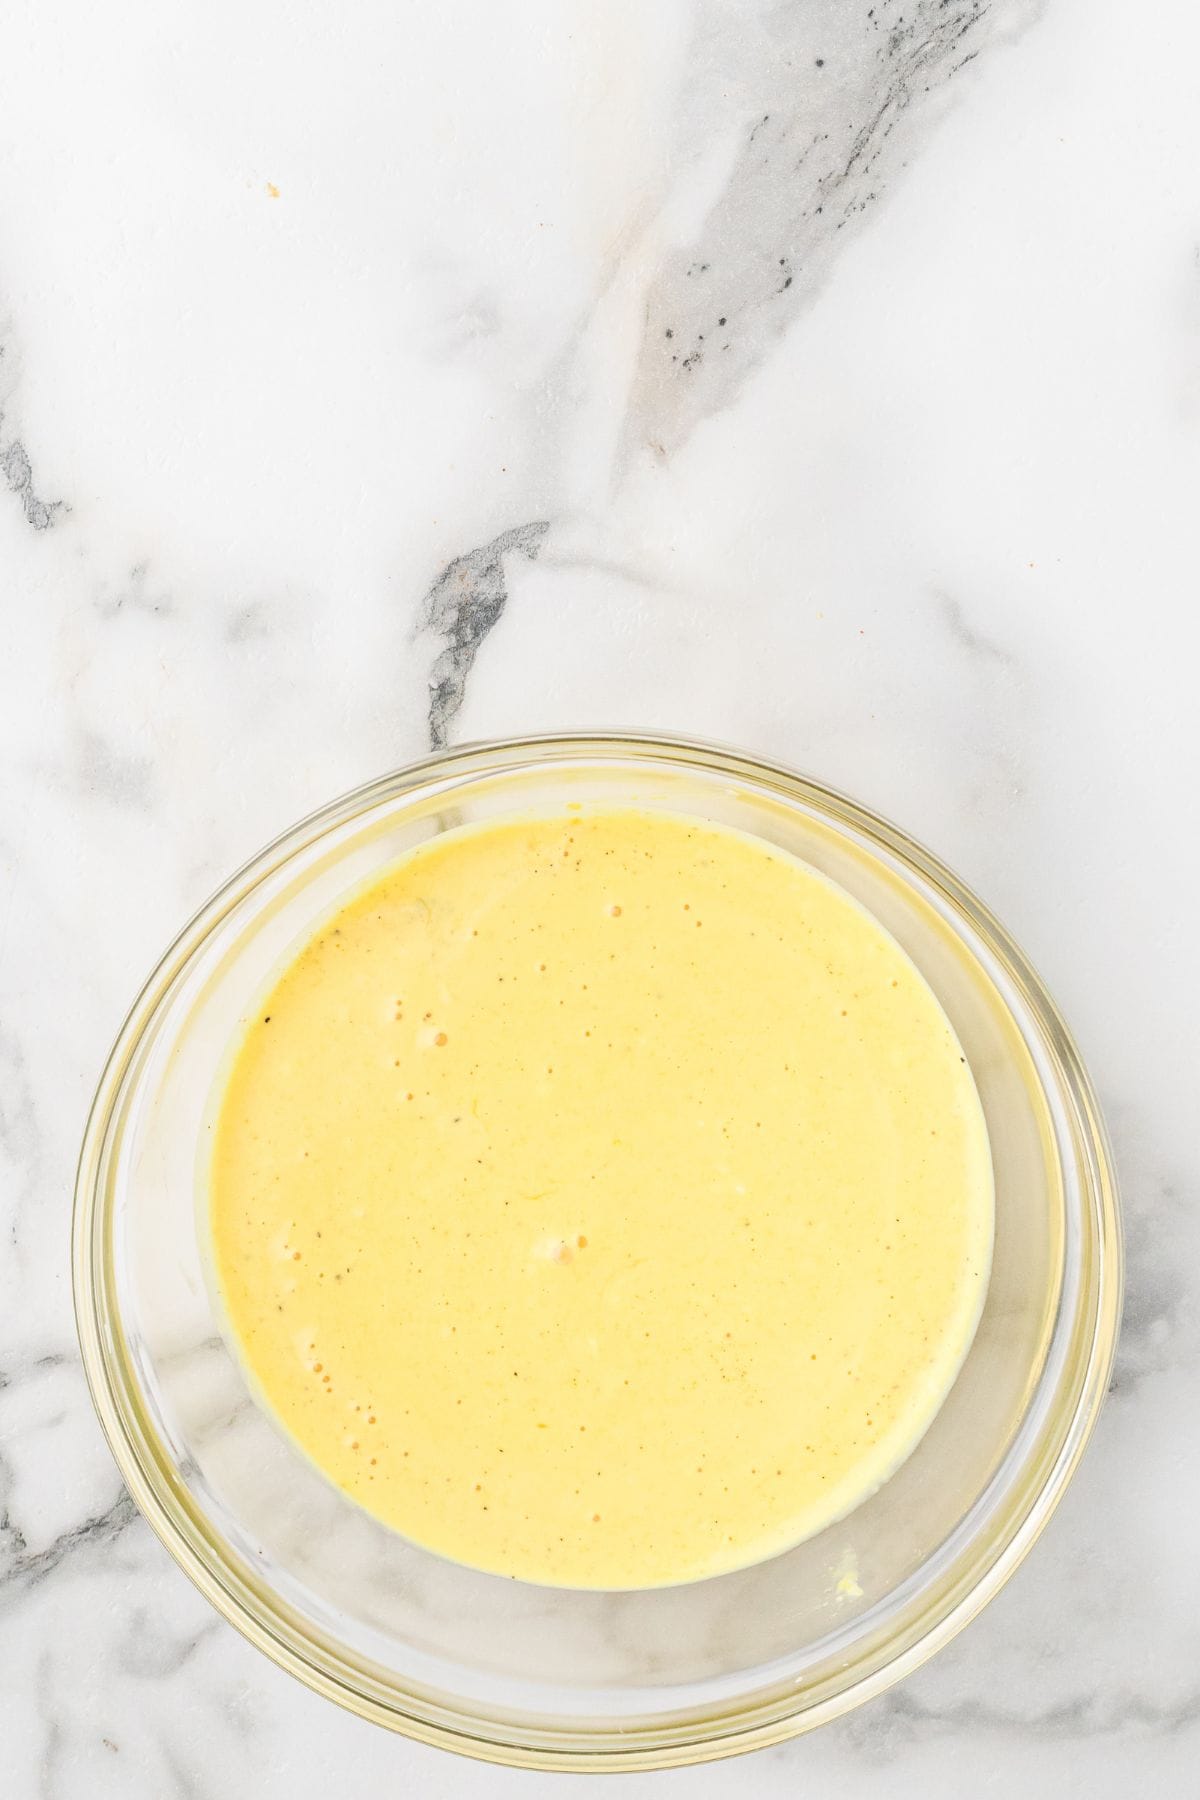
- In a medium bowl, lightly beat the egg whites until they’re just combined. Toss in the seasoned chicken strips and give them a good stir so that each piece is nicely coated.
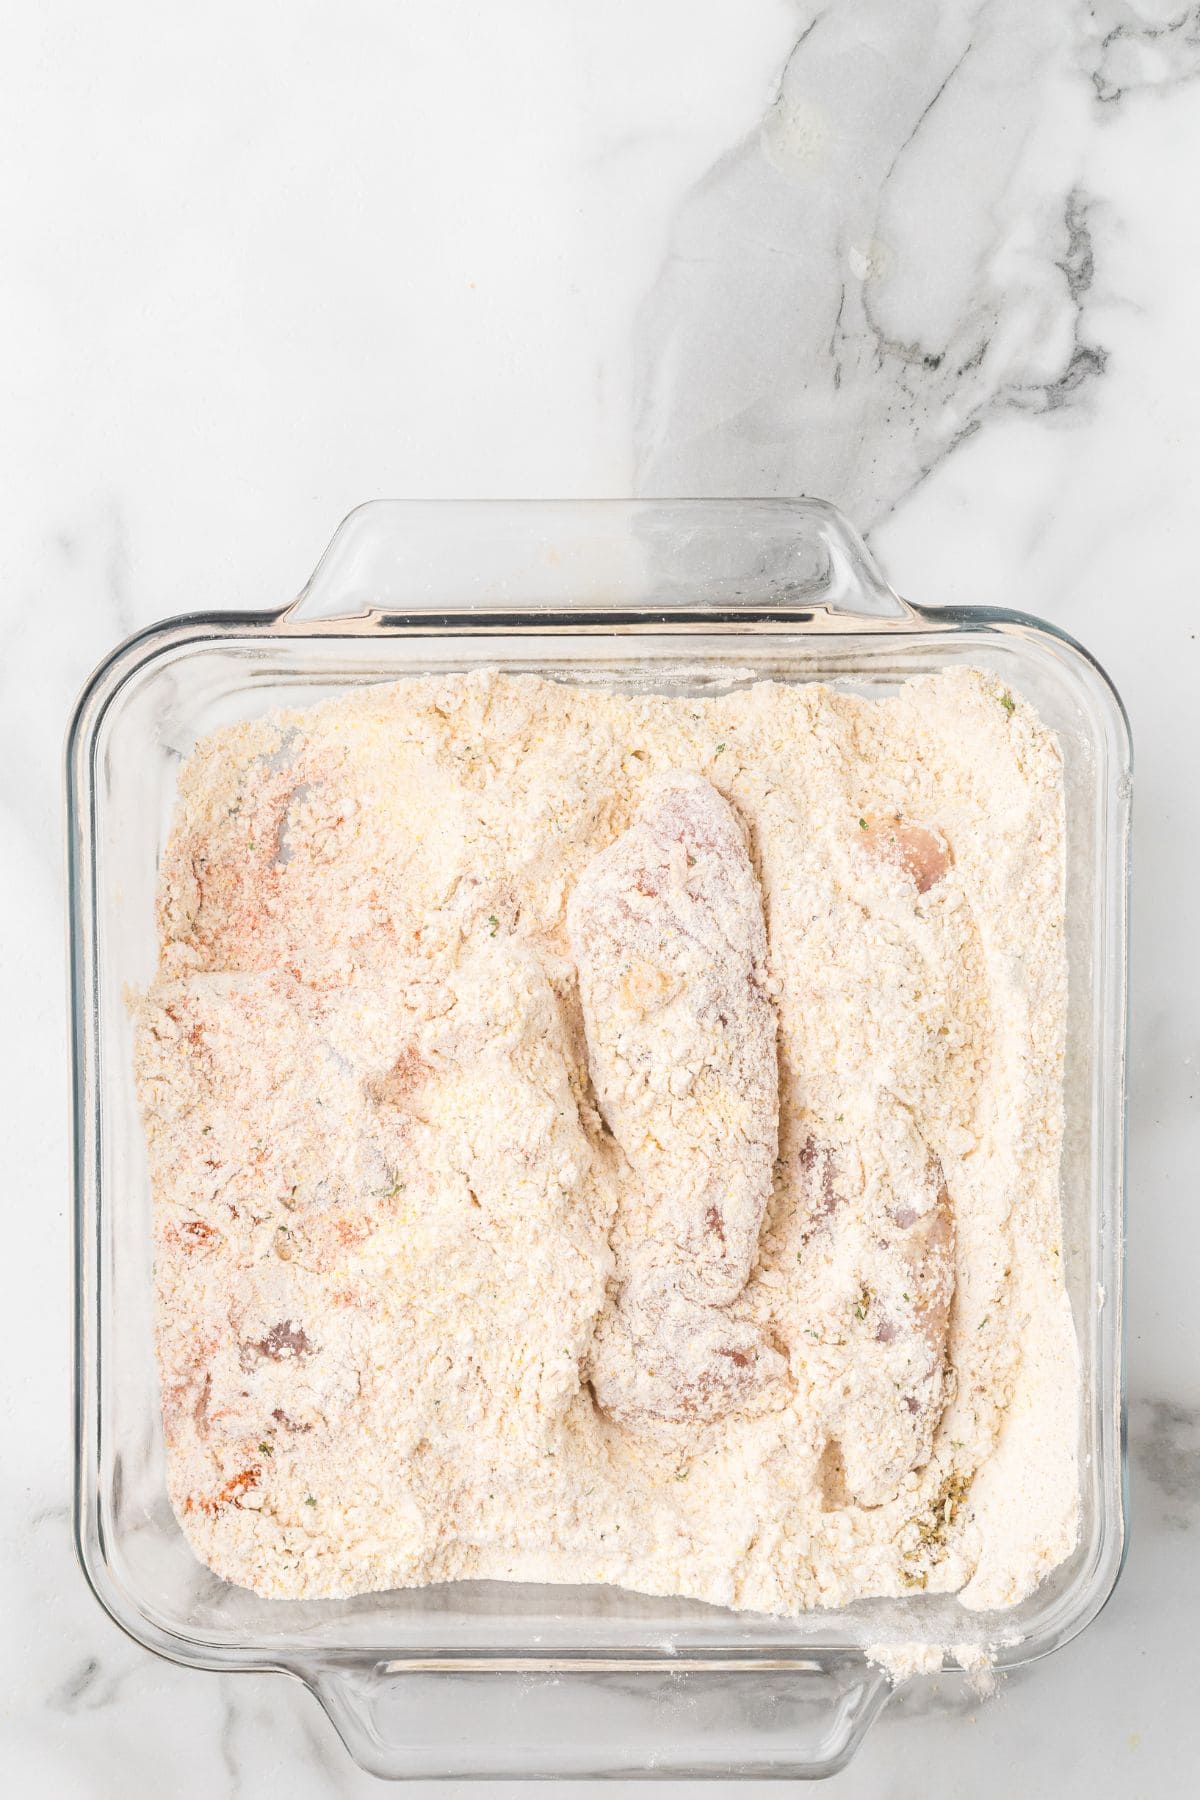
- In a small pan (or shallow dish), combine all the dry ingredients – the flour, cornmeal, and all those fantastic spices. Give it a good stir to distribute everything evenly.
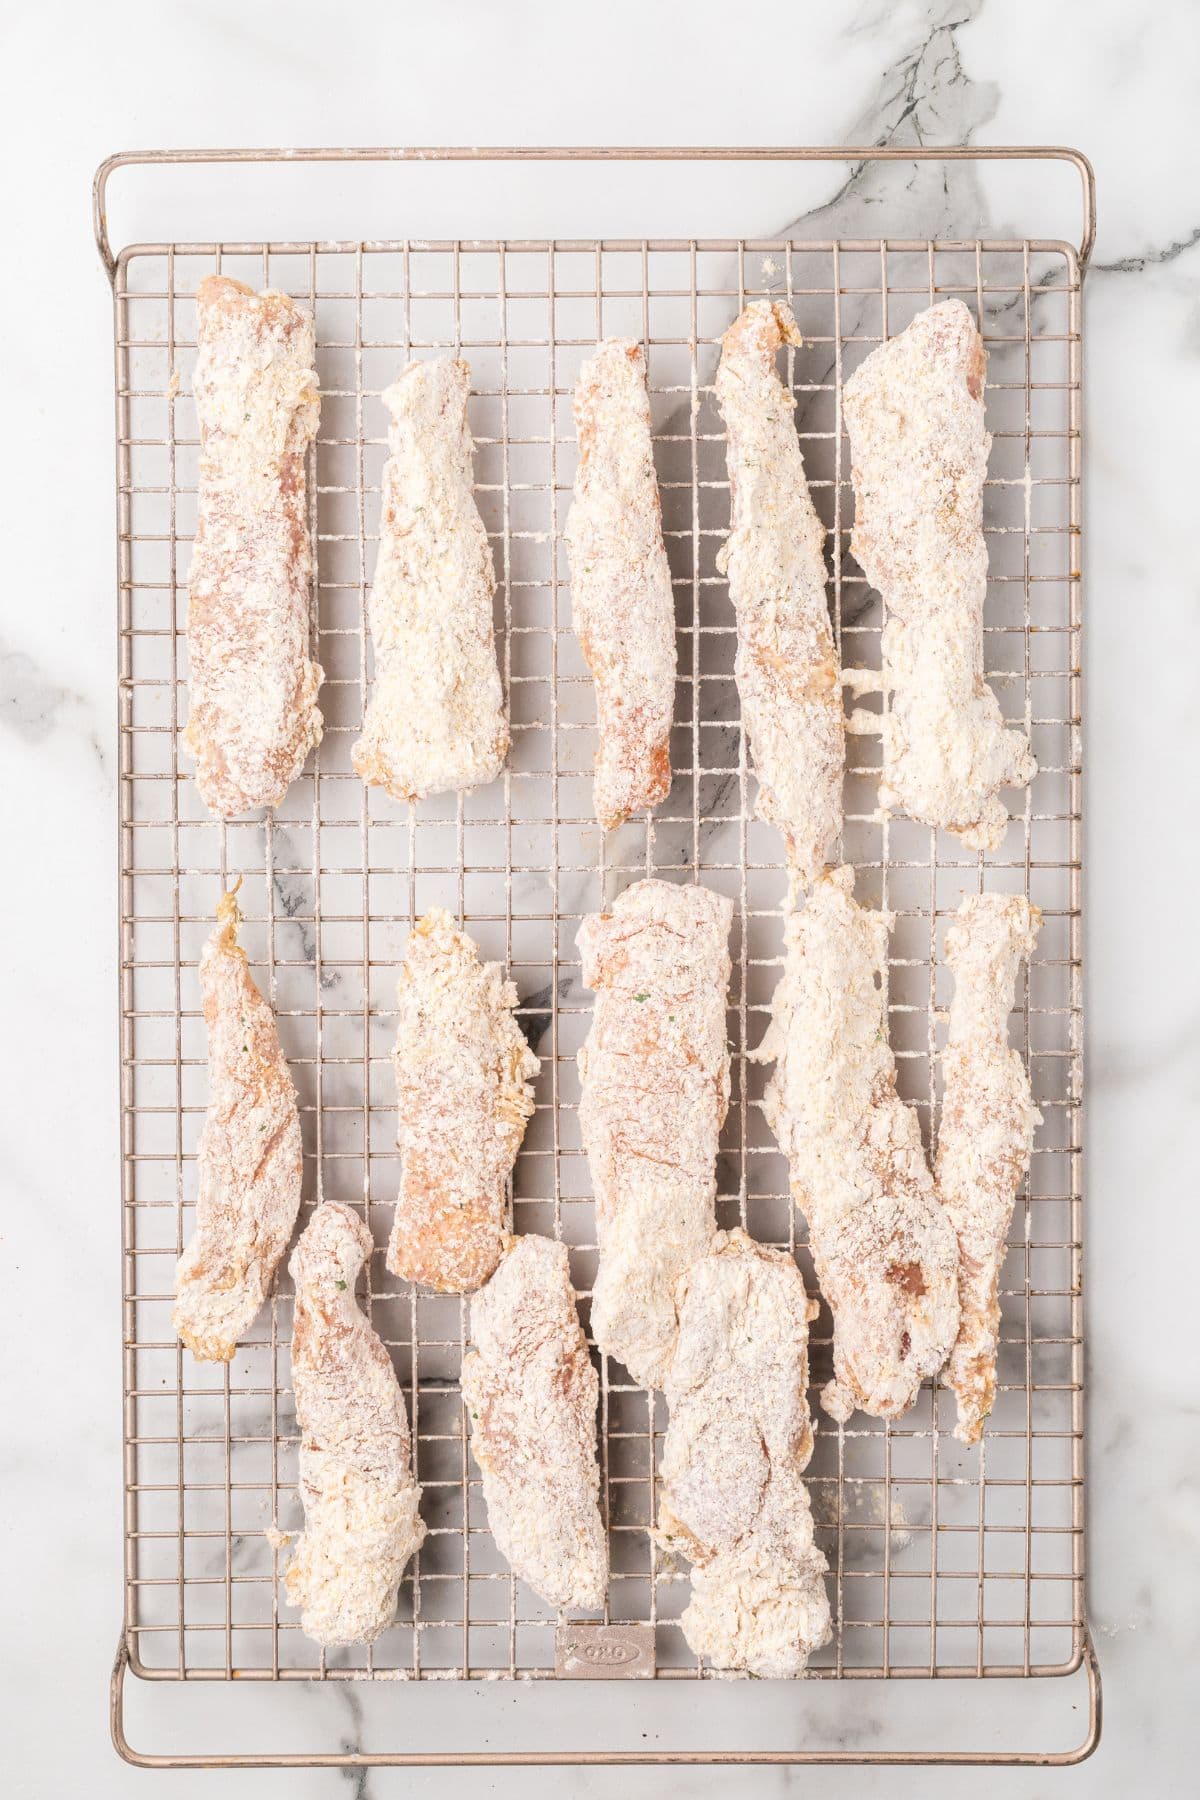
- Working with 3 or 4 chicken strips at a time, roll them around in the seasoned flour mixture until they’re completely coated.
- Set them on a plate or wire rack while you heat the oil. This short rest will help the coating stick better.

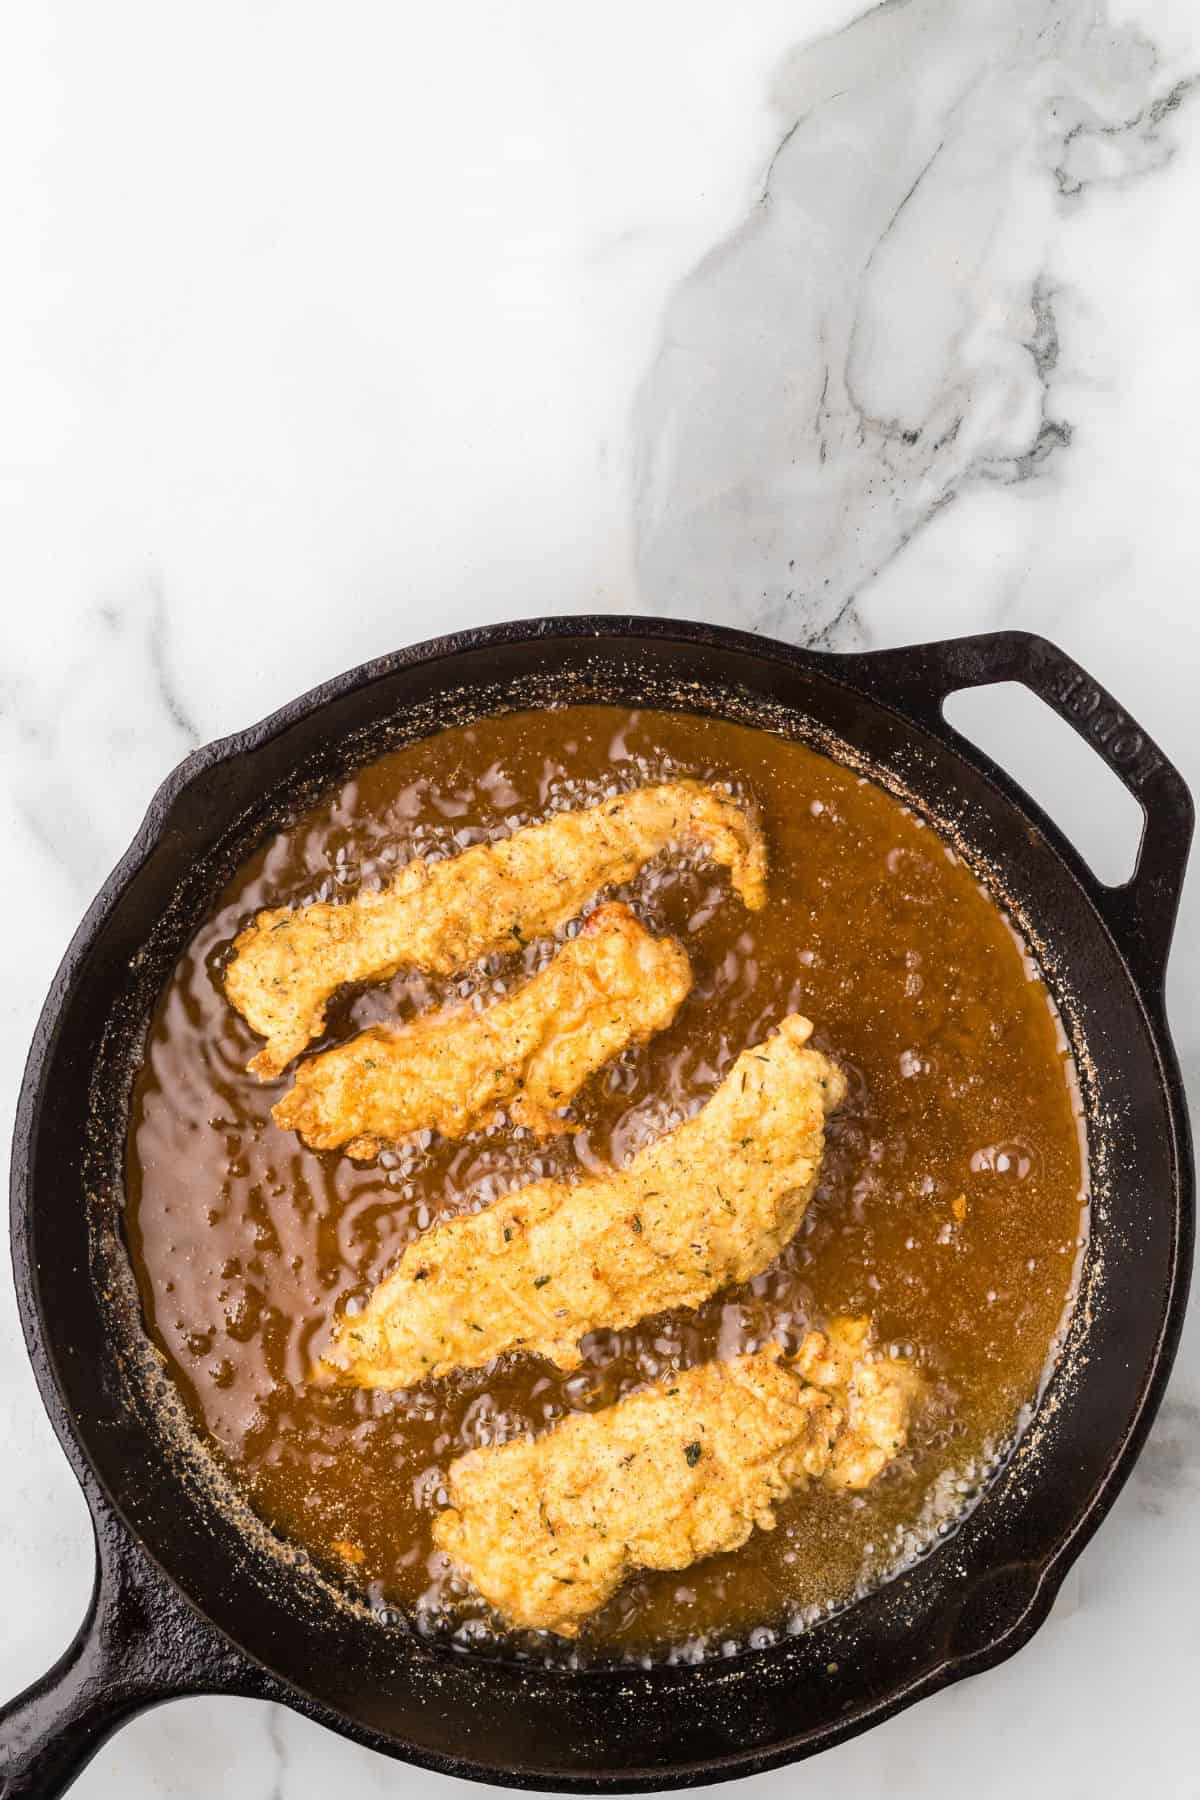
- Pour peanut oil to a depth of about an inch in a deep frying pan and place it over medium-high heat. Let the oil come up to frying temperature — 350°F to 375°F. You can use a thermometer, but you’ll know it’s ready when you stick the end of a wooden spoon in the oil, and it bubbles nicely around the handle.
- Carefully add the coated chicken strips to the hot oil in batches. It’s very important not to crowd the pan, or they won’t turn out nearly as crispy! Fry for about 5 minutes on each side until they’re golden brown and gorgeous.
- Transfer the finished chicken fingers to a paper towel-lined baking sheet to drain off any excess oil. Place them in a low oven (around 200°F) to keep warm while you finish frying the rest.

- While the chicken is cooking, mix up the honey-mustard and spicy ketchup sauces in two small bowls. Just stir the ingredients together until they’re well combined. Couldn’t be easier!
Air Fryer Method
Even though it’s hard to beat a deep-fried chicken finger, I know some of you really want to try these in your air fryer, right? So here’s what you do:
- Preheat the air fryer to 380°F.
- Generously spray the air fryer basket with cooking oil spray.
- Place the breaded chicken strips in the basket, leaving about 1 inch of space between each piece. You’ll need to work in batches to prevent overcrowding.
- Generously spray the tops of the chicken strips with oil.
- Air fry for 10 minutes, then flip the chicken and spray the other side with more oil.
- Cook for an additional 8-10 minutes, checking for doneness. The internal temperature should reach 165°F in the thickest part of the chicken.
- If needed, continue cooking in 2-minute intervals until they reach the proper temperature.
Note: Air fryer brands vary significantly in cooking times, so your cooking time may be faster or slower than these guidelines.
Recipe Tips
- Use a thermometer for the oil. While the wooden spoon trick I described above does work and I’ve used it for many, many years, a cooking thermometer is the proper way to gauge oil temperature. If you have one, please do use it.
- Let the flour-coated chicken rest. After coating the chicken strips, give them a 5-minute rest on the wire rack. It will help the coating adhere better during frying.
- Don’t skip the cornmeal. It’s what gives these chicken fingers their signature crunch that sets them apart from regular flour-coated versions. The texture difference is absolutely worth it.
- Work in small batches. Resist the urge to fry all the chicken at once. Overcrowding drops the oil temperature and can result in soggy, greasy chicken instead of crispy perfection.
Recipe Variations to Try
Chicken Options — Cut the chicken into nuggets for smaller, kid-friendly bites. Boneless thighs work great in place of breasts, but may need a bit more cooking time.
Coating Adjustments — Add cayenne or red pepper flakes for heat, or smoked paprika for deeper flavor. Mixed Italian seasoning can replace the thyme and oregano. Substitute panko breadcrumbs for the cornmeal and get a lighter crunch.
Oil Substitutions — Vegetable or canola oil may be used instead of peanut oil.
How to Serve Fried Chicken Tenders
I like to serve these with sides of potato wedges and coleslaw. They’re also great sliced crosswise and added to a salad with blue cheese dressing!
Storing Leftovers
Fried foods are always best served and enjoyed as soon as possible. However, leftovers can be stored in the refrigerator for a day or two and reheated in a low oven (or air fryer!) for about 10 minutes. Home-fried foods just don’t freeze well, so it’s not recommended.

Questions About Fried Chicken Tenders
You sure can! Uncooked, breaded chicken fingers freeze beautifully and are great for meal prep. After coating the chicken strips, place them on a parchment-lined baking sheet and freeze for at least 2 hours until solid. Then transfer them to freezer bags or airtight containers for up to 3 months. When ready to cook, fry them directly from frozen – just add an extra 1-2 minutes to the cooking time. Don’t thaw them first, as this can make the coating soggy and cause it to fall off.
Yes! To make gluten-free chicken fingers, you would substitute the all-purpose flour with your choice of gluten-free flour blend. The rest of the recipe would remain exactly the same.
Great question! Chicken tenders (or tenderloins) are the actual tender muscle that sits underneath the chicken breast. Every chicken has just two of these naturally tender pieces. Chicken strips, on the other hand, are simply chicken breast cut into strip shapes. For this recipe, either works perfectly. However, tenders are usually significantly more expensive.
More Chicken Recipes You’ll Enjoy
Traditional Southern Fried Chicken
Baked Parmesan Chicken
Chicken with Mushrooms in White Wine Sauce
Air Fryer Nashville Hot Chicken

Have a question or thought to share?
If you have a question about the recipe or if you’ve made it and want to share how it turned out, I would truly enjoy hearing from you. Just scroll down to leave a comment or add your star rating.
Thank you for stopping by. It means a lot to have you here.
Do More With ChatGPT
Recipe

Nana’s Fried Chicken Fingers
Ingredients
- 4 chicken breasts boneless, skinless (about 2 pounds)
- Salt
- Pepper
- 3 egg whites
- 2 cups all-purpose flour
- 1 cup yellow corn meal
- 2 ½ teaspoons paprika
- 1 teaspoon poultry seasoning
- 1 teaspoon dried thyme
- 1 teaspoon dried oregano
- ½ teaspoon garlic powder
- ½ teaspoon onion powder
- ¼ teaspoon celery seed
- 1 teaspoon dried parsley flakes
- Peanut oil
For the Honey-Mustard Sauce:
- ½ cup mayonnaise
- 2 tablespoons mustard yellow or Dijon
- Pinch garlic powder
- 1 tablespoon vinegar
- 2 tablespoons honey
- Salt and pepper to taste
For the Spicy Catsup:
- ½ cup catsup
- 1 tablespoon prepared horseradish
Instructions
- Cut the breasts lengthwise into approximately 1” thick strips.4 chicken breasts
- Generously season all sides with salt and pepper.Salt, Pepper
- In a medium bowl, lightly beat the egg whites. Add the seasoned chicken strips and stir so that each is well coated with egg white.3 egg whites
- In a small pan, combine all the remaining ingredients except the peanut oil.2 cups all-purpose flour, 1 cup yellow corn meal, 2 ½ teaspoons paprika, 1 teaspoon poultry seasoning, 1 teaspoon dried thyme, 1 teaspoon dried oregano, ½ teaspoon garlic powder, ½ teaspoon onion powder, ¼ teaspoon celery seed, 1 teaspoon dried parsley flakes
- Place 3 or 4 chicken strips at a time into the coating mixture turning until each is coated.
- Place the coated strips on a plate or wire rack while heating the oil.
- In a deep frying pan, heat 1” of peanut oil over medium high heat. Let the oil come to frying temperature — 350°F to 375°F.Peanut oil
- Fry the chicken strips in batches if necessary taking care not to crowd the pan. Turn the chicken strips halfway through frying.
- Remove from the oil to drain on a paper towel lined baking sheet. Keep warm in a low oven until all the chicken strips are cooked.
- For the dipping sauces, add the ingredients to two small bowls stirring until thoroughly combined.½ cup mayonnaise, 2 tablespoons mustard, Pinch garlic powder, 1 tablespoon vinegar, 2 tablespoons honey, Salt and pepper to taste, ½ cup catsup, 1 tablespoon prepared horseradish
Notes
- Fried foods are always best served and enjoyed as soon as possible. However, leftovers can be stored in the refrigerator for a day or two and reheated in a low oven for about 10 minutes.
- Home fried foods just don’t freeze well, so it’s not recommended.
Nutrition Information
Nutrition information is calculated by software based on the ingredients in each recipe. It is an estimate only and is provided for informational purposes. You should consult your healthcare provider or a registered dietitian if precise nutrition calculations are needed for health reasons.
My grandmother never made chicken like this!
VERY good recipe that kids of all ages will love.
All the kids, of every age, around here really love this recipe!
What temperature should the peanut oil be? Thanks
We never fried food except bow tie cookies at Christmas growing up. Did l miss it? Besides using the utensil?
Frying temperature for any type oil is between 350 and 375.
Sorry, I just don’t know. Never used an air fryer myself.
These sound good. Thank you Lana
This looks delicious.
I will try it tonight.
Who needs healthy chicken fingers, anyway. That is not what they’re designed for! I love the spices in these. Someone would have to pull me away if faced with a bowl of these.
My kids will love these!